
I legitimately don't know where Grim2's keg is supposed to go. Put it on his shoulder and call him Skaldi. It's ok, I've seen worse.
That being said, when all the grey pieces come out, you realize that you've bitten off a pretty serious hobby, and staring at the local paint rack doesn't help you. So, where to start? What do you need? What's preference, what's mandatory? What can wait, what I do I need for the journeyman?
We'll break this into a few sections.
A. Assembly. We have to build the thing first.
B. Painting. What you actually were looking for.
C. Basing. How not to use sand as a blanket solution
Then we'll hit all three again.
D. Assembly. We'll use the word "Pinning" this time since maybe you want to paint this model in steps.
E. Painting. You know what drybrushing is. What about wet blending or 2 brush? What if you want to airbrush?
F. Basing. I'll unleash everything from Hirst Arts to walking around town looking for rocks.
So, Chapter A. Assembly.
Right off the bat, you've dumped out your battlebox and there's no instructions. If you're a 40k player, you're both miffed that you're being forced into specific stances, but also pleasantly excited that every space marine arm won't be 4 joints to glue each.
Every piece has a spot to go in and it's got a keyslot that only it's mating piece really fits. Look at the picture, put the piece in, go from there. The battlebox stuff is easy. When you start assembling Nyss, you're welcome to cuss.
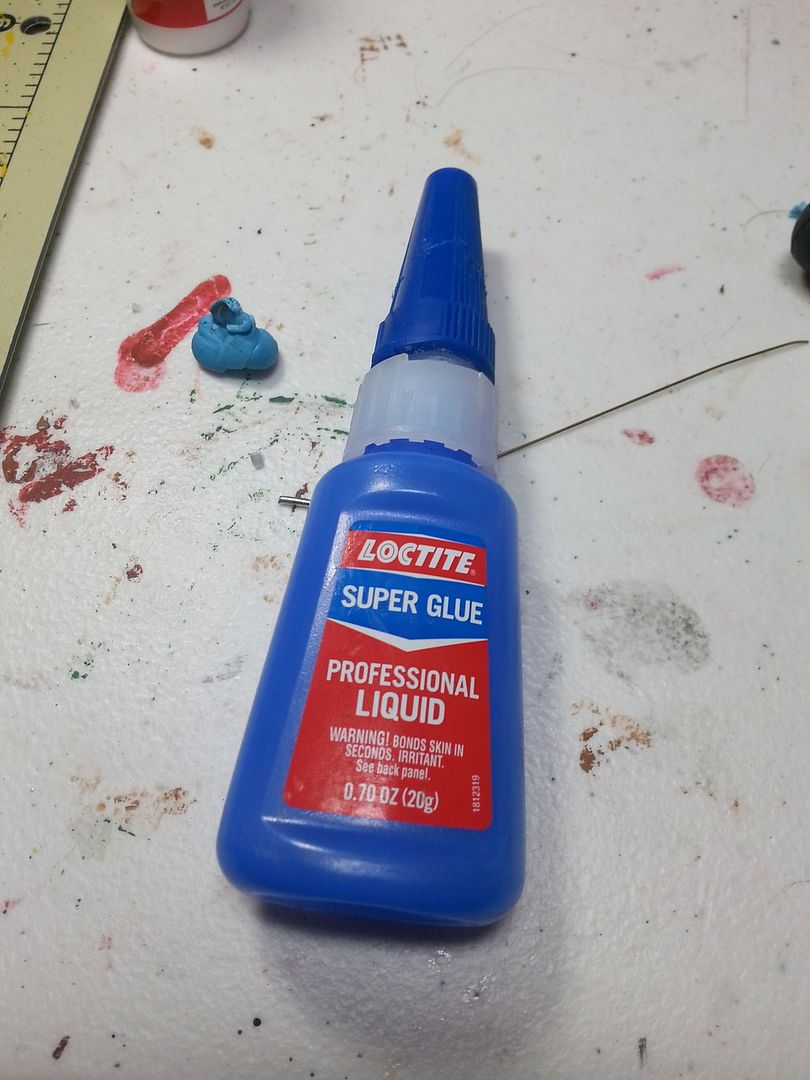
1. Glue. Lot of people have Zap a gap. Some have the Army Painter brand. Some actually pick up modeling glue from Hobbytown and some still have modeling cement from their 1942 British Spitfire model. All of that probably works, but I consistently come back to liquid Loctite. The stuff bonds plastic in less than ten seconds. The gel stuff seems like you'd have more control, but you waste more glue, and it's actually more difficult to work with.
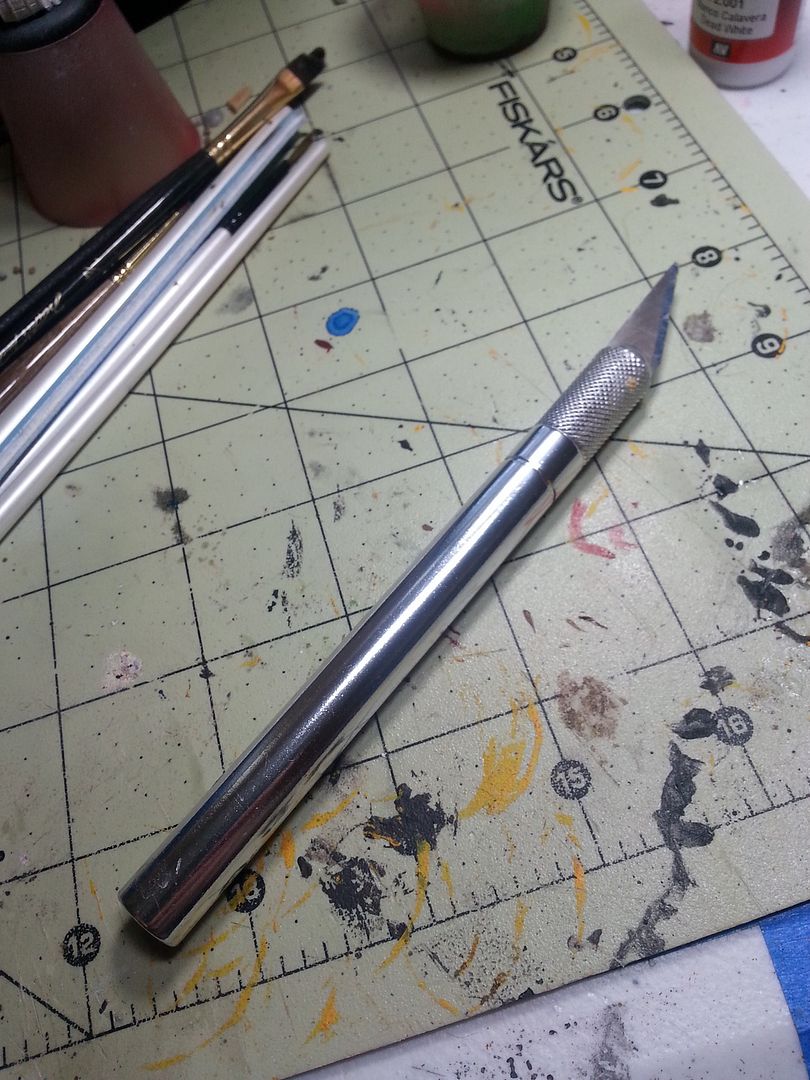
2. An exacto knife. There will be flashing to cut. I'm not worried about mold seams at new player level unless they are, but I do like to have an exacto knife to cut large pieces of flashing and gating off. Flashing, if you don't know, is weird thin/flat or pipe looking plastic that sticks from the middle point on a limb of your model. Its where the seam of the mold was, or where the resin was poured in. PP did the best they can during production, but the assembly really comes down to you. Some models are worse than others, plastics usually being a bit more of a culprit than metal. There are some cheap exacto knives out there, but I highly recommend spending more than 97 cents on one. Get one with a good grip. This is the tool I use the most for assembling, and for obvious reasons, it's the cause for most of my scars in this hobby. So get one with a good grip. Something you can hang onto and control. This one has a thick handle, which is also smooth except for some knurling at the blade end. I use this like a dough roller on my green stuff because of that smooth surface.
3. Pliers. On the metals specifically, some flashing will be difficult to cut off because of the size, so pliers to work it back and forth are good to have. I have a pair of Leathermans on me at all times so it's not a big deal for me, but I use them all the time for modeling.
4. Greystuff/Green stuff.
You know, the stuff that makes you feel like you're an IMF operative in Mission Impossible and you've got exploding bubblegum. Get a small pack of the stuff, it's amazingly handy for sticking metal models together long enough to glue. I usually dab glue on either side of the joint and stick a tiny ball of the stuff in the middle.
2. Painting
Where do I start with painting. A lot of pictures of people's painting desk is a large surface with two cutting boards and four painting racks with entire lines from all the companies. I'm here to tell you that 80% of those paints never get cracked open.
When getting into your paints, determine your A) Primary color, B) Secondary color and C) Any accents. My Trollbloods are Black with Blue tartans with red and white stripes. So, I will need Dark, Rich, and Highlight versions of all of those, plus the basics.
1. Primary (Lets say blue)
A) Dark (Near black)
B) Rich (Probably slightly darker than what you imagine your color to look like in the daylight)
C) Highlight (Like Light blue)
2. Secondary (Pretend green)
A) Dark (Still near back. Deep forest)
B) Rich (Elm leaf green kinda thing. What Robin Hood has got)
C) Lime Green
3. Accents
A) Accent 1 (Say red. Just one shade of it. Maybe this will be the pupil of our evil eyes)
B) Accent 2 (Yellow, for the flame on the model or something.)
Then the basics. Stuff every painter, no matter the scheme, will need.
4. Greyscale
A) Black.
B) Grey
C) White
5. Brown. Everything has ropes and straps.
A) Dark, near Black, Brown
B) Rich, Milk chocolate brown.
C) Tan
6. Steel metals
A) Dark
B) Gunmetal
C) Plata or Mithril, bright silver.
7. Gold materials.
A) Dark Bronze.
B) Gold
C) Bright Gold.
This seems a bit daunting, especially for the guys with financial commitments already. There's a few solutions. If you're going to do the Privateer Press studio scheme, they have boxes to get you started.

That runs about 15$ which is basically a buy 5, get 1 free deal. Paint usually runs 3, 4$ a bottle. Wayland games has them for 2.03 a bottle right now, Miniature Market is at 2.63. When I first started, I got the greyscales, and basic colors and worked into the stuff that I wouldn't need right away. E.G., leather browns, and tartan colors. The other option is companies sell bulk sets too, but you end up with a lot of colors you won't ever use.
I personally prefer Vallejo. They sell sets of 8 for 20$, which isn't much different. There's two paint lines in Vallejo. Game Color, and Model Color. The former is brighter, richer colors and covers the whole spectrum with a lot more variety. It's made for miniature games like WMH and 40k. Model Color is specifically for the historical model-making industry. WWII drab colors for tanks, planes and such. So very diverse offerings in just olive green shades. This line has the whole spectrum as well, but anything outside of classic tank and urban colors isn't expanded on very much. As far as makeup/recipe, the paints are identical. Hobby Lobby stocks Model Color quite a bit, game stores usually stock Game Color.
Vallejo also creates a lot of in-house modifiers like thinner, thickeners and such that are designed to work with their paints. I overall like Vallejo quite a bit, but I came from GW which is thick, sludgy stuff. The main thing I appreciated with Vallejo is the dropper bottles. There's solutions to the P3 line, e.g., putting them all in dropper bottles. I like Vallejo enough though that there's really very little reason for me to switch except to encourage new players and support the P3 line as a PG. I'll probably never switch to it, but I've purchased some to paint with so I at least understand the mechanics well enough to teach it to players that want to go all out PP.
Technical stuff now.
8. Thinner. Can be water if needed.
9. Primer. Cheap grey krylon (NOT MAXX COVERAGE) works great.
10. Sealer. Clear Matte Krylon works fantastic.
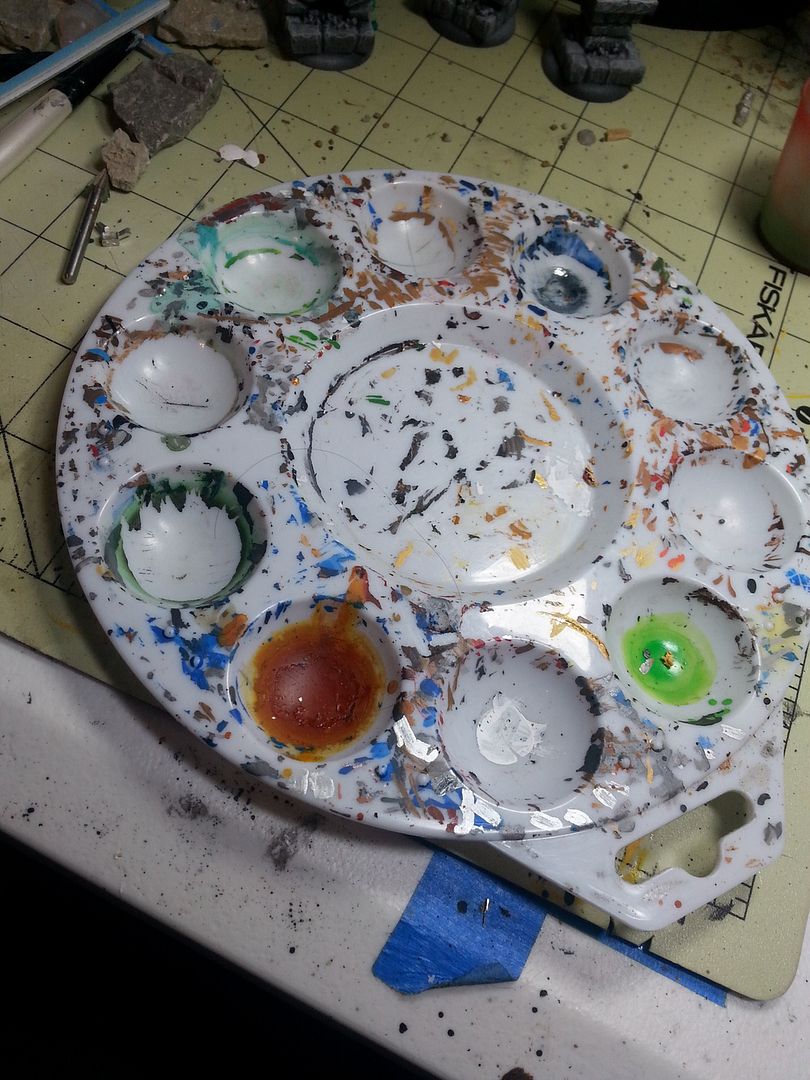
11. Paint tray. Basic stuff. Dollar item usually. But you need it. I have 3 or 4. One big one, two these size, and a 6 slot one for travel. I usually use this one here, and my wife uses the other one. Because the couple that paints together, stays together?
12. Brushes:
There's a lot of debate on the best brushes to use. The undeniable standard are Kolinsky Sable hairs from weasels in Siberia. The hairs are more common than it sounds, but the brushes are expensive. I will undoubtedly have some eventually. They last longer, retain their point better, etc. They're worth their money. But instead of 4, 5$ a brush, it's closer to 25$.
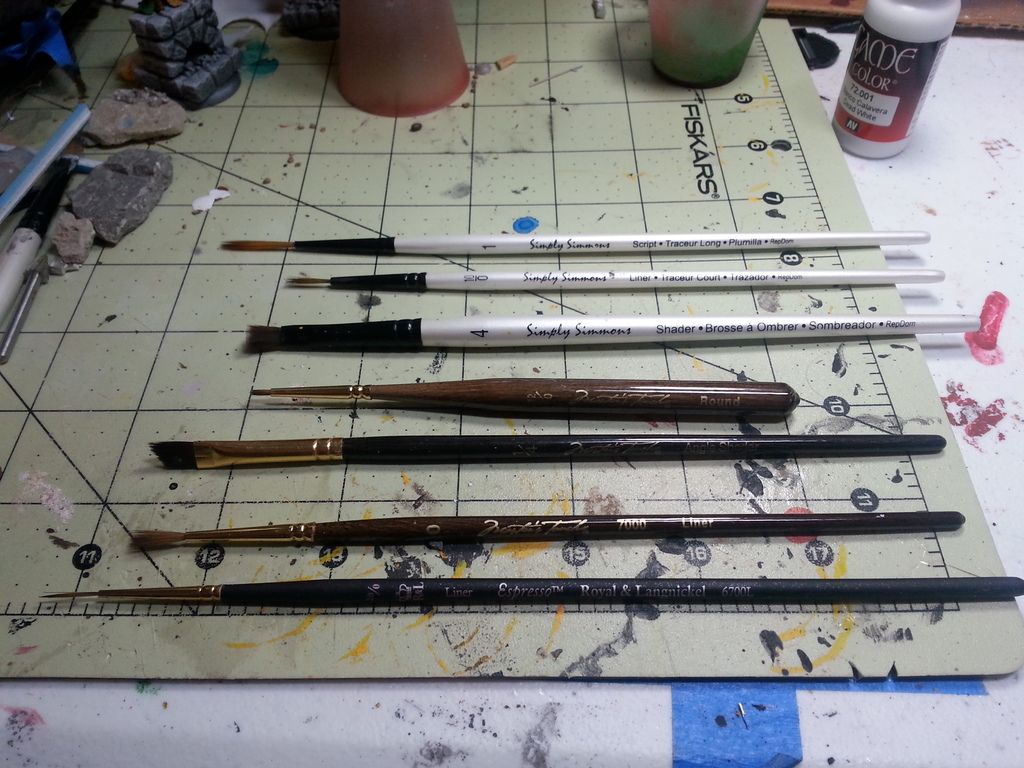
Most of my brushes are from Hobby Lobby. The generic brushes provided by both P3 and GW are synthetic brushes that are very shortlived. Hobby Lobby and Michaels both have a couple of good brands, to get going on, and great sales. There's 40% off sales at Hobby Lobby all the time, so I'm usually stocked up on brushes pretty well. The 3 brands here are Master's Tough, Winsor & Newton, and Simply Simmons. I use SS pretty rarely, the W&N one I'm using all the time, but most of my stock is Master's Touch.
The ones listed here though are for pretty specific jobs. We'll run through them. Top to bottom we have:
1. #1 Script. In my "Twelve Things" article, I talked about how I'm liking longer brushes because of the amount of paint they can hold, giving me more working time for larger surfaces. This is usually what I use for putting primary colors down. If it's for a colossal or even a jack that I didn't airbrush, I'll probably go up a size.
2. #10/0 Liner. This one is for more detailed spots. Not quite as fine of spots as the 20/0, but I have definitely used this as a water brush to support my 20/0. The two of them usually work in conjunction to blend.
3. #4 Shader. Drybrush. I go through these quick. My Drybrushes are just big brushes. Hobby Lobby does packs of brushes occasionally, and the four smallest are ones I can paint with, and largest three or four become drybrushes.
4. #12/0 Round. These used to be my painting brushes. I liked their small tips, thicker handles. However, they go bad very quickly because of how easy it is to get paint into the Ferrule (The metal neck holding the bristles), and once that dries, it wedges your bristles apart and makes it difficult to control the brush. Secondly, the brush doesn't hold much paint, so it dries very quickly. I use this as mostly a water brush to blend or erase.
5. #1/4 Angle Shader. Another drybrush, or in this case, a wash brush. My wash brushes follow the same path as drybrushes. Left over big brushes I can't use elsewhere. I like the angle shader because it can collect a lot of my wash or ink, distribute it quickly over the model, and then I'll wipe it off and come back to pull some wash off.
6. #0 Liner. Very similar to my #1 Script, but just a little smaller. For putting primaries down on small to medium based models. It also shades those as well. I can do a bit of detail work with it as well, specifically edges of armor and such. High points in cloth. Some faces. This brush is probably my workhorse
7. #20/0 Liner. The down to earth eyeball painter. My tartans, my gems, my eyes, faces, all that stuff. This thing holds plenty of paint, works it out there, and gives me a lot of control because of how long the bristles are and how much I can manipulate it. The actual parts of the bristles consist of the "toe", being the end of the brush and the "belly", being everything between the end of the bristles and the beginning of the ferrule. With the Liner, I'll paint a lot of armor edges with the belly. Instead of trying to drag the toe across a fine edge, and bristles touching either side and painting too much, you turn the brush and use the belly. It's a lot more forgiving.
Back to the regular stuff. We're up to
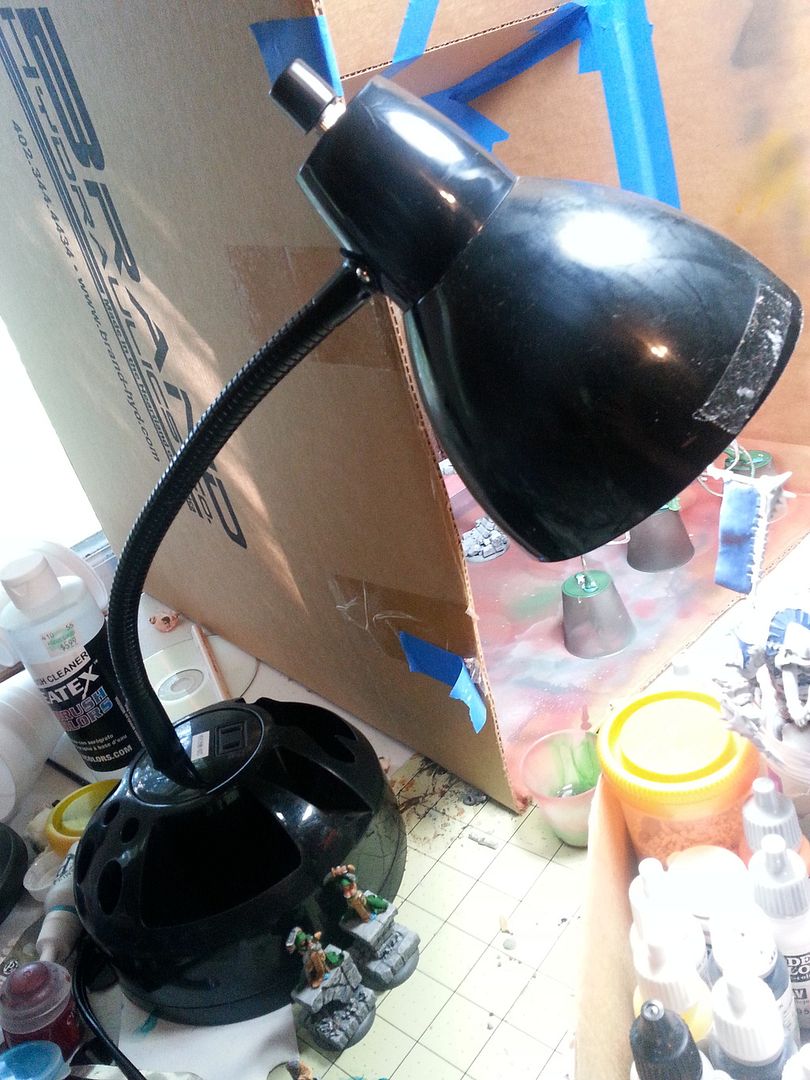
13. Lamp. My wife bought me an Ottlite, which is awesome. I love that thing. However, I also have a cheap black lamp from walmart with a daylight bulb that was just as expensive as the lamp. A solid, bright, daylight bulb is instrumental in getting good color on a model.
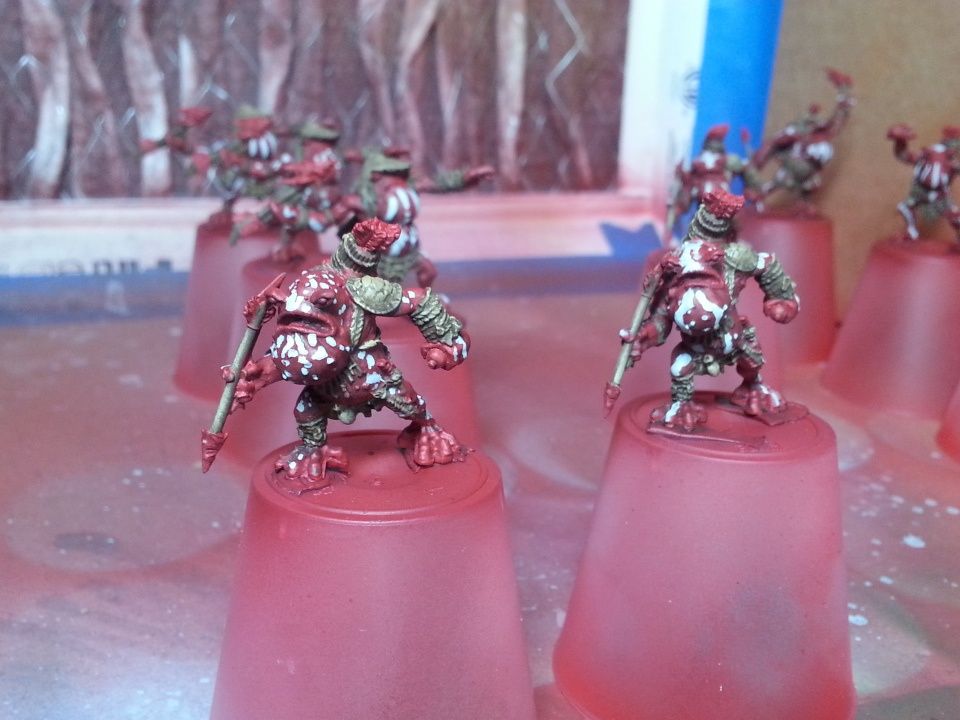
14. Model holder. There's a lot of options to hold a model. Some people have some plier looking things to hold the tab under a model, but I cut those off before I paint because cutting them after the paintjob is a good way to damage my paintjob. So, whether or not they're attached to the base, I'll stickytack them to something to hang on to so I'm not touching the model. There's enough oil on your fingers to create chipping issues later, so keeping hands free as much as you can is advisable. Used to, I used 1x1 blocks of wood, but now I found 10 pack plastic shot glasses at Dollar General for a buck. Those are awesome. I also use them for blending my airbrush mixes, and as water cups when I'm on the road.
15. Paper Towels
Last but not least, cleaner uppers. They're good to have around for offloading paint, cleaning brushes. It's kind of a no-brainer, but in case you didn't think about it, you'll need 'em.
C. Basing.
Only read this if straight black bases are not attractive to you. If you want to do something different, great. We already covered exacto knives and pliers. You'll need that to break off the tabs meant to hold a model to the slot. Watch your fingers with the knife. You'll get that sudden slice and cut an inch deep through the tip of your pinky. It's great. Luckily, there's superglue nearby usually.
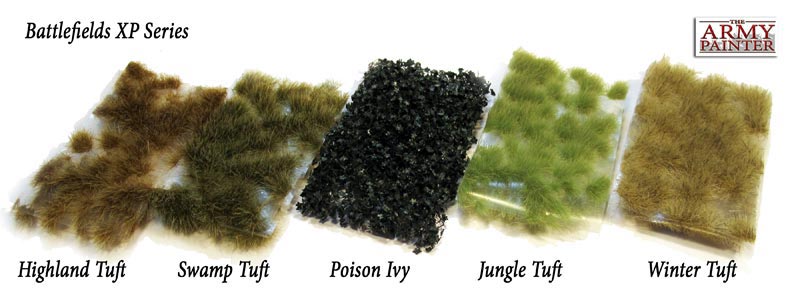
1. Army Painter Grass tufts
Grass tufts are like forgiveness. They cover a multitude of sins. I've legitimately painted bases brown, and then covered them in these tufts and gotten the greatest compliments on my basing skills. Literally, dab of glue, tweezers, pliers, fingernails, whatever, pick the grass off the plastic and stick it to the base. I liberally covered Denny3's base in the last article with these, but usually, I just hit points I don't like on my regular bases. Some of the black plastic showing through or whatever, grass tuft. I also like to have them under ledges, or just peeking out. Add some life to the scenery.
2. Rocks/Ballast
I won't get super in depth here. Rocks are simple. You can go buy sand/gravel ballast at Hobby Lobby, or Hobbytown. Or you can get rocks out of your driveway. I look for small, flattish ones. I usually need both. The gravel fills in the spots, makes it look a bit natural, like pieces are falling off the cliff that your whole army is standing on.
3. Tree Bark
A great alternative to rocks, I usually just pick the most non-linear stuff out of the mulch. As I've progressed though, I've gotten better at figuring out what's bark and what's rock so I usually just do rock.
4. Etc.
A lot can be used. I'll go into my full palette in the next article, but I have Corkboard, foamboard, insulation foam, sticks, plasticard, cardboard, Hirst Arts, wood pegs/dowels/rods, so on, so forth.
5. White Elmers Glue
Usually the most important thing. I like superglue, but Elmer's Glue is nice for being cheaper, larger quantities, dries slower so you have longer to work with. It's good to have.
In Conclusion
That's really the gist of getting started. My travel pack is all my neccessities:

Whatever colors I'll be using, the brushes I listed, some shot cups, ballast rocks, rocks, retarder, thinner, exacto knife and the GW sculpting tool that's handy. I usually fill a shot cup with water and get a paper towel from where I'm at. And that's it. My model is stickytacked to a cup and away I go. I have brought my daylight bulb lamp with me before, so there is that, but usually this is all I need for projects on the go. Stuff that's already based, or stuff I don't plan on basing fancy.
Hopefully, this answers a lot of questions for you, and if I left anything out, hop in and tell me how I'm living my life wrong. The second iteration of this article will be a bit more in depth and get more into the basing and assembling side of things. Airbrushes, pinning, Hirts Arts, etc. Hope you enjoyed it, and cya around.
Which line of the 'Masters Touch' brushes do you use?
ReplyDeleteI think its the Golden Taklon series. It's a brown handle, and the backer cardboard is tan/brown.
Delete