Sunday, July 26, 2015

Finished Phantasmal Croak Raiders

 Finished the Croak Raiders finally.  This was a long, drug out process.  I started with hollowing out the bases, getting Hirst Arts into them, and filling them with scenic effects water, which I will never use for anything important again.  Shrinks horrible, unevenly, and bubbles badly.  It's ok for a swamp, but I'm glad this wasn't for a display piece.


  If you want to skip right to the rest of the pics, scroll on down.  For wips, keep reading.

  I went big on these guys.  I've been wanting to do the hollow base thing for awhile.  So I cut the middle out of all of them with an exacto knife.  Took a few passes and some careful placement of fingers to keep from losing them, but it could be done.  I glued the empty chassis to thin plasticard and filled under the lips with milliput, which is a cheap, terrible version of Greenstuff.


  Dropped some small bits of Hirst Arts into the bases, glued them in. 


Then I begin filling up the bases.  Real thin layers of the water effects tinted green over the course of probably four days.  Painted the bricks and elmer glued some tallgrass effects in.


  Then I began painting the croaks.  I fully meant to prime them with gesso for the texture, and I forgot....   Would have been perfect for this texture though.  This is the Phantasmal Poison Dart frog.


  I ran with the white stripes, but varied it quite a bit.  
  

  I didn't know what color I wanted the arrows to be, so I checked out birds in that same eco system, and ran with Yellow Orioles.  That leads us into these.  Touch them up, add OSL from the flames, glue them to the bases, gloss finish the skin on the frog and call it a day.


My favorite patterns on these guys, based on the Phantasmal Poison Dart frog.


  That's it for these guys.  Really looking forward to putting them on the table with anyone and everyone.

Sunday, July 19, 2015

2x2 Demo board.

  So, that last article went ballistic.  I was running around in the 50-60 views per post with a few exceptions.  That last one got retweeted though, and re-posted and all sorts of things.  The day it dropped, I got 400 views on that article alone.  I should have added pictures or something lol.  My name is out there and it was a spur of the moment quip.  I'm glad it's doing well though.

  This is a project I've been wanting to do for a bit.There's 5 FLGS in our community, and some have terrain and some don't.  There's not just one place for me to keep demo gear, so I've got to take it with me to various stores when I support endeavors there.  I also wanted to have everything self-contained so I can just grab and go with no concerns.  One of our FLGS just opened a second branch, and opening day was yesterday.  I also have another demo day tomorrow at another store, so this kind of thing is nice to have.  Yesterday I was on my feet from 10 to 6 running demos.  Great time, but I'm doing nothing but sitting today.  They didn't have any terrain when I got there though, so I was really glad to have had this box.

So, I built this.


  It's nothing super crazy, and certainly not Poppabear skill but it's definitely inspired by his work.  It's already pretty heavy, so I didn't want another four pounds of plaster in it.  The bulk of it is 3/4'' Birch plywood cut at 45 degree on the corners to hide the layers.  I ran cheap lathe around the inside up top to glue/screw the playboard to and leave a ledge to put a future lid on.

  The drawers are regular plywood with fronts of the same Birch.  Both sides will have foam all through it when I have more Battleboxes, but for now I only have it on one side and my gear is in the other side.


  And a couple of WIPs.


  The terrain was simple.  I spread white glue all over, threw various ballast down, sprayed it with MAXX brown spraypaint.  I glued down a little bit of Hirst work, the hill being on a base of corkboard for height and rock.  Drybrushing, then some Army Painter Flock, and random tufts.  Sealed it and removed the tape.  I'm probably going to add in a forest on the hillside but was pressed for time.  Otherwise, she be done.

  That's that.  Croak Raiders are close.


  They're close.  They're going on these.


  It's really close.  Then on to more commissions.

  Anyways, that's the update.  Cya around.


Wednesday, July 15, 2015

A Dozen things I wish I had known when I started painting.

Here's Kraye.  2012?  2013?


  That hat is a custom job.  I was pretty excited about that.  I was proud of all these paintjobs and really felt like I'd turned a new corner coming out of the Warhammer paint, wash, drybrush days.

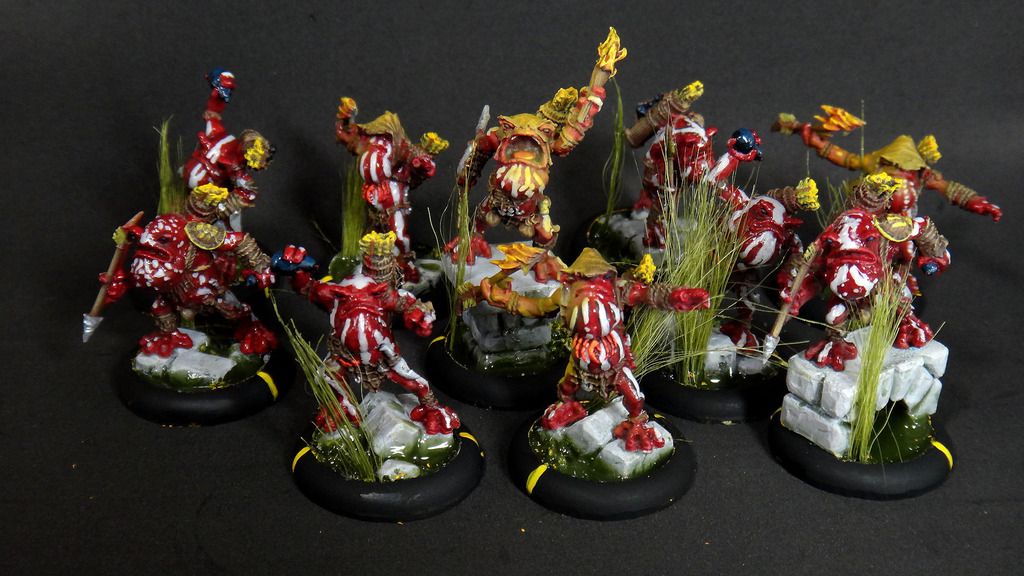
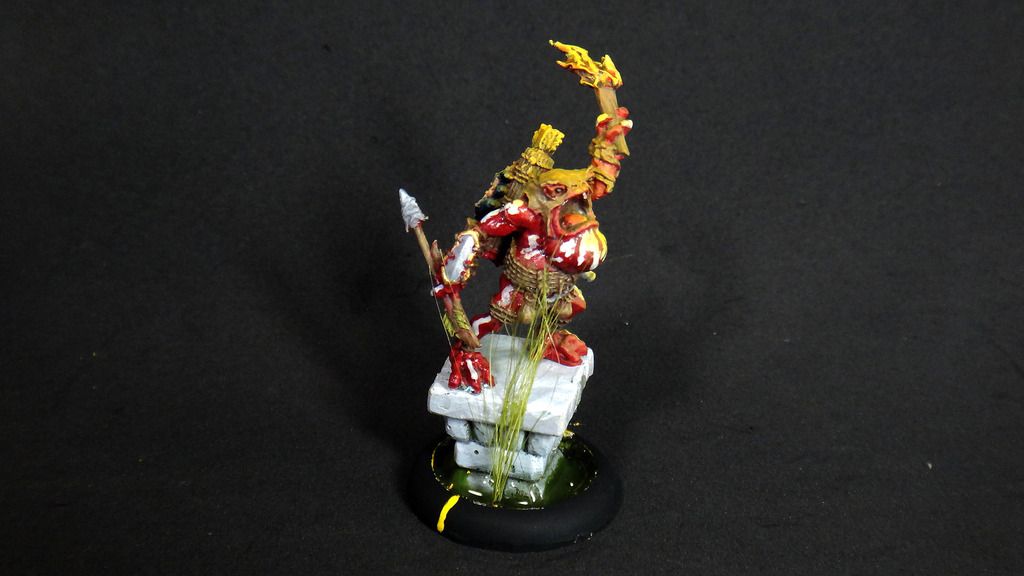
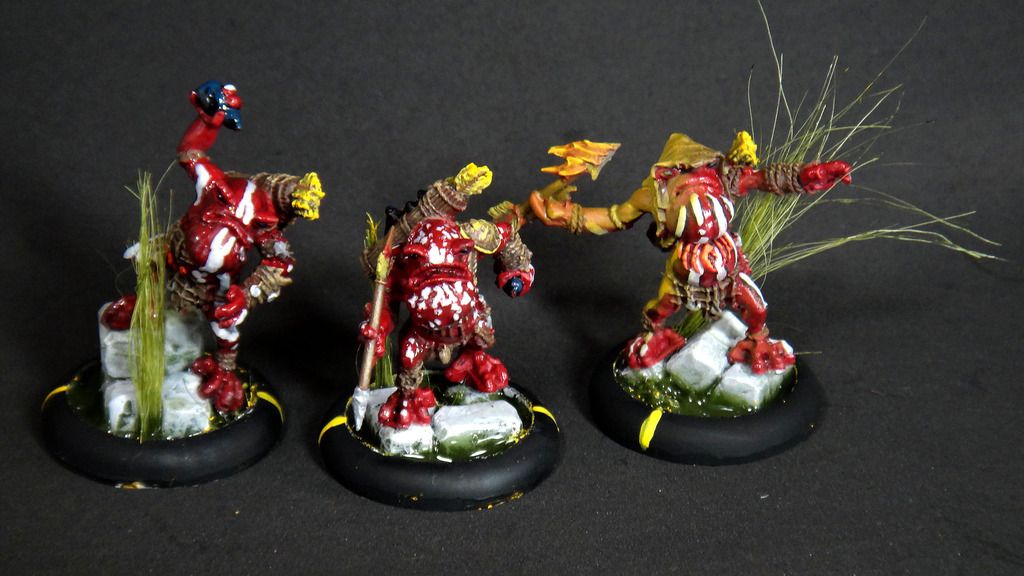
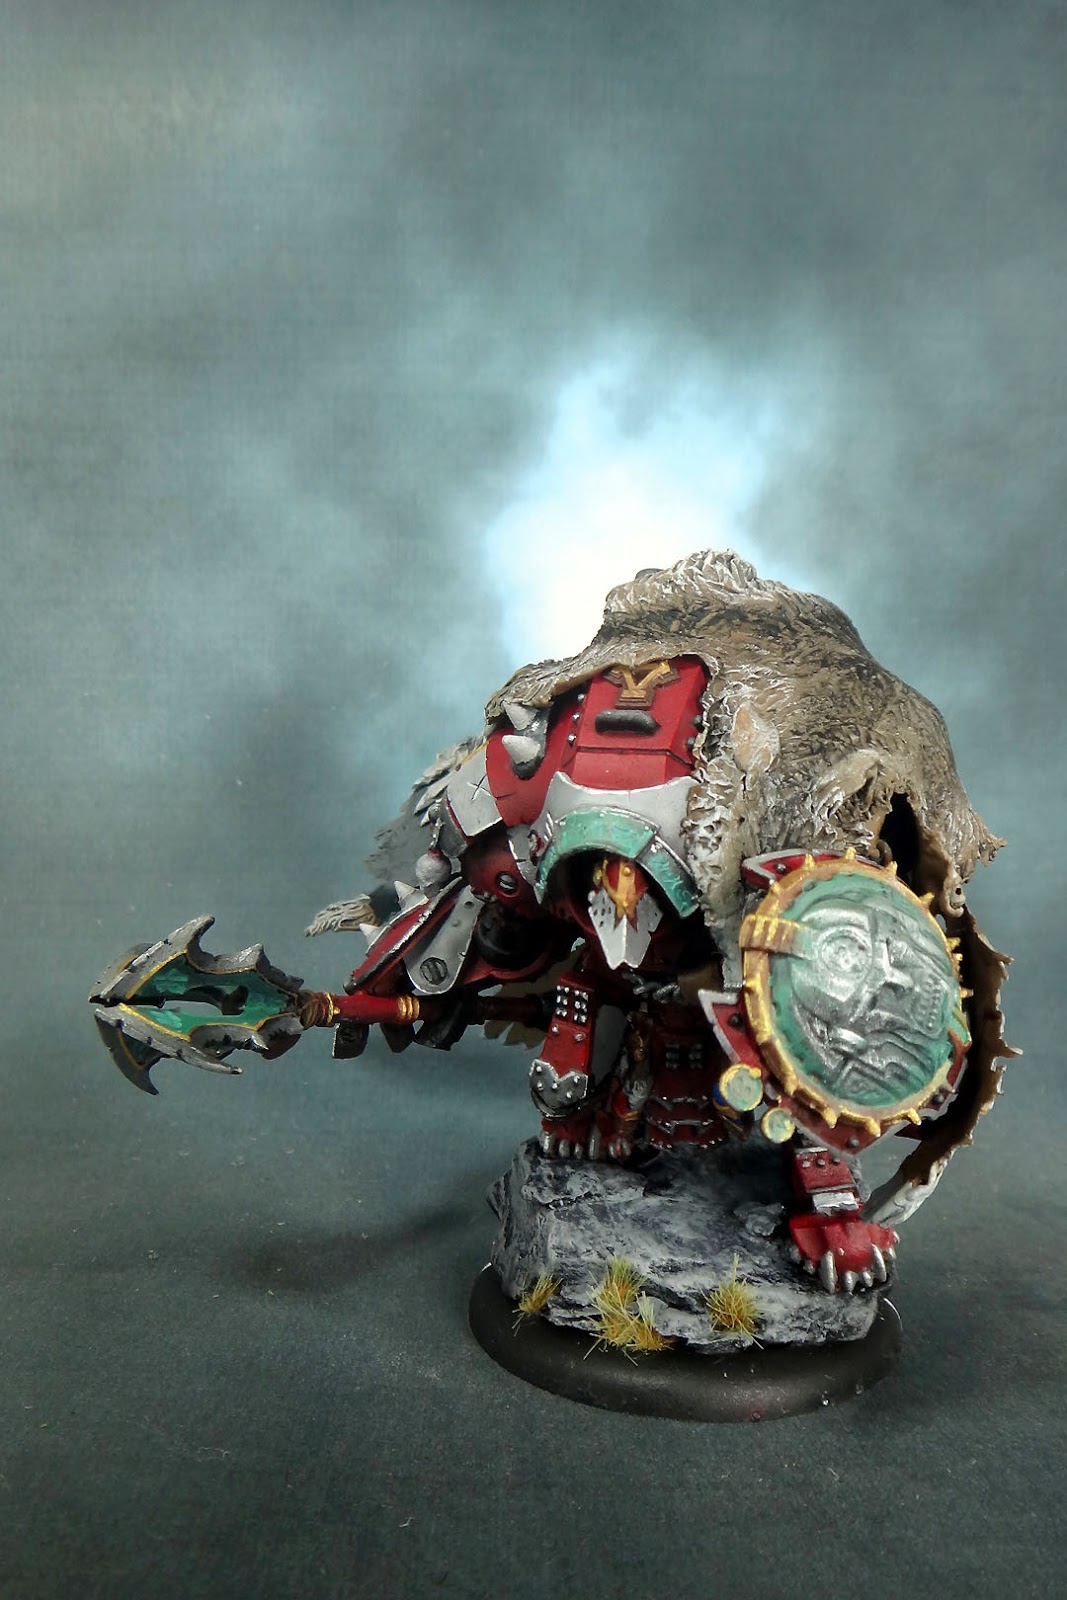
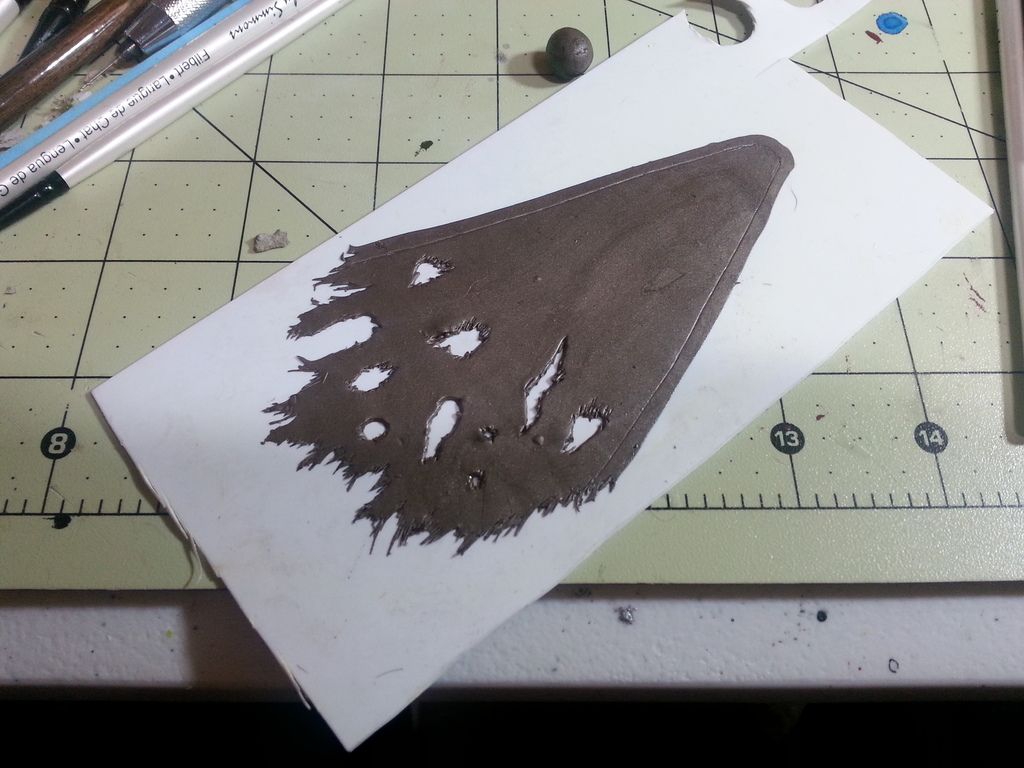
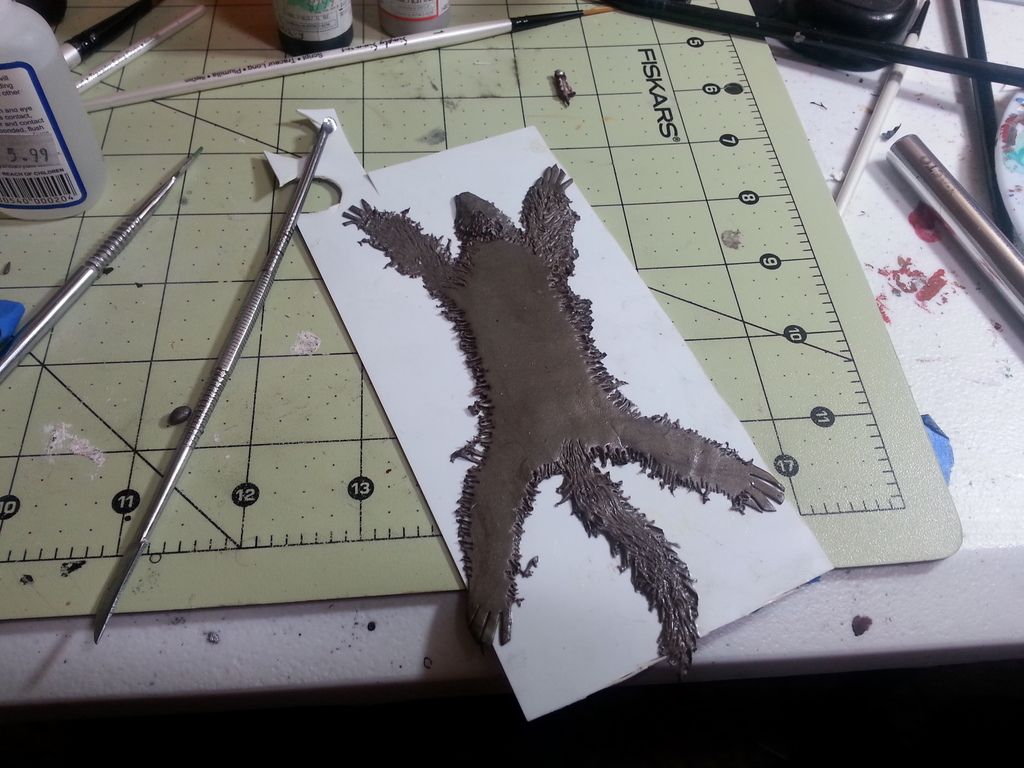
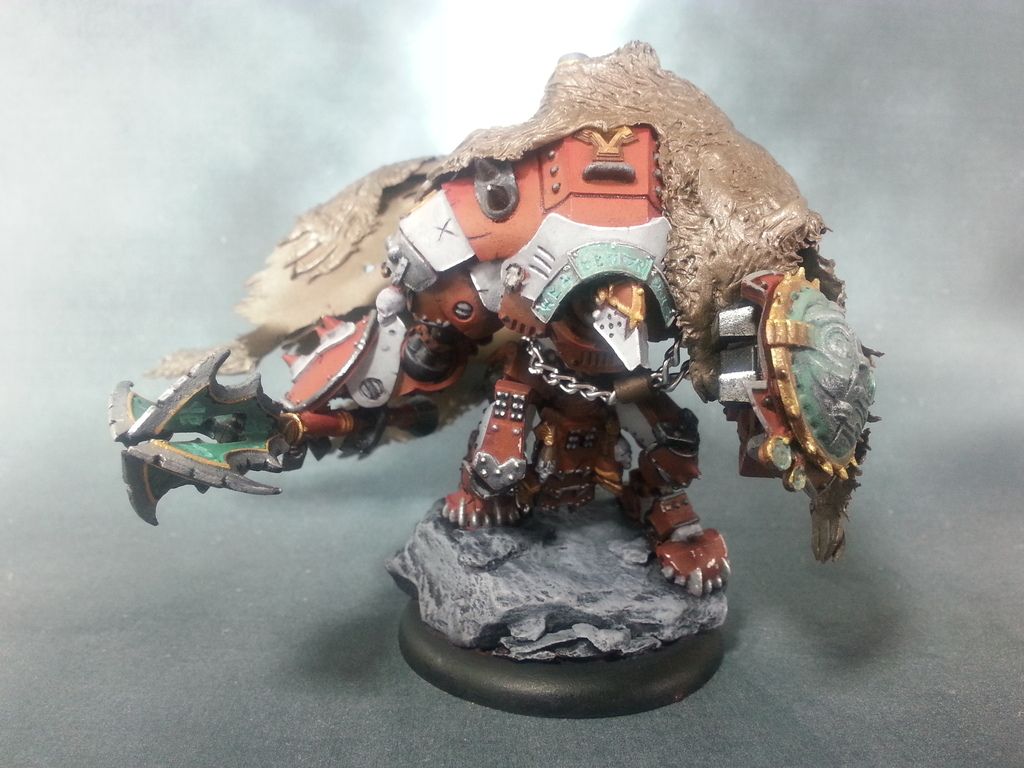
  This is Ruin, and I finished him over the 4th.


  Instead of just the hat, the whole cape is sculpted here.  The painting is much better blended, and the highlighting is just a light edge instead of a 1/8'' strip of lighter paint on the edge of everything.  The metal has much more work and blending in it instead of just various shades of metal GW paints.

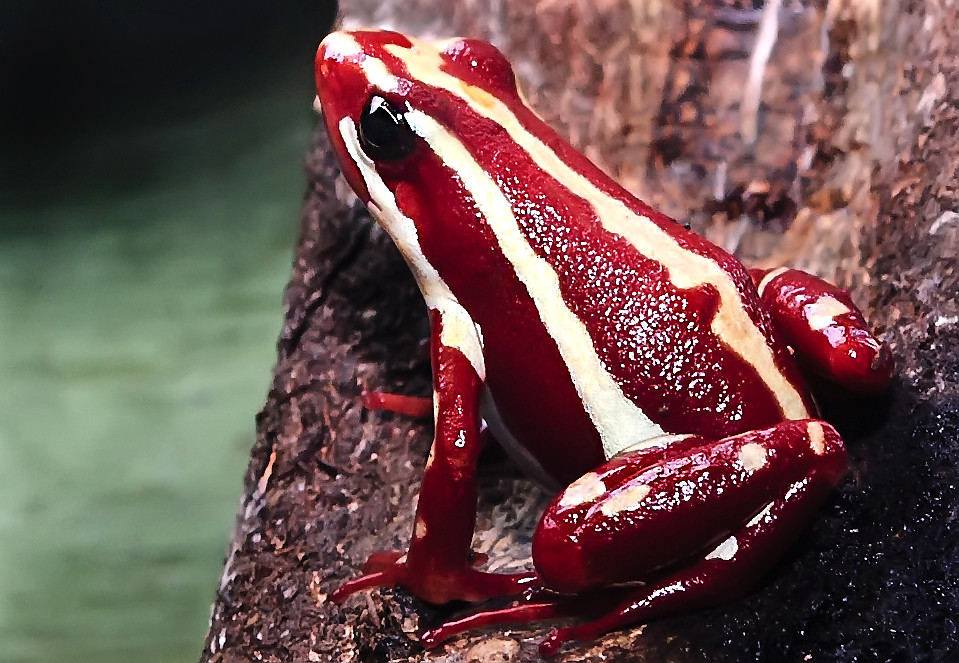
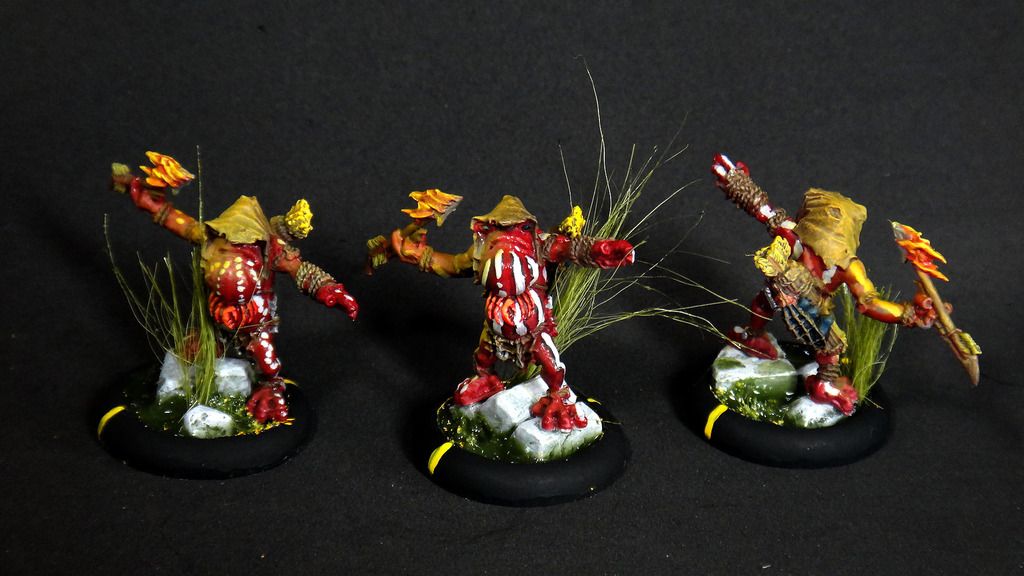
  I checked the date.  The Cygnar picture was May, 2013.  So over two years ago.  The difference is pretty stark.  Ruin is running at a 6.9 on CoolMiniorNot, which for my first submission, I'm pretty happy with.  I don't pretend that this is anything to compare to some work like Arizona_Trolls, PG_Menelkers, Patryns or JRS studios.  However, I would certainly consider it well above table-top standard, and to stop and paint every model to the level of detail I put in Ruin would take forever.  That being said, as I was working on my Croak Raiders, I was comparing the techniques and styles I was using to techniques in the past and some simple things I wish I had known.

1.  Little brushes do not mean fine lines.  My favorite brush when I got into Warmachine was the Army Painter Insane Detail brush.  It's got like, two strands.  I used it for every fine detail I could, edging, and all of that.  The issue I began to notice is that the paint dries on the brush incredibly quick.  Couple that with there being too much paint on the bristles after a fresh dip and you realistically have about two, three strokes of good painting before you're re-dipping, then dropping some of the paint. After you get slightly better brush control, you don't try to blend, or get rid of what you consider too much paint with the insane-detail brush, you go right into edging with it.  However, that is inconsistently, and long lines (which look better with long, single strokes) get a wave to them as it takes multiple attempts to paint them.  

  The Answer.  Bigger brush/longer bristles.  Pick up more paint, knock off what you don't need, but there's enough paint stored in the bristles to flow to the tip as you paint and give you more working time with that particular dip.

2.  Paint varies brand to brand in consistency.  In every scenario, it still needs to be watered down.  GW paint is very thick, PP more watery, and Vallejo right in the middle.  While, as a PG, I would like to use PP paints, I like Vallejo paints and appreciate the dropper bottles it comes in.  In any case, it needs thinned.  You can use water, you can use that brand's thinner, whatever.  But in most cases it needs thinned.  

  Why, and the exceptions.  1)  Especially in GW's case, it's thick, doesn't spread well and a little water evens it out and lets it work without drying far quickly than needed.  2.  More water lets you blend it into the layer below and gives you working time to spread it about.  The exceptions are 1) You need to cover the model.  Priming, or chips and I usually don't water down the color.  I want it thick.  2)  Drybrush.  I find that it drying a bit quicker gives it that chalkier feel to the paint and drybrushes better.  Wet, watery paint doesn't drybrush at all.

  3.  Paint gets darker when it dries.  I definitely have painted a layer, decided it was way too light even though I didn't blend it much lighter than it was previously, and mixed back trying to adjust.

  The Answer.  Let it dry.  Have some faith.  See what it looks like dried and you may not think the contrast is bad.

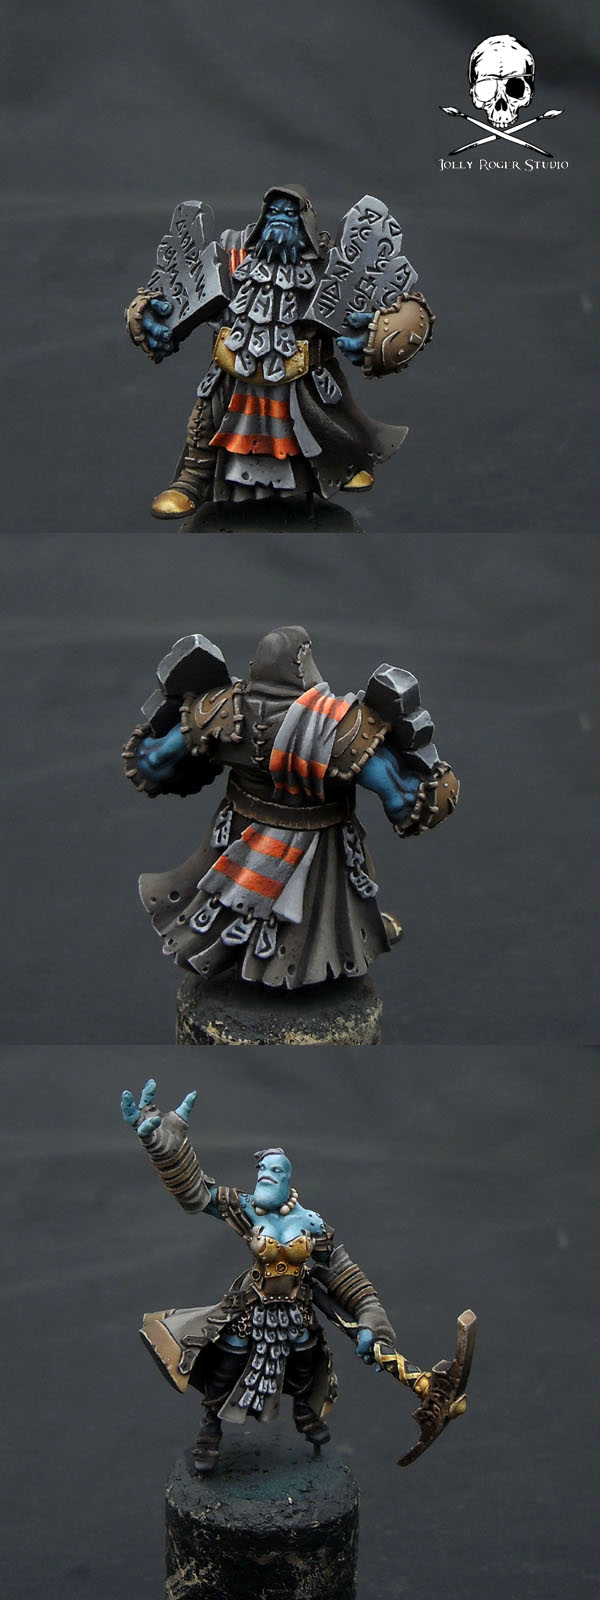
  4.  Speaking of Contrast.  You need it.  A lot of times I was very pleased with the painting skills and technical proficiency, but for all that, I didn't feel that it was nearly as good, or even comparable to some of the other high-level painters I've seen like everyone at JRS studios.  JRS probably does it the best.


  Look at those arms on the Runebearer.  Ever met a guy that had that much color difference just in his arms?  Or such stark shadows in his clothes?  I would look at real references, and then be irritated when I really didn't feel that the model didn't pop.  I started looking at what I like about JRS, and it's the contrast.  It's the stark differences in shadows that really take these to the next level.  

  The Answer.  Start dark, end light and don't be afraid to pop some pure white on the edges of the right surface.  

  5.  Washes.  Make your own.  Some of GWs aren't bad, and probably the best washes on the market, but if you need a grey wash, or a light blue one for a glow, or a green one for everything cryx, make one.

  The Answer.  A wash is a drop of paint in a paint pot of water.  1:15 kinda thing.  If you're going to use it a lot, mix it in a sealable pot.

  6.  Straight Metal paints are setting you up for failure.  They will not give you a smooth reflective surface like you're imagining.  It's a paint full of reflective flakes and it's going to look as such.

  The Answer.  Tone it down and mix it into paint the color of what you're actually trying to produce.  If your armor is grey, mix it into your grey paint so it gives just a hint of reflectivity.  Highlight the edges and the spots that you want to actually shine with a slight drybrushing and that's what will actually look solid, IMO.  Or learn how to do NMM.  That's crazy.

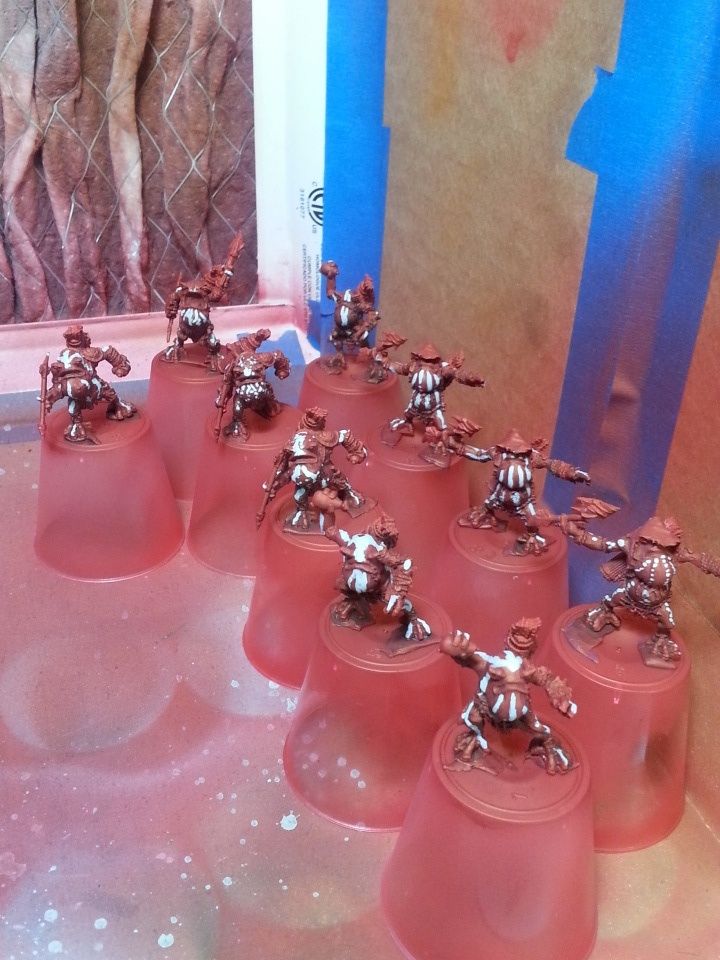
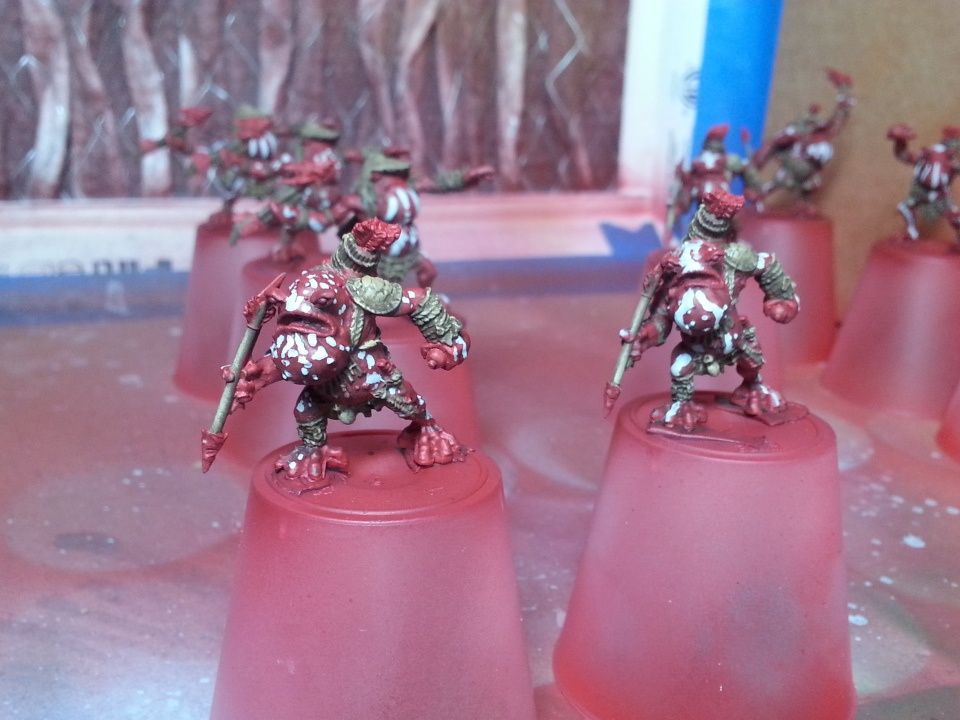
  7.  Get something to hang onto your model with.  I used to assemble the model to the base and do it all at once and in some cases that still happens, but it's still nice to have something to hang onto.  For my own models, I base and paint them as one, but for a lot of my commissions, I break it up and get pretty detailed. 

  The Answer.  My new favorite thing is plastic shot glasses from dollar general and a little bit of Loctite's interpretation of sticky tack.  2x2 blocks of wood work too, but the shot cups are nice and compact.  I've seen guys use cork too.  You can drill the model and peg it, but I like sticky tack.  Drilling it is a backup option.

  8.  Tieing in with 7, Make contact with both hands.  This is probably one of the kickers for me.  I've got halfway steady hands anyways, but the slightest motion in either hand is different than what the other hand is doing.  My right pinky (I'm right hand dominant) is usually touching my left hand and maintaining contact for my detail work.  

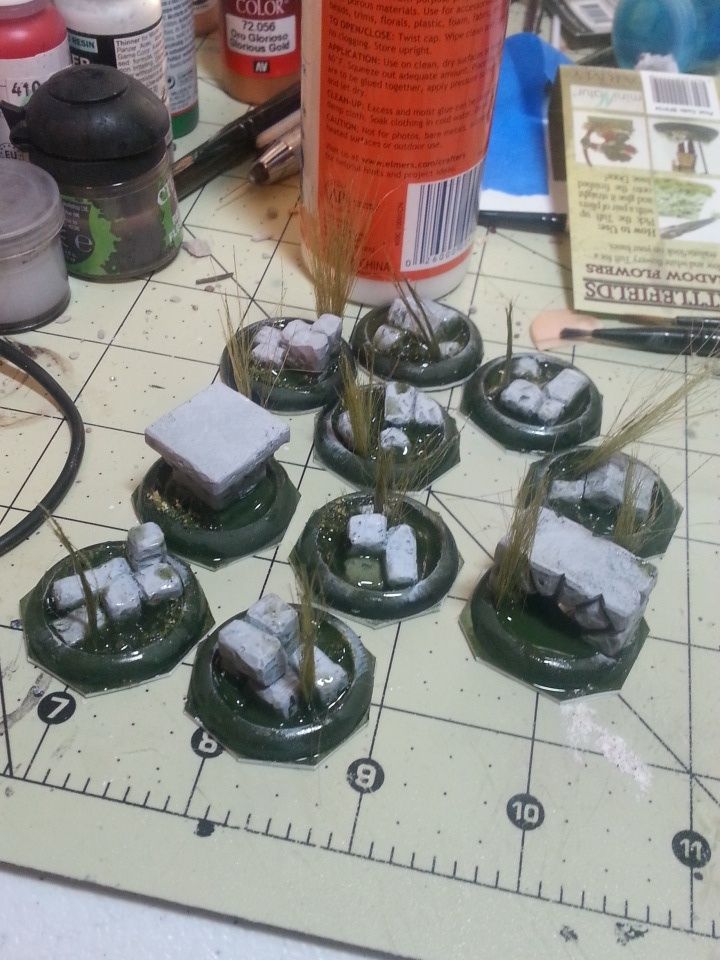
  9.  Army Painter grass tufts cover a multitude of sins on your base and make it look really professional.  I've had a lot of people impressed with the grass on my bases when really, it comes that way.  I added the glue.

  10.  Lighting is half the battle.  Get a good light for your station.  My wife bought me an Ottlite, but I find that a good daylight bulb works great too.  I use them both but the Ott is my primary.  

  11.  Lighting is the camera issue too.  Get good pictures, be it with your phone or a camera, but lighting is the biggest thing.  My photobooth is sitting on top of my air booth which is on my workstation.  I move the lights up, and have tinfoil on either side of the inside of a box reflecting light back onto the model in the center.  That's done more for my photos than anything. Play with your settings.

  12.  Have fun.  If you're not enjoying painting, step back because the end of the road won't be worth it.  My army is probably only 60% painted maybe, but what is painted is generally very decent work for tabletop.  If it's a job I rushed, I hate it, and will end up cleaning it off and starting over.  If the idea of picking up a brush makes you sick, don't.  Play it Painted 2015 is a great goal, but playing based with an army you don't hate the looks of is acceptable as well.  PP is pretty lax on that compared to GW, take advantage of it.

 Anyways, those are some thoughts I've had rattling for a bit.  There's no importance in the order.  Just some ideas I wish I'd had earlier.

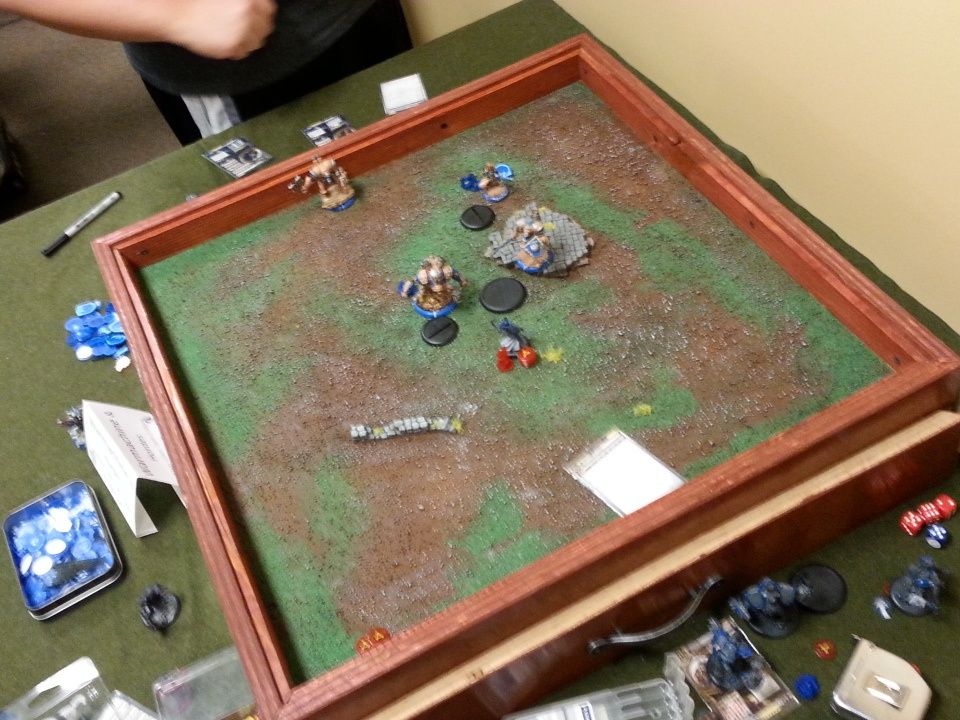
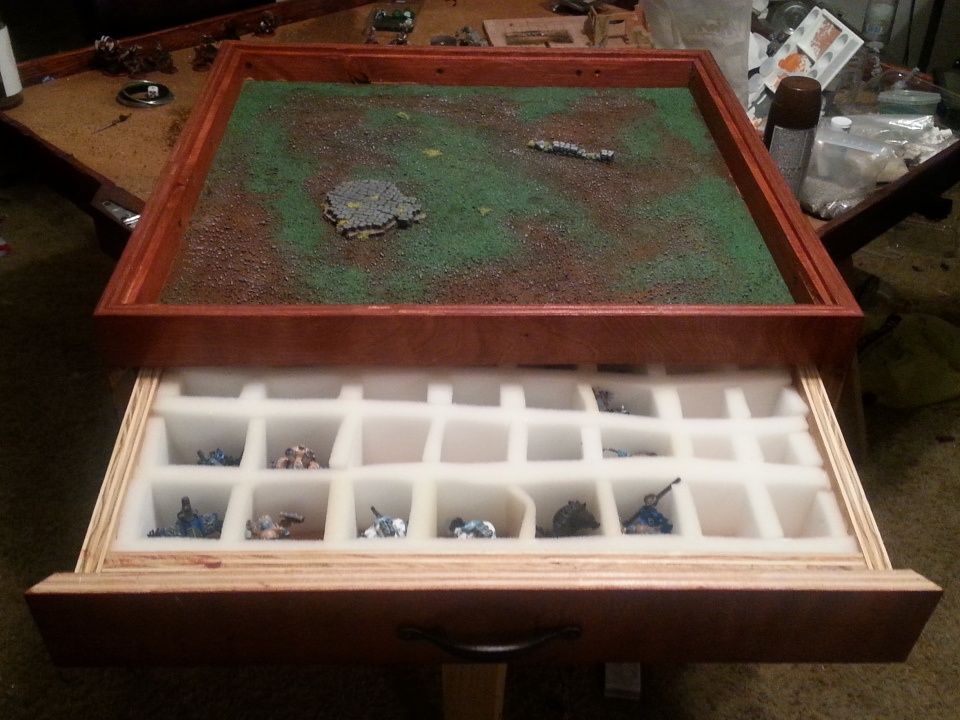
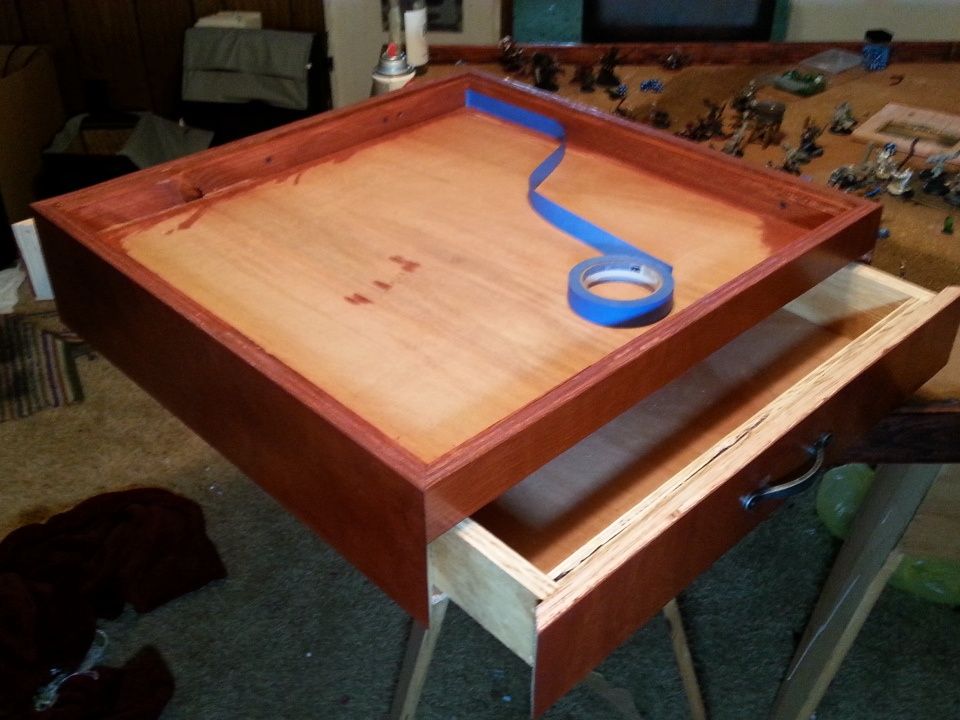
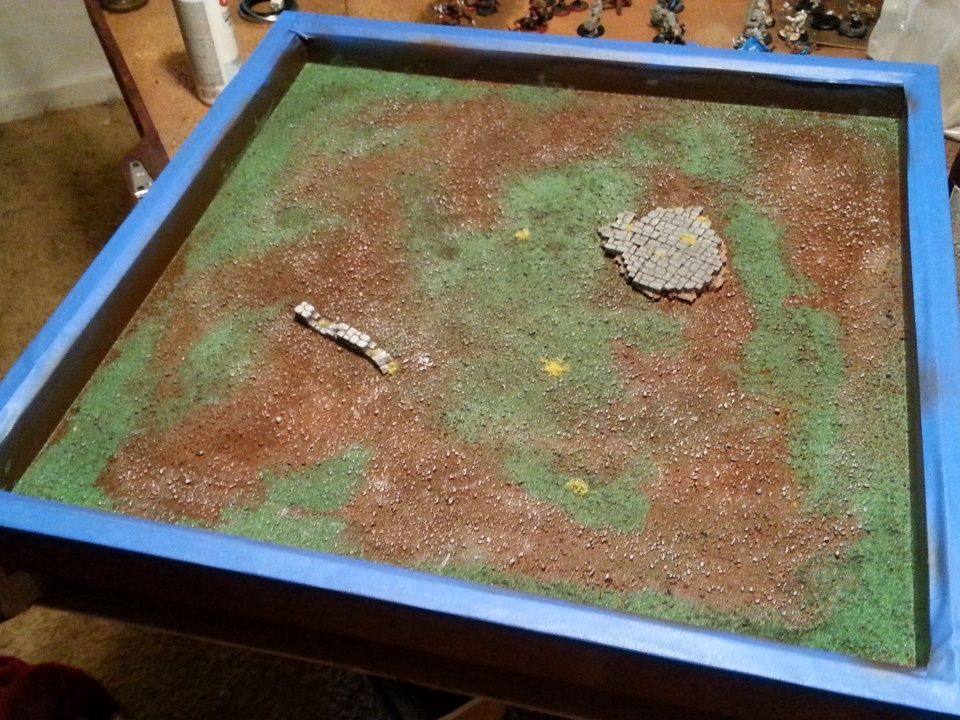
  Some stuff is in the pipeline.  I've got terrain gluing right now in a 2x2 box with 2 drawers for PG Demo work, so I'll show that before too long.  Otherwise, lots of commission work, some Croak Raiders on the way...  Looks like I'll be painting Kromac 1 and 2 for someone, my wife's Morvahna, and some Ret casters as well.  Getting busy.

  Anyways, hope this article shortcuts some work for you.  We'll see you around!


Sunday, July 5, 2015

Ruin Commission w/ Hand Sculpted warpwolf/flag cape

  I finished it.  I've had this model... two months maybe.  Painting it took awhile, but with the holiday weekend I was able to burn through the cape pretty quickly.  That being said, the cape was easily one of the most frustrating things I've ever had the pleasure of working with.  I don't know if PP's stuff is better than Greenstuff or not.  I haven't actually greenstuffed an item this large before.  I need to now, but once PP's Greystuff hits about 45 minutes to an hour, it's pretty much stuck in place, but at the same token, will sag if you're trying to get it to support itself.

  I painted the warjack, pretty much sealed it and then began working the cape.  I did the flag part first, then ran the warpwolf on top with all the lessons I'd learned from the cape.  I initially rolled the cape too thin, so it was difficult to keep in place.  The wolf I may have gotten too thick, but it worked out.  I've got WIP pictures after the final product.  Let's hit the high point first, shall we?

 Note:  After posting all of these nice pics I realized I forgot to glue the medals back on after gluing the chain on from the cape.  This first picture, I went and got for the medals, but everything else, they're still missing.


  So the WIP.  I started with repositioning most of the model, getting a far more aggressive stance in place.  I modded the right hand to get a looser grip on the axe/mace so I could swing it out farther from the model like he was getting momentum going.  Then I airbrushed red, highlighted, moved to white, did all the metals, touched up minor details and one-off colors and moved onto the cape.


  I rolled out PP's greystuff, let it dry a little bit and then cut the holes into it, dragging fringes out with the tool and giving an edge.  I then let it dry for a total of 45 minutes.  This was too much time, and I really struggled to get good bends into the "fabric".  The issue though is that any less time and the sculpting material doesn't support itself.  What ended up working for me though was blue painters tape.  It sticks to the sculpt, but doesn't remove paint or change the texture.  So, using the tape, I supported the cape as I wanted, taping it to a box or whatever I need to get the angles and let it dry for the night.


  Then we moved onto the Wolf. I rolled out a basic outline, considerably thicker than the cape had been.  I used the tool (The GW standard Greenstuff tool) to drag out the edges for hairs and then drag all through the pelt for the fur itself.  At first it's pretty daunting, but you get the hang of it pretty quickly.  It's literally just dragging the tip through the clay, almost as it you're edging with a brush.


  Keep your tool wet.  Once it starts drying, it starts literally dragging material and tearing rather than just indenting so much.  The smooth motion is what you want for hte fur.


  I laid the wolf pelt over the cape and did the bluetape trick again.


  The chain you see I put in the cape by folding the narrow end of the cape over the chain and glueing it in place to secure the chain, then wrapping a small strap of material around the joint.  That got me to this point.


  Today, I finished a few minor details on Ruin, and then painted the cape.


  Altogether, this landed me this guy.


  I'm super pleased with how this has turned out, and I think it's probably my best work actually.  Between the sculpting skills, the airbrush, and the hand painted detail, I'm really excited to see how he turned out and I hope I've met the customer's expectations.  Leave any comments, critiques or outright insults and enjoy!