Thursday, November 27, 2014

Reposed Braylen Wanderheart painted, with Fell Caller to boot.

A friend of mine grabbed Braylen for me at WMW.  I love the model, but don't care for the dual-wielding position.  It's crowded, and as an experienced shooter, I've got no use for shooting that way.  I changed it up enough to look a little more realistic, but that's about it.


  I cut the arm at the glove wrappings, drilled in a wire to both sides and sculpted around it with Greystuff from PP.  I prefer that to Greenstuff from Citadel so far.  Mainly because the solidifier (the dark grey) doesn't bloody stick to every tool in your box like the blue in the Greenstuff does.

  So, Braylen, finished:


   At the same time, I finished my Fell Caller as well, the guy I've been doing metal tutorials on.


  And Gunslingers.  Jarl's almost finished.  I keep losing steam on him. And Gunnbjorn doesn't count as a gunslinger because I don't own him yet.


  That's it for today.  Happy Thanksgiving!  We're in the process of moving here shortly, and I'm going to spend the next couple of weeks remodeling the important aspects of the house, and then in turn, my Den.  I've got a two-room area I'm converting into an all out Office/War room/Den area.  Mancave, if you will.  So it'll be busy.  Won't be many games, or painting, but the return will be amazing and I'll have a full out lighting setup, and painting corner, and game table right in the middle.  It'll be glorious.  Thanks for reading and enjoy your holiday!


Tuesday, November 25, 2014

NMM/Flake Part II: Silver/Steel

  I got this project started, and then my Mountain King took full priority.  I don't know why, but I figured while the momentum was there, I'd get him done.  Then I got Braylen Wanderheart, and started working on her.  I hit the metal on her, and decided to finish the Fell Caller's metal too, and this tutorial.

  So.  Here we go.  I've tried to mke the metals work for a long time, and I've never felt like they looked very good.  Never bad, but just not what I wanted when you use them as your primary color.  They're great drybrushed, but not as just your color.

  I'm starting with a black, and I'll mix 1:1 with gunmetal.


  Now we'll dabble in just a little grey.  Vallejo-wise, is Stonewall Grey.  Probably 2:2:1.


  More stonewall grey.  Getting into a 1:1:1 ratio.  This is also where I took a break, and picked him up again, thus the background change.


 I'm trying to pick on the upper half of his armor, and I'm trying to create a conflicting gradient on the sword blades.  At this point, blending is getting difficult, and the ammount of paint you're mixing is kind of ridiculous.  To change the hue you have to add enough paint to change the whole pot, so you may be better off starting another pot with a lot less paint.  We're going to Gunmetal, Grey, black, 2:2:1 with a little retarder thrown in.  Also, I'm starting to get into a basic 2 brush blend.  One brush is my color, the other brush is basically water.  I'll hit a spot with water real quick (not much, just enough to dampen it), and then paint it, then blend again with the water brush.


  Starting to get lighter.  I'm not touching the backplane of the armor anymore, just the protruded edges.  Really trying to get a good gradient on the outer rim and on the sword blade.  At this point, my black is pretty much out of the blend completely and I'm doing 2:1 gunmetal and grey.  The metal actually darkens the grey enough at this point.  


  At this point I'm mixing a little white into the pot.  2:2:1 Grey, gunmetal white.  What you're seeing is the exact same lighting as everything else, but the metal seems like it's reflecting it.  It's not.  This is the paint color.  It's the goal here.  For the last one, I do a white silver (Plata Silver for Vallejo) at 1:1 and touch the very tops of what I'm shading.  I end up watering it a down a bit and dragging it back across a lot of the blend translucently enough that I don't hide any of my work, but I brighten it.  Then I go pure silver and do just a little bit of edging.  If you've ever basecoated a model, and then played it in a game, you've seen the wear on the corners and edges that takes it back down to metal.  That's what you're trying to replicate essentially.


I also did Braylen simultaneously.


  And there it is.  I hope this has helped a little bit, or pointed out a few things.  If you give it a shot, let me know and shoot me results!


Friday, November 14, 2014

Completed Mountain King

  I've had him almost a year, and he's been sitting there with the normal trollblood color's base on him that whole time until last week.  Last week, for some reason, I got the itch to paint him.  I don't know why, but it's been a task I've been afraid to tackle for a long time.  Mainly because of the base.  I had a grandoise plan to build a circle temple around him that he's recklessly destroying.  However, sometime last week at the plant I work at, I stumbled across a concrete core that had been drilled out to allow for electrical conduits.  At first I didn't know what to do with it, but I went ahead and pocketed it because it'd be invaluable somewhere as a hobby item.

  Once I got home and did the pocket dump routine to my hobby box, I saw Bruce, and held the concrete core up to him.  Suddenly the concrete core was a pillar, and I saw the opportunity to do something unique with the Mountain King.
 

  That's right.  My King has 4'' reach because he's swinging a huge pillar that's bigger than most warjacks.  Not kidding.  That thing is bigger around than a Khador jack without arms.  So back to the beginning.  I wrapped this pillar up in some leftover jewelry chains of my wife's, and glue it to his arm.  I removed all the whelps I could, and didn't add any of the others.  I let the ones coming out of his torso, but I felt like everything else was too much.  In fact, two of the others, I've based them on their own small bases and will use them as regular whelps.

  Then I glued this whole thing to a base covered in rocks.  This thing weighs a ton.  I finally took all of my Cygnar out of their bag, and set them to the side sadly, even while they cried out that Dynamo would make them playable.  Negative.  So off to the side, and I built a foam box for the King.  He takes up a third of the Cygnar bag by himself.  I'm trying to stuff most of Runes and Elementary Evolutionism into the bag (Basically models that I'm not bringing to every game), but the King is huge.


  I messed around with painting runes on the pillar, and I may go back and do it at some point, but I doubt it.  I wasn't planning on using most of the chains, but that pillar really got me going.  I went from imagining a temple-wrecking Mountain King to a Bruce that's hell bent on revenge and he's bringing parts of prison with him to beat the daylights out of eveyrone else.


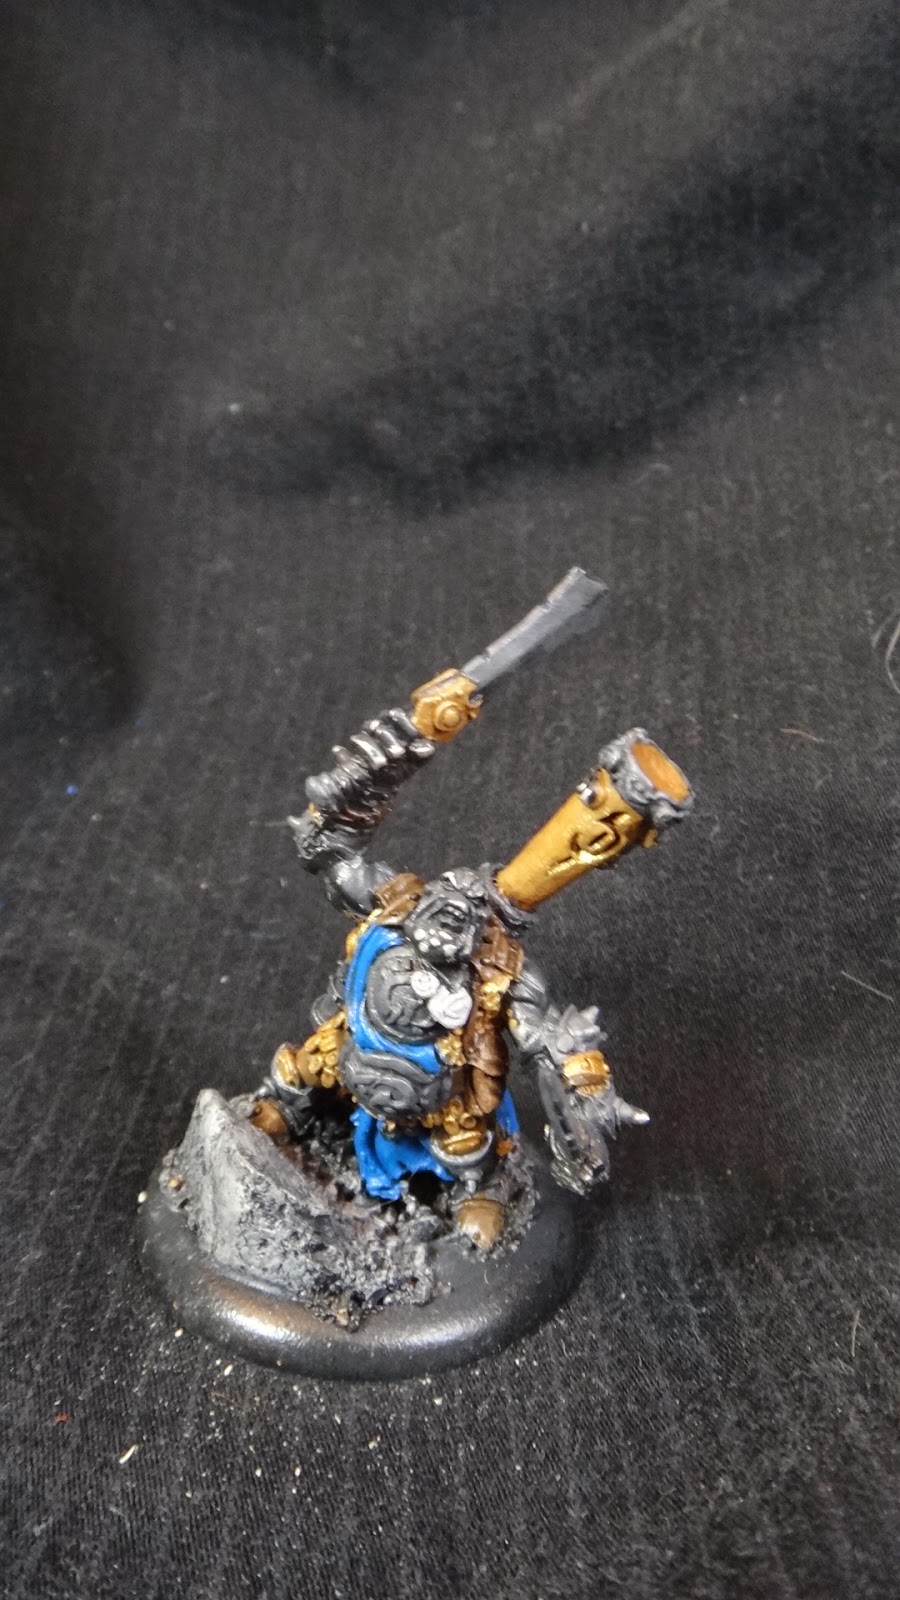
  Then I fell in love with my wife again.  See, all this shading and stuff was done in 15 minutes with an airbrush.  It doesn't get any easier.  I would not want to do a King without an airbrush.  I sealed him at this state, glued him to the base and took him to the FLGS. I actually have a batrep enroute with the King in a Grim2 list.  


  Now we're going places.  I was driving north through Missouri and I saw this tan rock lining the side of the road, but you could see where it had been weathered to a grey.  Even the water runoff areas were a cloudy grey, and I really liked that effect.  So I based the King's rocks in a british tan kind of color, and after this picture, shaded and drybrushed them.  After that, I did the same thing with grey, but catching only the high points and edges.  Really, anything that looks like it'd take a lot of rain as the King trods along in the middle of a thunderstorm.  
  
  I finally got to finish him today.  I'm very pleased with how he turned out and I'm excited to see him on the table.  The kilt was my wife's idea.  I wanted to incorporate the kilt the rest of my army has, but wanted to take advantage of the patchwork the King has going on.  What you see is my wife's idea.

  If you look closer at the rocks, you'll notice he's got a lot of blood runoff.  I really wanted to emphasize what the King is really going through.  He's an aged, ragged dire troll that's literally growing rocks through his back.  It can't be completely harmless, and in the rage and anger, his heart is racing and it's pumping blood through everything, leaking through the damaged veins in his back and arms.  After I'd painted the rocks, I went through and did purple and red on the torn edges of his skin, like he's trying to heal and regenerate, but there's blood straight up flowing between the rocks and his skin.  The blood was easy.  Two red washes that I just let flow into the cracks.  I like what it did for the model.


  And that, folks, is my Mountain King.  Stay tuned for his batrep against Sorscha2.