
Anyways. You're here because the title indicated a hobby related subject. Let's take a look. I own 2 impalers. One came painted, the other came unassembled in the original plastic bag. The one that came painted is the one that you've seen in my batreps (Read: all of them). I'm to the point where I want an impaler that matches my army. The first one is painted fine, but it's clearly not mine. That being said, since I have one, I want the other to be different.
I have 0 interest in playing Skorne, but I love their flags. If you've ever seen the Last Samurai, the battlefield behind Tom Cruise is full of flags marking units and men, and it looks fantastic. Very colorful, very vivid. As time goes on, I want to progress that way with my army. So, let's look.
To start off with, I grabbed 1/4 dowel from Hobby Lobby. I already had Grey Stuff (PP3 green stuff) and magnets, so no issue there. I cut two lengths from the dowel, one about 3 1/2" and other about 2". Then I glued them together, which was a royal pain. Trying to hold two round objects together long enough to glue together without glueing you too.

Forgive my phone pics. The final pictures will be legit, but the wip shots are shot with a phone camera. So, once this is glued, we need the flag, as Eddie Izzard will tell you. Before we mix up our putty, we need a couple of things. Cooking spray (PAM or the knockoff), flat, untextured plastic and modeling tools, like the green stuff tool from GW, or any like tool. Hobby Lobby sells a four pack of them in different sizes and shapes. For my plastic, it's needed as a modeling surface. Something flat that we can spray with the pam, and shape this flag on. I took a plastic cottage cheese lid, flipped it over and cut the rim off, using the underside as my surface. Spray it quick with your cooking spray and wipe off the excess. This is just so the putty doesn't stick.
Mix up your favorite modeling putty. I did a ball about the size of my thumb after the last knuckle, and it was too much. Start with probably 2/3ds of that and go from there. First thing I did was tear off a small ball, roll it out to a noodle and flatten it with the handle of my modelling tool.

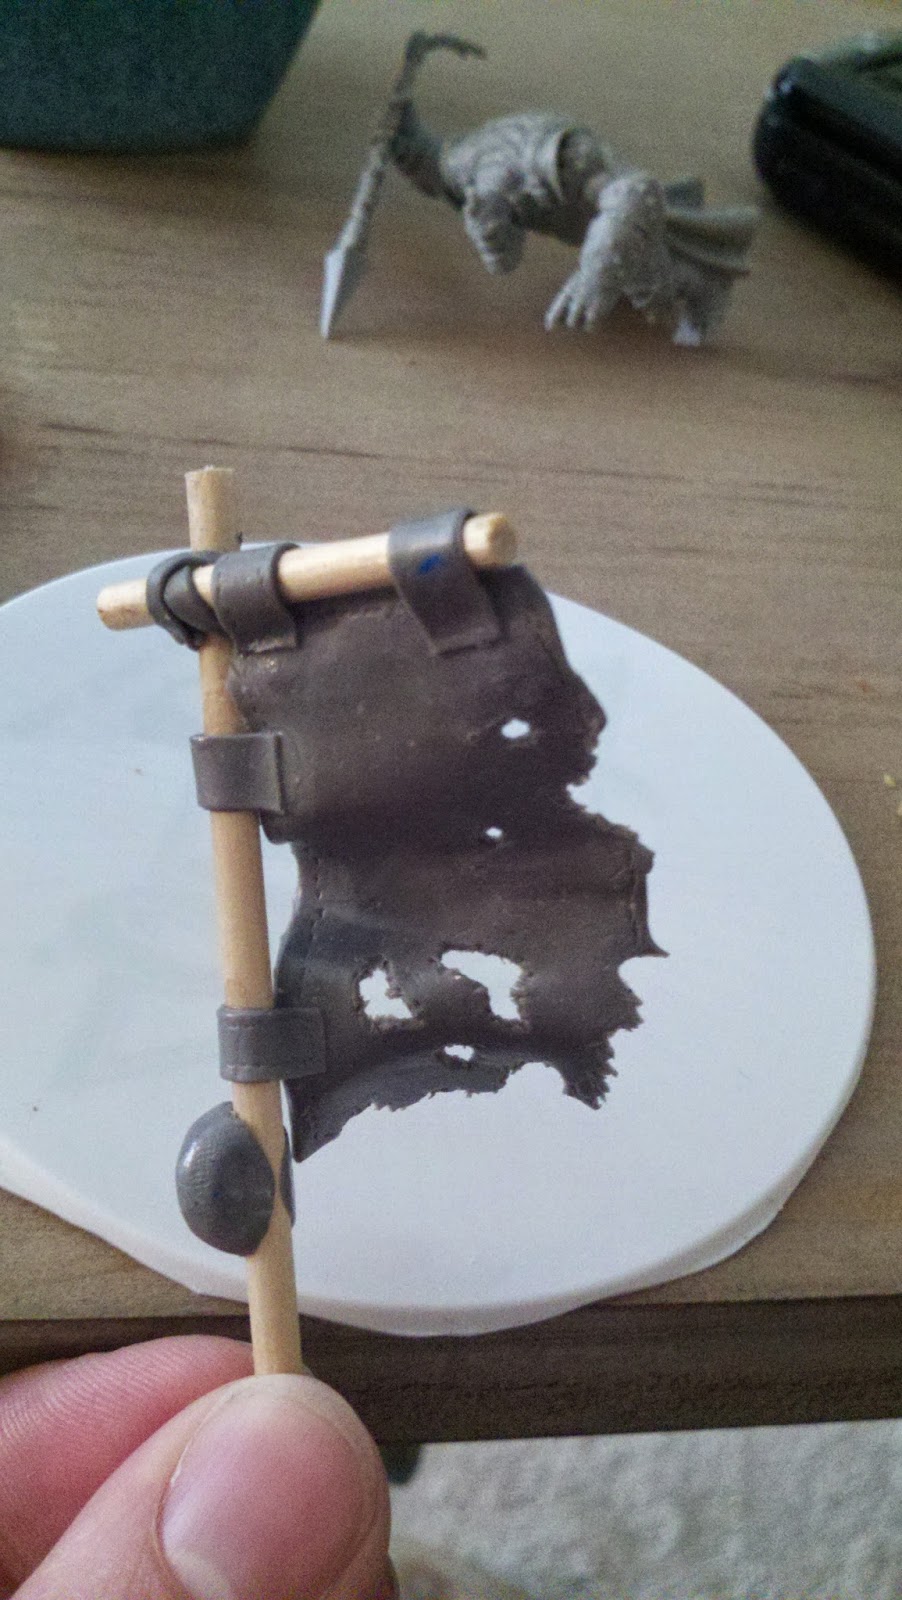
Then, using the half-ball shape on the end (Opposite end of what is seen in this pic), I pushed the middle of this strap in. I had to stretch it a little to get the length I wanted, then wrapped it around the glue joint of the flagpole.

Now the flag. Take what's left of your putty and smash it out. This was the longest part, rolling it out and smashing it with the tool the same way I did the strap, but on a much larger scale. Once that's done, cut as square a shape as you can by pressing your hobby knife into the putty. If you cut it like you would anything else, it'll probably drag and tear your edges. You'll notice I didn't square off the right edge. I intend for this flag to be tattered, so I didn't worry about that end.

Start with drawing a few loose lines where you want the tatters (assuming you want them). Don't worry abuot being to precise. Then press your hobby knife into the line to serrate it as much as possible. Then slowly start picking away what you serrated. This will naturally tatter the edge and give it the torn look. Once your done, use the tip of your knife to press a seam all around the flag.

Using what's left, cut straps probably twice as thick as the first one. Cut four of them, enough to attach to the flag, wrap over the pole and back to the flag. Stipple your seams around the edges like we did with the flag. At this point, go eat supper, watch a tv show or two. Give it about an hour to dry and stiffen before you come back.

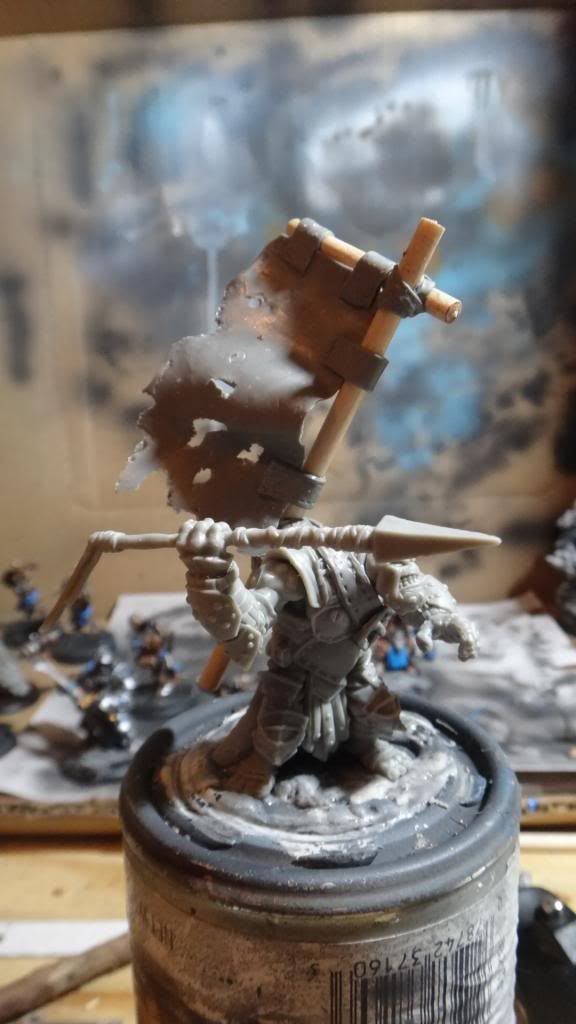
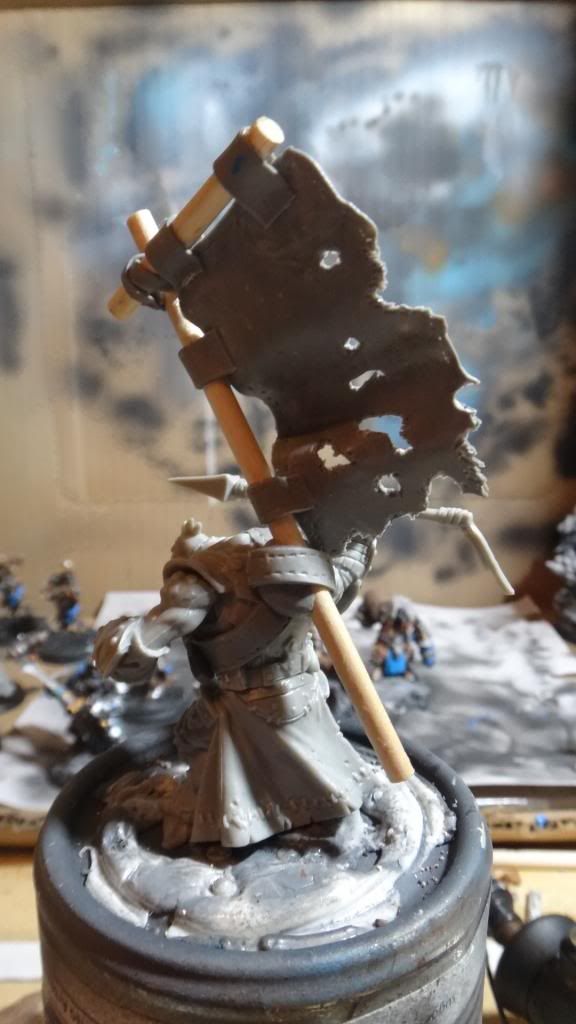
Now glue them to the flag, wrap over the pole and glue the other side. I added a base to the flag so I can place a magnet on this thing (for storage purposes) so I had to slide the flag up a little to fit it, which is fine. I want the waving look anyways. So push your flag around till you get the shape you want and glue the straps in place on the pole. Set this thing in a vice and leave it overnight.
For my Troll, I wanted a belt wrapping around the troll, as if it's holding the flag. I made a wide belt the same way I made the straps, then cut a square for a belt buckle, and cut out the center. I glued it over the top of the belt, poked holes in the belt and cut a small rectangle out of my scraps which I glue to the belt buckle as well. I then added a small strap over the base onto the flag, just to complete it.

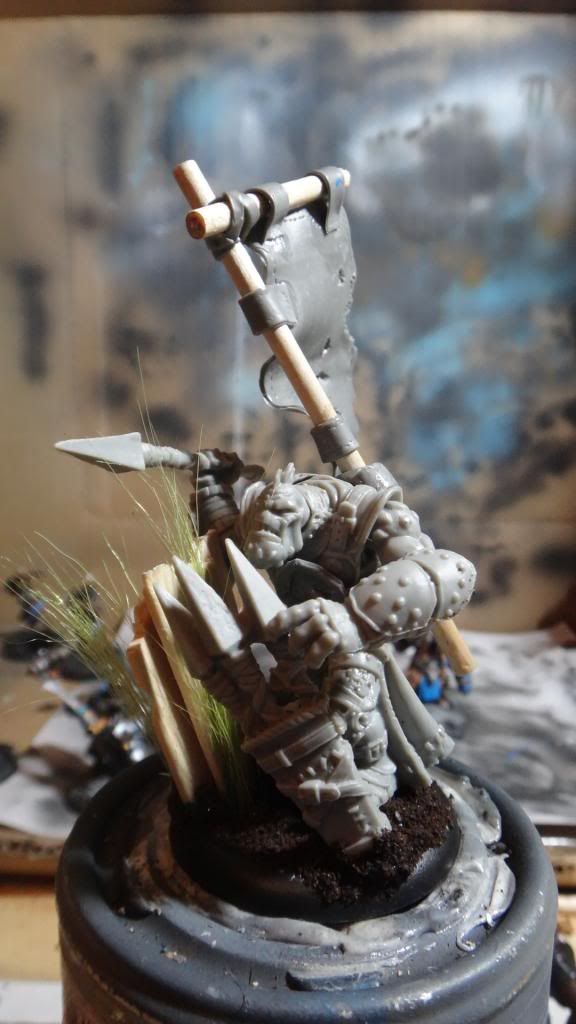
There's a preview there of the completed model, but let's get the full view here.
The base is actually what started this, because as I mentioned earlier, I'm looking for that "Last Samurai" final battle scene with the flags and wood barriers. I wanted to set up the Impaler as if he's dug in behind a wall, his sheath of arrows stuck in the ground beside him for him to draw from. Once I had his back free, the flag idea was even better. The base is just wide popsicle sticks, the spear quiver, long grass from hobby lobby and coffee grounds.

That's it for today. Finished the tartan on my Champs, Sons of Bragg, Mulg and Kithkar. All's left is the touchups and they'll be posted. Then, of course, I gotta paint this guy, which will be fun. Anyways, hope this was interesting for you and chime in with suggestions or questions!
Hobby posts are always nice. Also, please tell me you're going to name your army the Last Trollmuri
ReplyDeleteLol, Trollmurai? Not sure how well that rolls off the tongue.
ReplyDelete