
For now though, I've got a modification tutorial for you. I'm not a huge fan of the Ol' Rowdy model, and I can't really explain why, but it annoys me. On top of that, it's a lot of metal and when I'm trying to pay for a Trollblood army and be ready for Vengeance to drop, I don't want to pay 40$ for a metal model I don't like and won't be used in the overall tournament scene. E.G., It's not going to Warmachine cons with me.
I've got the Ironclad from the battlebox, and until recently, wasn't playing it all that much. Now that I've converted it, I use it all the time for an Ironclad, but that's besides the point. Rowdy's essentially our regular Ironclad with a few main differences.


Outside of the pose, mind you. I don't care about the pose. One of the main reasons I don't like the Ol' Rowdy model. The main five things though are 1) Two extra boiler pipes. 2) Fancy Buckler thing on the right. 3) Cygnus up top and center. 4) Wires on the arm. 5) The Shoulderpad, the last one being the biggest change.
Looking at this, I'm not going to worry about the buckler, and I didn't realize until I was halfway through the conversion that I needed more exhaust pipes. If it really bothers me, I'll order a few metal ones off of the bits section of PPress's store. I will, however, worry about the other three things.
For this, I needed:
1. Polystyrene card of various thicknesses. Thin, and really thin.
2. Greenstuff.
3. A way to heat plastic somewhat precisely. I have a butane pencil torch that does wonders, but a longnecked kitchen lighter will work too.
4. Obvious hobby things, e.g., knife, superglue, patience, coffee, bandaids.
For the base that I created, I used corkboard, coffee grounds, and red pepper flakes, but that's me. So lets get started. Start with cutting a rectangle out of your thicker plastic. Two by one inches will probably be just a little big, but it'll let you trim it down to what you want. Heat up the center of it and fold it against a hard surface so it develops that sharp (ish) edge down the center.
You can set it up on the Ironclad now, size it a bit. Check the Ol' Rowdy pic, and notice that you're covering the first two studs, and use that to line it up. Shave it down, cut a new piece, whatever you need to do at this point. Right now, it's pretty square looking, and we need it to form a bit better, so lets get back into it.

The left side is unformed. On the right, I heated it just a little and curved it, trying to get rid of that "Hey, I built this guys!" look. It's going to be hard to avoid, and nobody's going to mistake the shoulder pad as the original, but we can try, right?

Both sides formed. I'm ok with this. Lay it down on your thin styrene and sketch an edge for it for that shoulder guard.

Then cut it out, shave it down to fit. I also cut mine so that the bottom edge didn't necessarily follow the piece we just made, but rather the shoulder on the warjack itself.

And glue.

I think I actually didn't like that particular piece, so I cut another one. You can see here how it has the much gentler curve on the Ironclad side.

While that's drying, it's time to greenstuff. Mix up a ball of it and mush it flat on top of the Ironclad. You want it pretty thin.

For greenstuff modelling, this is pretty straight forward. Scratch the cygnus into it with a paperclip then cut it. The main trick here is to cut it cleanly so that when you pull material away, it doesn't take parts of your bird with it. But then don't cut it so clean that you leave cuts in the warjack paint.
Or just paint it after you're done. Yeah, do that. Don't convert already-painted warjacks unless you're a cheapskate like me.

Cool. Fix any edges, smooth it out with your butterknife flat or sculpting tool. Dip it in water first so it slides on the greenstuff, instead of ruining it.

While we have green stuff out, take all the material you just cut and roll it into a long noodle. Save a piece and roll it into a thicker cylinder, cut it in half, and place it as ports on the arm, then take the long noodle and drape it artistically all over Rowdy's left arm. I don't understand why a high-powered, fast-moving warjack has a cable loosely draped over his arm so it can catch on things and rip off and lose power to the arm or whatever, but Rowdy does. Let things sit, and pick up your shoulder pad again.
More greenstuff! The big thing here is just the corners. Mash some down thinly on the corners, cut the excess, and let it dry.

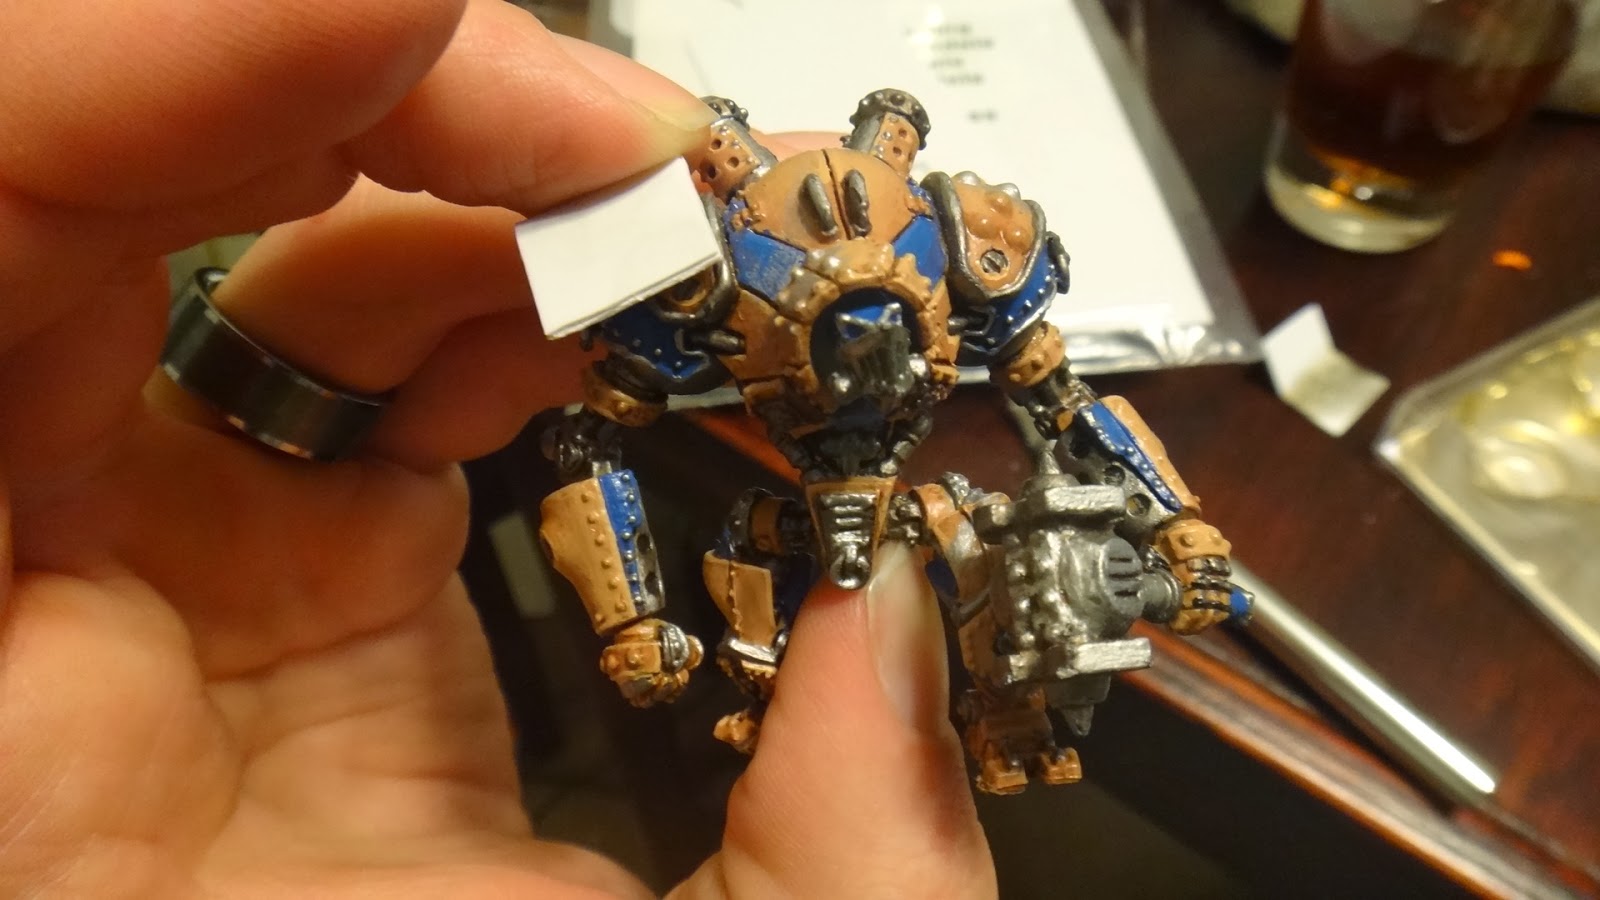
Test fit, because I want to know. Can you tell me?! I want to know about these strangers like me...
Wife's pandora station. I apologize. I really like what Phil Collins did with Tarzan, but I don't like anything else he's done. It's weird. Anyways.

Not bad. I want some more detail though. Cut a narrow strip of the reeeally thin styrene. In fact, cut several trips, but one wider than the rest. This will be the edging on our pauldron here. Eyeball and cut the edges for around the main part, then glue the wider strip up at the top on the flange. Like so:
Oh, and roll another noodle of green stuff, you want it to be small enough to fit into the gap on the flange between the shoulderpad and flange edging.

I left that piece sticking out because it's easier to cut there rather than measuring. Don't worry about these unsightly gaps we have at the moment, they'll be fixed. One thing I wish I had done was get the lighter out and bend those front strips a bit more. I had a nice gentle curve, but now it's mostly hidden. Take some more GS, and hide that corner. Just smash it in there, smooth the excess. Then, if that noodle has dried some so it's got some resiliency, cut it, and drop it in as seen below. This is a glueing nightmare, mind you, but the effect is nice.

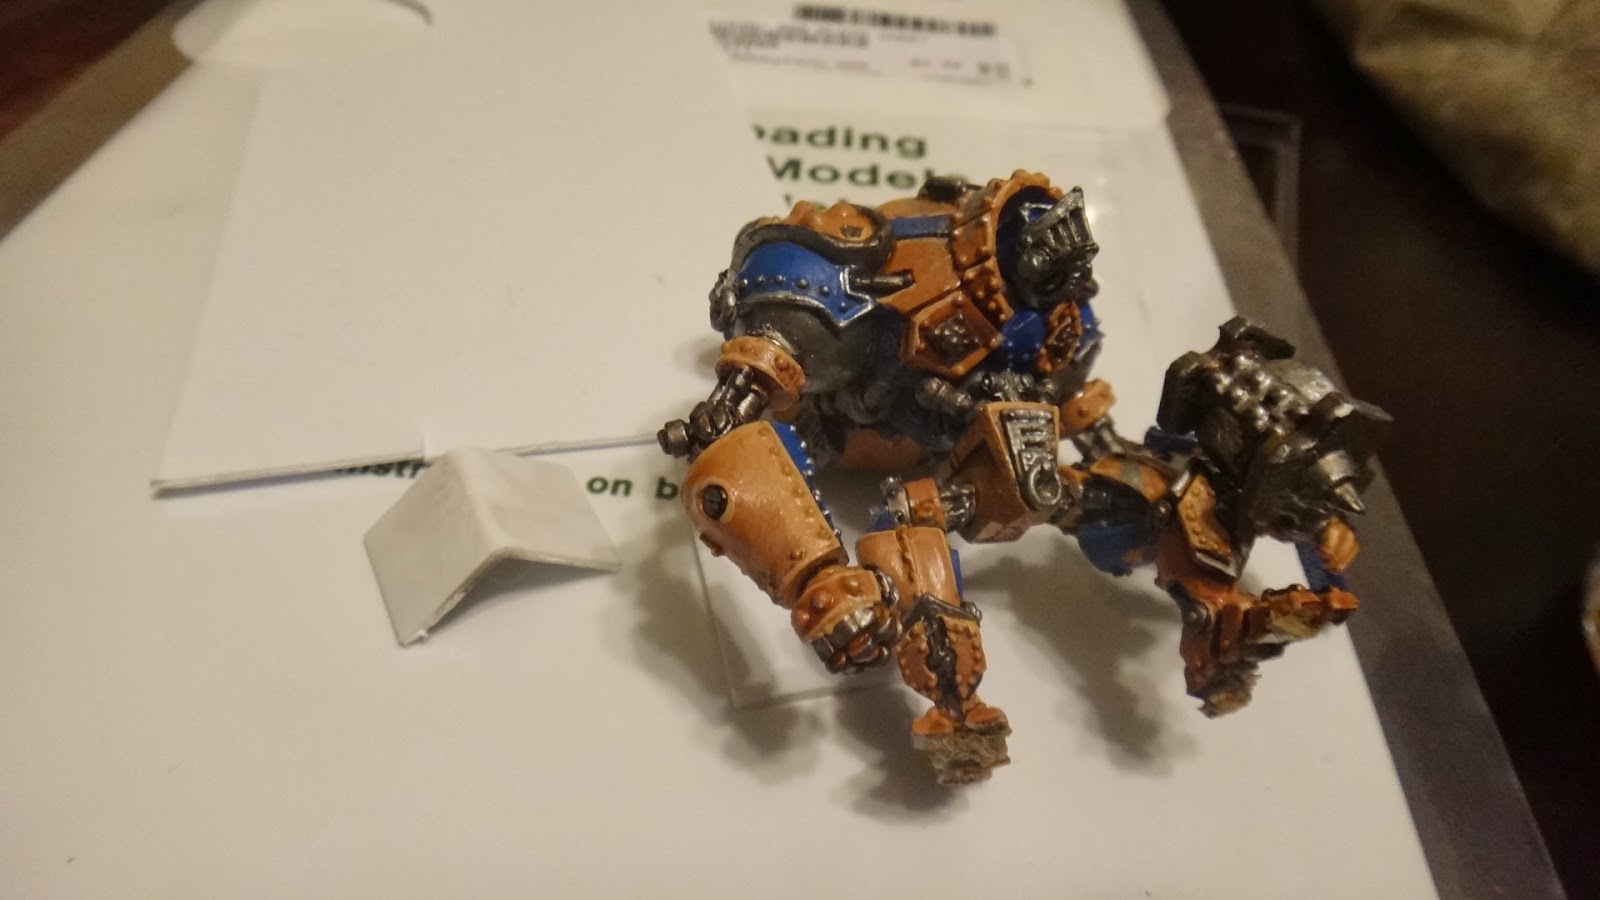
Test fitting again. I think it might be a bit big, but I like it.

Primed.

And the base. Again, corkboard, coffee grounds, red pepper flakes, and apparently hobby lobby ballast.


I like it. I don't think it turned out too bad at all, and he did alright in the small tourney that happened that weekend. I certainly like it more than the original model, and while it's got some fine cutting, it wasn't too bad overall.
The only other thing I have for you is the secret santa gift I did for a friend. He requested Mercs, so I though Bart looked like fun.


The base is just a bunch of popsycle sticks washed and drybrushed, with the exception of the railing itself, which is a fancy one-sided toothpick I found somewhere. Bart himself is a cool caster, and was a lot of fun to paint. I actually got to see him being played a few weeks ago, which was really neat too.
Hope you enjoyed this tutorial, and hope to have more running around. If there's anything specific from the folding board I did that you'd like to see done in tutorial form, I'd be happy to oblige. Leave a comment, let me know!
No comments:
Post a Comment