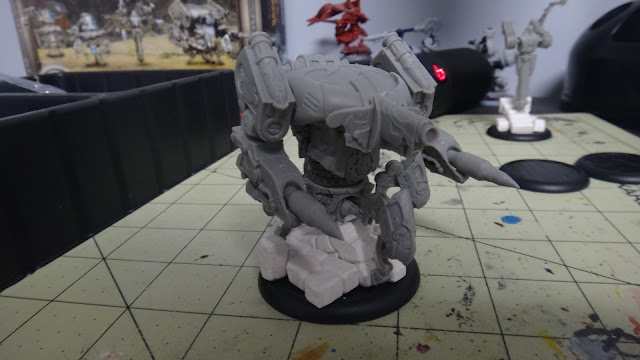
I bought a Convergence Battlebox to continue my collection of BB kits. I'm three away from having every faction. Convergence has such a different mechanic that I wanted to pick it up before the other three. I've been asked several times how induction works and what's it's like to play and I legitimately have no idea. So I grabbed the box and built it yesterday.
So, starting off, there's a lot of things that a lot of people recommend for magnetizing. My original in-depth article is my dire troll article. This article is really just covering what parts get glued, and what my magnet points are. My tool list has also changed. I just use a 1/8'' bit in the dremel for everything. If I'm putting a bigger magnet than that in there, I widen it out with a stirring motion and cut the flashing it creates with a knife. We'll show that a little bit.
The magnets I use are below. They're just rare earth magnets I pick up at the FLGS, The ones I used for most of this is the left one, the 1/8th. I've got one just a hair smaller for like, Ret jacks, but this one is my workhorse in most cases. The one over is close to 3/16ths, and is my second most used. The one on the right is a full 1/4'' and is for the big things like the turret on my War Wagon.
This is the waist point for the convergence jack. I did it just because I don't have all the parts for the convergence jack, so I don't know if the legs will be in the way for some of the weapons so I have it where I can rotate it a bit. Here, again, I just drilled, then spiraled the bit around to widen it. It creates this flashing here, but just run your hobby knife around that edge and it cleans up nicely.
Usually I just drill the hole straight, maybe worm it a hair to make sure the magnet will stick. Most of the technique is just getting the magnet in there to stick without gluing multiple magnets to your fingers. In this picture, I'm tapping a shoulder for the convergence kit. I've drilled it deep enough for one magnet, dripped a bit of glue in and slid in one magnet, using the whole stick of them. Then I'll slide it off once it's flush with the plastic, sliding in a fingernail in behind it to make sure it doesn't pull itself up out of the hole.
So, connection points on this guy. The waist is extra. The main points is the head on the main body, the shoulder points and the arm points. The left shoulder could be glued directly to the body, and just the elbow point could be magnetized for future kits, but the left shoulder actually needs to come off for one of the other jacks.
My wife's goat kit is even easier. The body is mostly the same with the exception of a waist extension piece that you can add in if you want. I think it's for the shadowhorn, but she put it in and glued it. Each head comes with it's own set of arms though, so it's not like trying to mag the wrist points on the Warpwolf or anything. Just the neck and shoulder joints. I used 1/8'' magnets for all of it, but the neck and head joint, I wish I'd gone a size up.

And that's it. Just a quick reference for magnetizing these two heavies. In the pipeline, I've got a lot. I got Doomshaper3, Glacier King, double Efaarit, and a bunch of other stuff. The D3 and GK unboxing/assembly is coming soon. I have to figure out what all I want to do with my GK. Once that's done, it'll be on here. Still working on the painting articles, doing a bunch of commissions still, and of course trying to keep up with real life and incoming holidays. Speaking of which, enjoy your thanksgiving and will see you guys later!


No comments:
Post a Comment