Let's rehash. I posted probably six articles in August, and have done nothing since. Things got busy, but it's time to push this particular series through. So, I listed the following:
1. Glue
2. Exacto Knife
3. Pliers
4. Greystuff
Pretty simple. That's more than enough to build a model and put it on the table. But lets go from fielding a model, to cleaning a model and having it completely prepared for a good paintjob. We can break this into further categories. Cleaning, Attaching/Pinning, Priming.
Further tools we'll need is a pinning drill, bits, and pins to go with it. GW and PP both manufacture a drill kit and PP's pins and bits are probably the best for the job without running around and getting them from multiple other locations. A vise can also be handy but I haven't used one yet.
Cleaning
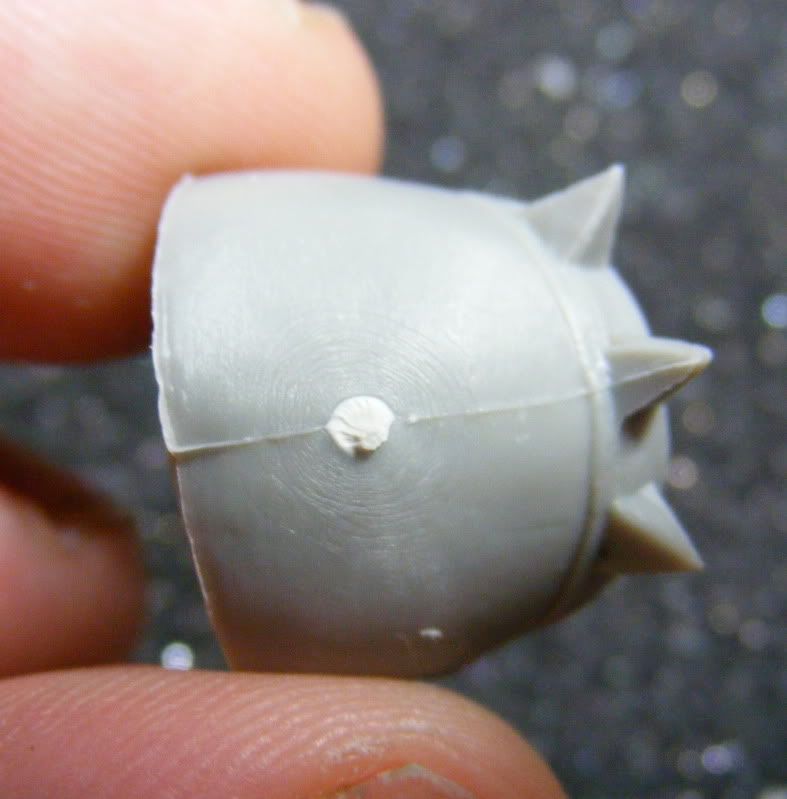
One of the major downsides often brought up in PP's resin style of manufacturing models is the horrible mold lines left behind in models. Warders have been particularly denounced in this regard, mold lines in the middle of faces and etc. Recent molds have been vastly improved, but this does nothing for older sculpts. The exception to this has been Convergence. The Convergence sculpts have been pretty rough. So, we need to recognize these seams and deal with them.
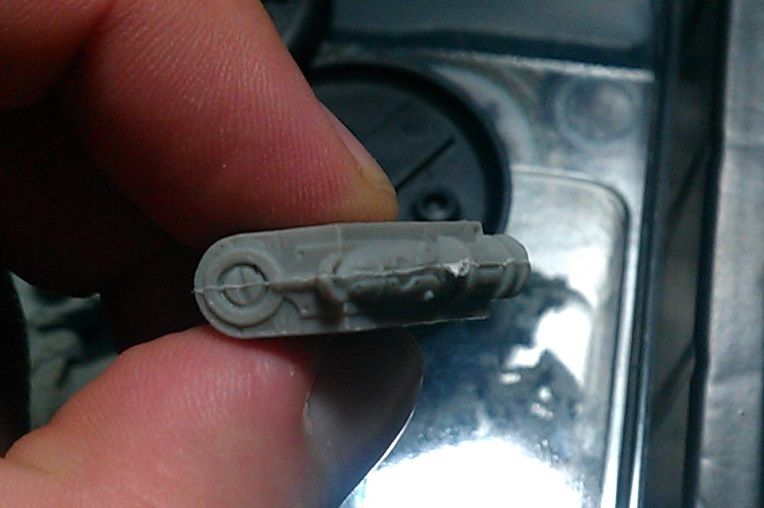
It's pretty easy to identify a mold line. It's usually a raised seam along a model.
In both cases it's pretty easy to recognize. Sometimes, the mold itself wasn't aligned perfectly, so one edge is offset from the other. Those are a bit harder to deal with but it can be done.
So, the Exacto knife is the first way to deal with this. Cut off the biggest pieces, in some cases a cylinder port where the resin was filled in. This is particularly bad on Colossals/Gargantuans. So, once we've cut this stuff, we can sand it. Instead of actually getting sandpaper, start with scraping your blade on your knife across. Sometimes this can scratch off a seam, and in particularly tight places with no lateral movement for a sanding motion, it's the best thing. If that doesn't work, Hobby Lobby and other such stores have sanding sticks.
Get some. They're sweet. Some different styles but the main thing about most of them is they have different grit on either side. They're pretty cheap and generally easy to find. If your local hobby store (Michaels, Hobby Lobby, Hobbytown, etc) support model kits at all, E.G., tanks, planes, cars, they'll have these sticks.
Pliers are also nice to have for the cleaning. I like to keep the tabs on the model until I'm ready to glue it to the base, However, at some point, I have to cut that tab off and that takes some significant force. If you have a lot of fragile bits on the base, then don't glue them on before you cut that tab off. However, if you cut it off early, you'll get a lot of fingerprint oil on the model that you should ideally clean off before painting the model. On the resin ones, that's not nearly as important. On the metal ones it becomes significantly more important.
For actual washing, soapy water and a blowdryer is pretty standard. Scrub as much as you can carefully but attempt not to lose parts down the drain because that makes this process significantly more difficult.
Actual Cleaning/Assembly
Someone gifted me a Goreshade1 resculpt model at a convention recently, and I'm not a Cryx player, but it's a really pretty model, and a small diorama throughout this series would help to serve a lot of points. So we're going to cover tools as we just did, and then move into the process where I can show what we're doing and worrying about.
So, here's the model we got.
My final vision for this model is to utilize the strolling stance he has, and have him and the deathwalker casually walking down from the rocky bluff, with three or four bodies laying about. Some Alexia blisters or something. Have the deathwalker strolling from one of the bodies specifically.
The terrain will be pretty varied. I'd like to get rocks, insulation foam, tree bark, ballast and all kinds of stuff involved so I can cover a lot of different techniques. It'll be probably desert based but I may change my mind. Haven't decided for sure yet. That's the next article, and it's taken probably six months for this one.
So, let's build this guy. We're going to stay pretty stock, no modding. Just clean edges.
Right off the bat, theres some extra flashing on the pointy things. I'm going to break off the flashing and sand those points a bit. The bottom of the cloak has similar issues but the sanding stick fits in there just fine. The main thing is cut the big chunks of flashing. Clean it with the sanding stick.
Here's a particularly large piece of flashing on the hilt. There's a little more on the back edge of the blade tip, and then there's a fine line down the front of the handle too. So I'll hit that largest offender with a knife.
That'll leave a small edge, so I'll hit it with the rough grit on the stick, and then the softer grit.
I also took the knife to that flashing at the blade tip and scraped it off. I sanded it with the light grit to finish it off.
Now you see the edge running down the handle. Just a thin line but it's frustrating because of the amount of detail.
I scraped very selectively with the knife and then sanded lightly.
That piece is done. I'll touch up the bottom of the cloak the same way.
I'm planning on washing the whole model anyways, so I'm going to cut off the feet tabs now. Get it set against your cutting bad and rock the model back and forth carefully to work your blade through the metal and then sand the rest.
Finally, there's a thin line on top of the shoulders of the torso. I'll sand them lightly. The spikes on the backpiece were the same way. Only one was noticeably bad flashing.
Assembly
Alright, so now we're into the assembly side of things. If you're going to clean them, soak them in soapy water, brush them with a toothbrush, blow dry them or let them sit on a paper towel. Pick it up tomorrow after they're dry.
Now, let's do the girl first because it's one joint. There's little to no weight going to be held at this joint, so we're not pinning it. On all metal models though, I usually greenstuff the joints. So, you'll need your favorite glue and your favorite sculpting material. In my case, it's the loctite professional liquid super glue in a long necked blue bottle.
And greenstuff, just your typical GW or Galeforce 9 tubes of blue/green material. The PP grey/brown stuff is also extremely good, but it doesn't come in the large tube quantities like the green/blue stuff does. So, roll a little ball of the grey green stuff, and have your favorite sculpting tool nearby to use it to set it in there and let's get this started.
Here's the joint. Most of PP's miniatures have that nice little square knob to line things up the way they envisioned. I've definitely cut them off before so I could do what I want, but this time we'll stick with what they want.
Here, I cut just a tiny bit of green stuff off and I'm going to put it in that slot.
Put a very fine drop of glue in there and set the arm. Resin models set extremely quickly. Couple of seconds. Metal models do not. I've held metal to metal for over a minute before. Abby2 will have you looking at quitting the hobby entirely. The greenstuff helps a lot to hold the part together and give it a lot more stick while it sets. Scoring the joints with the knife helps too but most of the time this is unnecessary.
And there she is. I'll set her aside and move onto the main show. Goreshade himself. His arms specifically are much more weight at a small connection point, unlike the girl's arm. These, I will pin. Especially the arm that has the skull with the giant trail behind it.
So for this, I have the GW drilling kit with the PP pinning kit. A dremel is nice for bigger pinning jobs, but at this diameter, it's too much. I'm going to drill dead center in the joint squares. Put the knob against your palm and twist the drill. This particular model likes to unscrew the drill from the palm setter, instead of spinning like it's supposed to, so pay attention to that. Don't give yourself too much bit out of the tip because you'll break it pretty quickly with the amount of pressure you have to apply as you drill.
I drilled about an 1/16'' to 1/8'' inch into both joints, and then cut a probably 3/16'' bar and made a small ball of green stuff. I'll stick the pin into the socket with the green stuff, add some glue and stick the other end in.
For the leg/torso connection, I'm just going to greenstuff. It's not holding weight at a bad angle or anything. Same with the backpack and the second half of the trail coming off of the skull.
The cloak, I thought, stuck up under the backpack and would have lots of surface area to glue to. I was wrong. It actually comes off the lower edge of the backpack and doesn't touch the torso at all. So I did a noodle of greenstuff along the top of the cape and glued it in. I had to hold it for awhile, but it wasn't bad.
Then I had to go back in and cut the excess greenstuff out. It's easier to do while it's still pliable, but you also don't want to break the cape loose. So do the large chunks while pliable, and fine tuning after it's dried and solidified.
Then I did some final greenstuff on the trail joint since the joint didn't flow well at all and left a visible seam.
And here they're assembled.
One day, when MKIV comes out, I'll do the second part of this series, which will be basing. We're not basing these guys to their plastic bases because I want to do a far more comprehensive basing tutorial than what two bases would provide. As I said before, we'll have a chance to look at lots of different basing material, techniques and we'll probably do a little bit of painting on just the terrain too so it's ready to go before we attach the painted miniatures in the third article.
That's it for now, hopefully this has given you some insight on the finer details of assembly for the hobby. Any comments or questions can be sent to me here, or on my twitter feed. Thanks for reading!


