Showing posts with label painting. Show all posts

Sunday, March 12, 2017

Airbrush basics and how to get going with one

News: Before we get started, a quick announcement.  I've recently become a contributing blogger at www.midwestwargaming.com, a group based in Iowa City.  For an international community, that's pretty local for me, being in Omaha, and I'm happy to join these guys.

 Almost all of my articles will be featured there, and in all honesty, it's quite possible that the redundancy will mean that this particular site no longer gets maintained.  I don't know, haven't decided yet.  My personal hobby stuff won't go to MWWG, but idk that my personal hobby stuff will warrant a blog of their own.  So we'll see.

  For you MWWG followers that are seeing me here for the first time, a little bit about me.  I've been wargaming for nine years, and my articles focus on hobby and painting.  Batreps are a possibility, but since I'm no longer playing Warmachine, and Guildball doesn't batrep very well, I doubt I'll do many of them.  My local Horus Heresy Meta is spinning out of control though, with a well planned Isstvan event in our future, so that will probably be an article of it's own.  We'll see.

  As I said before, I'm currently living near Omaha.  I've been married to my lovely wife for almost four years, and we introduced our first child, a son, into our home last September.  I play Guildball for my competitive game, and 30k Horus Heresy for fun.  You may see me at a couple of cons in the area (Tricon in Sioux City or Musecon in Des Moines, or the Bugeater in Omaha), but that's about it.  So, on to the article.

Airbrush basics and how to get going with one

 Eventually, someone will tell you that you need one, or they have one, or whatever.  Eventually, it will come up, and it's going to click that those models you've seen painted with these beautiful smooth blends aren't done by hand.  Usually.  They're done with an airbrush.  Jolly Roger Studios is a great example of what can be done with an airbrush.

  Then you look at getting one.  Just a quick Amazon search, maybe a google article like this one and the guy lists an easy 300$ worth of supplies.  Minimum.  That's before you buy any air paints, or cleaner, or brush holders or anything.  That's a brush, an air supply, maybe a hose and a regulator.  At this point, you shelve this idea until either A) You rob a bank successfully or B) You start a new army/game and your wrist literally cramps at the thought of hand painting them all.  The Carpal Tunnel seeps into your forearms and begs you to consider an airbrush.

  So we're googling articles again.  Let's cover the basics.

I.  Why do I need an airbrush? What can I do with it?  This is important because despite seeing what your favorite Golden Demon winner can do with an airbrush, you can't.  Not for a long time.  So realistically, what is it going to accomplish?

II.  What do I need to start? Basics.  The stuff I can convince my wife on.

III.  What do I want after that?  The stuff that I can pick up for 5-15$ at a time over the course of when that situation arises.

IV.  Basic troubleshooting because heck yes, we bought an airbrush and I can't believe I wasted my money on this heap of trash.  Day 1-4 was really bad for me.


I. Why do I need an Airbrush?

 
We can presume that because you're here, you've already largely decided what good it would do you, but lets set forth some realistic expectations.  The Airbrush is not the end all, be all of painting.  In fact, some armies aren't going to hardly let you break it out at all.

  Airbrushing does a few things extremely well.  At this stage, primarily, it's going to basecoat and shade large portions very quickly.  On a good day, where the temperature is right and my paints are in good shape, I can knock out 30+ models basecoated in under an hour.  Easy.  Infantry.  Tanks, you're still looking at 5-6 minutes apiece to basecoat and shade..

  It also does Object Source Lighting very well since it simulates the light with the spray of the brush.  It does OSL extremely naturally.  All those sweet searchlights on those space marine tanks? Probably an air brush.

  Where you're going to have problems are armies/models with lots of different colors.  For example, I airbrushed my Fennblades from the Trollblood faction in Warmachine.  They're shirtless, so the torso, arms and some of the legs are all the same color.  That's 60, 70% of the model.  Airbrush the skin tones.  Do an overspray and it's shaded.  Done.

  On the same token, the Highwaymen from the same faction, I did not airbrush.  I did multiple colors, nobody had the same clothes pattern or anything.  Was completely pointless to airbrush it IMO because there was no color that was greater than 10% of the range.

  Warhammer Space Marine armies love airbrushes.  I wouldn't do another space marine army without one.  They're 90% the same color with few exceptions.  Airbrush a space marine and all you've got are some metals, eyes, some edging and the gun.  A few minor details and the dude is done.

  In comparison, a Cryx army from Warmachine has blacks, greens and metals.  A lot.  Pretty evenly distributed.  You might pick one and airbrush it but it's not going to be worth the time savings like a Space Marine army would be, or Khador where literally everything is red.  This all varies obviously with your color scheme, but if you're looking at doing some fancy schemes that are going to have three and four main colors, the Airbrush isn't going to save you a lot of time.

  It's also not going to do much more than the basecoating.  It's good for the OSL later, but that's one of the few details you can do with a brush.  After the basecoat, your airbrush probably won't be out much longer.  And if you're not going to shade your army, you might as well use the GW rattlecans.

  So, don't expect to never pick up a brush again.  You'll do a lot of traditional brush work yet.  The Airbrush just sets the base layer and does most of the blending work for you.  Large, single/dual color armies are where it wants to be.

II.  What do I need to start?

  There's some varied responses on this one.  Even after you've come to terms with the up front cost of the brush itself, the real pill to get down is the compressor, which is almost always more than the brush.  Let's break this up.  We'll talk brush first, then the equipment to run it.

A. The Brush  Your first brush is a tough one.  You get what you pay for, but I also feel like you're only saving maybe 30$ if you skimp out on a solid mid-high range brush.  My first one was a Neo Iwata.  My wife bought it for me on a 40% off coupon and it worked ok for awhile.  It was really bad about clogging though, and did not clean well, whatsoever.  I got to where I didn't want to pull it out except for the largest jobs that pretty much required it.  The jobs like Warmachine Colossals that even if the brush causes problems, the time saved is still a large amount.

  Since the two brushes I've owned and used extensively cover both ends of the spectrum pretty well (without getting into the obvious failures like non-dual action, or some of the aerosol wannabes from companies like Testors that should know better), I'm going to talk about them.

  My wife bought me a Neo for my birthday, first year of marriage.  We'd looked around a little bit and we bought the Iwata because it was cheap.  That's basically it.  Dual action, gravity fed, airbrush.  Hobby Lobby had a 40% off daily coupon that knocked it down to extremely affordable so she got me one and it almost ruined airbrushing for me.  At first, I was pretty sure it was just me, but as time went on it became clearer that a lot of it was the brush too.  On sunny, perfect days with perfect airbrush paint, it would work for awhile.  But eventually, the nozzle would clog.  The passage behind the threads would build up.  Paint would work back up through the brush.  Etc.  On it's best day, I still disassembled it to clean it, front to back, every ten minutes.

  At some point, since I live in Nebraska, it was clear I needed something a little less finicky.  So I got the Badger Xtreme off of Amazon for like 80$ or 90$ bucks, only 20-30$ more than the Iwata is retail, before the 40% coupon.

  The Badger not only does all the basic things the Iwata did, but better.  Like someone actually put thought into it.  The cap on the end doesn't need to come off to remove the brush, the nut is visible to remove the also visible brush.  There is no nosecone to collect paint and build up.  There's a nice little last-minute air regulator on the chin of the brush.  The trigger sits up higher for more control.  And someone actually cleaned a brush and built this brush to be cleaned as well.  In the image below, I try to explain more.


  Do you have to buy the Xtreme? Or the newest Paasche? Not at all, but if you're able to look at a brush before you buy it, or a similar model, do so.  Find some online reviews where they take it apart.  As a new airbrusher, you're going to have to clean your brush often, no matter what.  The Iwata cannot be cleaned effectively and every three or four sessions, the brush needs a come-to-jesus conversation where you're bending wire and breaking qtips trying to clean out the brush.  The badger A) doesn't need cleaned that often and B) skips the first 3 or 4 steps with a much simpler, easier access design.

B. The Other Stuff.  Bare basics of running the brush is a hose, regulator, tank.  You should also consider a cartridge mask, and an airbrush booth because acrylic is toxic for you, the family and the dog.  Don't do this in the living room on commercials.

  The hose is 10$.  Done.  Make sure it's the right brand, but my badger came with an adapter for the Neo hose, so that's cool.

  A regulator can be a normal air regulator from your hardware store.  15$ probably.  Get one with a gauge.  You should be able to lay eyes on the pressure going through your brush.  Depending on where you live (high moisture), you'll want a moisture trap too.

 I really do recommend the cartridge mask and use mine every time.  They're about 30$ by the time you buy filters.  A dust mask is not the same.

  An airbrush booth is also nice.  They can be anywhere from 40-100$.  I built mine for like, 12$.  I took a 2x3 box, cut out the bottom and set it on edge.  I put a furnace filter in the back and a 10$ walmart boxfan behind it.  Boom.  Works great, but I still use my mask.  This just keeps the acrylic localized.

  Now the hard part.  The tank.  Or compressor.  Or both.  Right off the bat, do you already have a compressor that you would use for pneumatic guns or anything, or ready access to one?  Get 30-40$ air tank from Harbor freight and call it good.

  If you don't already have a compressor, but you can think of many situations that it would be nice to have one, then don't budget for the airbrush compressor, get the real deal.  A portable compressor is anywhere from 140-200$.  It'll run air tools (ratchets, drills, nail guns),  fill tires, just be an all around useful thing to have.  Even if it's not something you would have thought of getting seriously before, by the time you look at the price of an airbrush compressor that's made specifically for little brushes, you might as well consider the real deal.  Mine's a pancake compressor we bought to run a roofing gun back when Dad was a rental property owner. So let me just plant that bug in your ear.  Consider the real deal.

  The cheap way to all of this though is with an airtank.  Get that 30-40$ one from Harbor Freight or whatever cheap hardware store you have locally.  They're rated for about 110psi.  I airbrushed 3 tanks, two walkers and four units, all with about 4 colors each, and it dropped to around half.  That's more than enough for most airbrush sessions.  Easily.  The nice thing about most air tanks is that they have a fill port that's just like your tire's fill port, allowing you to fill the thing at a gas station.  For free, in most cases.  Before I bought my air compressor, I filled my tank at work or at the gas station.  It was the cost of the tank, a regulator and a hose.  And on mine, I installed quick-disconnect air fittings at the tank so I could disconnect it from the airbrush assembly and connect it to any air hose if I wanted to fill it that way.  My regulator and the airbrush hose are all one piece and can be removed from the air tank at any point, plugged directly onto a compressor, whatever.  Even with my own compressor, I still have this air tank because the compressor is loud, and I actually don't want it run whenever it wants.

  So for around 65$ (regulator, hose, tank), you can be good to go.  Spend an extra buck on teflon tape to seal the threads and you're golden.

  This one here is a perfect example.  Unscrew the regular airhose with a crimped tire fitting from the valve and replace with a regulator.  If you've never hooked anything up like this before, carry the whole assembly into your hardware store and they'll tell you connections you need to hook up your regulator.  In most cases, it's 1/4 connections.

  I really, and honestly, dislike airbrush specific compressors.  They only benefit is that they're tiny.  But they still make noise, still need regulated, and by the time you've spent money on them, you should have just spent the extra money on something you can use on so many other things.  Seriously, when your buddy roofs a house, and you go rent a belt-fed nail gun and show up with your compressor, he'll love you.

III.  What do I want after that?

  If you haven't already gotten the mask/airbooth, that should be the first thing.

  Next is one of those nice airbrush buckets for cleaning.  It's less about having a "cleaner" and more about having someplace that you can set an airbrush for a second without spilling your paint because it turns out, those kinds of places don't exist naturally.

  Airbrush cleaner is also nice but I tend to use water more often than not because if all I'm doing is a color change, I don't want to mix Airbrush cleaner into my paint and then spray it on a model.  Airbrush cleaner is good for the last clean at the end of the day.

  Qtips, wire cleaners.  Etc.  Depends on the brush you need.  I have a bunch of cleaning supplies I'll never use because my Badger isn't a poorly designed piece of bantha fodder.

  If you haven't invested in Airbrush Paints yet (The Vallejo line is really good), you should try it.  I tried to just water down my paints for a long time and that was one reason I didn't know that a lot of it was my brush and not me, because I really couldn't get the consistency right.  Now that I've had some experience, I'd probably be ok, but buying airbrush paint is so much easier.

IV.  Basic Troubleshooting

  The brush is going to hurt your feelings at some point.  The Xtreme has only bugged me once, but it wasn't a problem with the brush, but rather the paint.  The simple operating procedure is to pour your paint in the pot, then pull the trigger back to control your air and push it down to control how much paint you feed.  The air passing siphons the paint through the tip and into the airstream (you're not actually blowing the paint, but sucking it).  Should be pretty simple.  Spend some time playing with the brush, closer and farther to figure out your ideal working distance, and controlling the trigger to manipulate it to what you need.  Eventually though, it'll hurt your feelings and you have to fix it.

So let's look.

  Lots of spatter.  Small spatter.  Your airbrush pressure is too high and is feeling dragging the paint out with it.  Take it down a notch.  Lower pressure is generally better.  23-26 psi.

  Lots of spatter.  Large spatter.  Larger drops than you would think possible.  Somewhere, paint is collecting on the outside of your brush.  If you scroll back up to that picture, you can see on the left side that the Badger does not have a nose cone while the Iwata does.  My Badger doesn't really do this, but the Iwata will build up paint on the inside of that cone and then start blowing the drops off, creating a large spatter.  This buildup is caused by your paint being too wet.  Also, that nose cone is pretty useless.  It's not there to direct your paint, so take it off.  The paint being too wet is a problem, so fix that, but that nose cone has zero forgiveness whatsoever.

  Brush is spitting.  Or doing nothing.  Ram the trigger all the way to the back repeatedly.  See if you can get any sudden bursts.  Sometimes, you can force through whatever the problem is and continue airbrushing (definitely worth trying if your pot is loaded, otherwise you're wasting that paint to clean the brush).  If you can get sudden spurts, keep trying.  Look at the end of the chassis, and pull the trigger back to pull the brush out.  Clean off that exit where the brush and paint come out.  Sometimes paint dries on that exit port, but make sure your brush is pulled back or you'll bend the tip.  The Iwata was really bad about this too.

  If you can't get the brush to work it through, dump your paint, clean it out and try again.  If you get into the nozzle and find a lot of dried paint up in there, either you let it sit and dry, or it's probably too cold for the brush.  Trying to run an airbrush in an area that's less than 50-55F is pretty hopeless.  Not only is the metal brush cold to the touch, but that much air flowing past it turns it into a heatsink that cools and dries paint extremely quick.  There's a margin of error that can be accounted for if you can keep your paints warm.  I surrounded a coffee mug (with coffee in it, obviously) with paints, nestled up against the exterior and that worked ok.  You can also thin them above normal and that will help, but usually, you'll still dump pots and clean several times and it's just not worth doing.  If you're going to try it, pour small amounts so the loss is minimal when you clean, thin your paints, and keep them warm.

  If it's just spitting and the temperature is fine, then your paint is probably at fault.  Either it's too thick (even the airbrush paints need help sometimes), or it's actually got stuff in it.  One of my greys got a bunch of dried pigment in it so it had these chunks of paint that constantly got wedged in the brush.  It was fine for brush painting with, but for airbrushing, it was really ruining the process.  If your paint is good to go, then really look at how clean that brush actually is.  Try and see every surface.  This is where the Iwata really frustrated me because that area I marked in red would build up, and at this point, it would start clogging my brush.  I spent an hour picking at that chunk, trying to get it out.  Literally no angle for it.  That was my last day using that brush.  The nozzle/tip, the threaded or pressed piece that is the final stage for the brush, it likes to get dried paint and sometimes it sneaks past you.  I have found the the brush itself is the best at cleaning this thing.  Circular and stabbing motions, pushing dried paint out the exit.

  Last but not least, check your tank.  You might be empty.

  Airbrushing is a massive timesaver, most of the time.  The upfront cost is the biggest downside, and if your army can't make the most of it, then don't worry about it.  But those armies that occupy one or two large colors, the airbrush really makes it work.  I wouldn't do another 40k, 30k or Warmachine army without one.

  Hopefully this helps with some initial ideas airbrushing and the cost involved.  Any questions or comments are appreciated and I'm more than happy to help with advising setups and parts.  I just recently helped a good friend of mine build his, and he churned out some pink horrors on his first solo run.


  Took him just a few minutes.  The airbrush is awesome for this kind of thing.  Again, hope this article helps somewhat, and feel free to throw things in my general direction.

Thursday, March 2, 2017

Painting fine raised details and edges without drybrushing

  This is a by request tutorial from members of my own meta and in response to me running my mouth online and saying something about it's as easy as brush angle and the amount of paint on the brush.

  Painting raised filigree is a daunting task in many cases.  It happens as a last step on a mostly painted model and has every potential of ruining your paintjob.  It's very fine detail and unless you know what you're doing, it can make or break the model.  Hvarl's red axe was nervewracking for me to put the final white touches on the cracks, but it made that blade.


   So lets begin.  I have a mostly painted Custodes dude from the Burning of Prospero box that has lots of really pretty raised filigree that I'm going to tackle for this walkthrough.


 I'm using a medium sized brush.  Less than a #2, but larger than the tiny detail brush from GW.  I can paint this with a #2 though because this technique is Not about fine control with the tip.  This technique focuses on the belly of the brush, the area between the tip and the base.  This particular brand, Master's Touch from Hobby Lobby, like the curl within a few paintjobs, and have a slight curl at the tip.  That actually works better for me in this case because it keeps the ends of the bristles up out of the rest of my model while I paint these raised edges, but it's not required.  


  Here's the paints I'm using.  I actually won't end up painting with the P3.  The thing about your paint consistency is A) How much is on the brush and B) How dry it is.  Regular model color isn't bad.  P3 is a little too wet for this detail work in my opinion, and the Game Air is here for really bad examples.


  This is way too much paint.  The motion used to do the painting is to lightly drag the belly of the brush across the model at a very shallow angle that keeps the tip up off the model.  If the brush is overloaded in paint, it will slough off too much and pool and build up badly.  Wipe some of this off on a paper towel.  Not drybrush levels, but just to get the large glob off.


  My bristles split on me in this picture. I had to wet it down and reshape the brush, but that's the amount of paint that should be on the brush for this.  Note, that if you have to wet your brush to clean it, dry it thoroughly, or the water added to the paint will lower the surface tension of the paint and allow it to run down the edge of the filigree easy, causing problems I will demonstrate here shortly.


  Alright, so look at this picture.  Nevermind the white mark on the left of the pad lol.  When doing this filigree, these raised edges, you're using the brush exactly like this.  A very very shallow angle in relation to the model that keeps the tip up off the rest of the model.  The direction of motion is extremely important as well.  If, in this picture below, I move the brush up and down on the filigree, perpendicular to it's edges, I will scrape paint off the brush and build up paint on the filigree, losing the detail.  What I want to do is move the brush along the filigree, with my tip at and angle that can't reach the model.  If the paint is too dry, it isn't going to come off of the brush.  If it's too wet, it'll puddle.  If there's too much paint, it will glob onto the model, and if there's too little, it won't do anything at all.


  So pretty.


  Same technique, on an even smaller scale, hitting these little claw feet on the top.  Keep the angle of the brush so that it does not encounter what ever is behind your detail.  Why are we using the belly of the brush, you say?  Because 99% of us do not have the fine control over the brush to use the tip.  On top of that, as you work, the bristles can split or paint levels change and now you're all over the place.  This is the safest, most efficient way to do this.


  Here is where I put too much paint on my brush and tried to run it against the filigree on the bottom of the pad, under the bird.  You can see where it filled in that area in the middle because I had too much paint and it scraped off, filling that area.  Too much paint.


  This is too wet of paint.  I switched to the Game Air for this demonstration, and you can see that it just began running off the filigree and all over the upper edge of the shoulder pad.  The surface tension became too low with the moisture and just ran off.


  Here, I'm doing a large flat raised area, not just a fine filigree line.  This is where brush direction has has to be very careful because you can slough off the edges and fill them with paint.  Take this in layers.  There's more area, so you don't need as much paint. Hit it a couple of times to build it up.  Use the belly of the brush and try to run with the edges as much as possible, exactly the opposite of drybrushing.


  Because this is what Drybrushing looks like on the right knee here.  Inconsistent, just scratches, and there's paint in the recesses in the middle that got scraped off too.  You can't see it as well but there's paint around the logo that the drybrush left as well.  For new painters, dry brushing probably works ok, but if you want a cleanly finished looking model, drybrushing largely goes away.


  Just painting more detail here.


  Here, my paint is a little too wet.  Not bad, but it's not covering super well so I let it dry and hit it with another layer.  You can see though, that about the middle in that detail, some of the detail is lost because I let the paint get too wet and it basically became a wash and filled in some of those gaps in the wings logo.


  This technique works excellent for edging, as well.  


  Tada.  One great looking set of filigree and edges, done.  This is not actually how I'm going to paint this model, I'll use silver, but for this tutorial, I wanted something that would stand out a bit more.  That's really cleaned up those edges, popped everything, and was not drybrushed.  So none of the scraping patterns across the side anything.  All clean egdes and filigree.  You can use this same technique to highlight these areas, and/or shade them.  


  So, in Summary:

1.  Brush size matters less than you think.  Small brush does not equal better control.
2.  Do not use the tip.  The control is much less out there and every vibration in your hand is felt there.  Use the belly of the brush, where a tip error won't ruin everything around it.
3.  Pay attention to the motion direction of the brush.  Do the opposite direction you would of Drybrushing.  Drybrushing WANTS to scrape paint off of the brush, this technique does not.  Move with the edges, not against them.

4. Paint consistency.  Thicker paint drybrushes well, but may need slightly watered down here.  Be careful with that though because again, if your surface tension gets too low the paint will spill around like a wash.  
5.  Paint amount.  Dip lightly, rub the large globs off on a paper towel.  The paint you're using will come from inside the brush.  
6.  Pay attention to your paint consistency throughout the session.  This varies for every brand, paint age, and paint color.  White gets very dry quicker, and chalkier than some of the darker pigments.  If it's in a pot, this is less of a concern, but pay attention.  Sometimes, I want it dryer, so I'll let it set for a few minutes before painting.

  Hopefully this has helped and pointed you in the right direction.  Feel free to leave any comments or questions or insults.
Tuesday, February 14, 2017

Paint Brands and where they fit with you as a painter.

  I can count on one hand the games I've gotten in any miniature game whatsoever in the last three months.  Here's why.


  He's 5 months old, loves bright colors, being up high, and possibly penguins.  They are the most successful at sidelining his attention so far.  

  He, on the other hand, is easily the most successful at sidelining my attention, and thus my gaming has really dived.  Given my time at home though, I've gotten a ton of hobby time which is great as I descend in Horus Heresy 30k and return to the world of GW.  It pains me a little bit, but while I've spent the last month assembling, painting and forging new skills, I have yet to play a single game of it.  I'm definitely loving the hobby aspect though.  I have desperately missed this quality of models.  NOTE: This draft was originally written in January, and I have since gotten in... 3 games.

  Anyways, as I'm painting through my stuff it occurs to me the vast array of paints I have accumulated, used, discarded, disdained, praised and spilled everywhere.  I can most certainly recount the many opinions I've had of what my favorite brand is, and the more I look at it, the more I think it absolutely had everything to do with my skill level.

  The caveat to that is that I don't actually think that paint brands are intrinsically linked to your skill level.  There's a measure of that, I'm sure, since nobody that wants really nice models ever uses Walmart acrylics, but there are excellent painters that use each brand.  I generally feel sorry for the 'Eavy Metal guys who are forced to use GW paints for all of their models.  I'm sure there's some workarounds for that, but thousands of space marines painted that way?

  I'm out.

  So, let's talk paints.  This is meant to be a fairly quick article, a reminder that I'm still alive, and a nice preview of the plethora of stuff I have in the pipeline.  But that's towards the end.  Paints.

  There's a few brands I won't say much about, like Reaper or Scale75 since I haven't gotten the chance to reaaaaally delve into those lines.  Scale75 is one I'm itching to try out though.  At the beginning though, I was living in a dormitory in Keesler AFB on the gulf in Mississippi, and the gaming store catering to the strictly nerd training Air Force Base had all GW paints, and Reaper. (Not kidding about nerds.  We were all Radio, Radar, or some form of data networking.  Nerds.  All of us.  Except the specop guys carrying rocks on their shoulders for Para Rescue.  We didn't run into those guys at the comic book store).

  So I have owned Reaper, and painted them, and what I remember was really liking them.  However, I had next to 0 idea how to paint that point, so I can't tell you if my fond memories of them are worth anything.  I do know that they loved to clog in the tip though.

Games Workshop, or Citadel

  GW (Games Workshop, or Citadel) was the other thing, and what most painters have started with, or tried at some point along the way.  The advantages of it at that time was that it was thick, and covered very well, and worked very well with the GW wash.  GW paints can be applied pretty quickly, less that perfectly, dumped in a wash and come out with decent looking tabletop quality.  Drybrush and go.  As thick as the paint is, everything will have consistent color, everything will be covered, everything will be popped well by the wash, and it's good to go.  It's also a huge range of colors, and available in every store that has miniatures.  On top of that, every single painting tutorial ever produced by White Dwarf or Warhammer TV uses the Citadel colors.  They also have several different styles of paints, including "basing", "layers", "drybrush" and "washes".  

  The downsides are pretty quick to show their face though.  The paint is super thick, which is why it covers well, but it dries with a thick, textured surface.  In the videos on Warhammer TV, they show the guy watering down the paint, but when you're new, you really don't have a clue what consistency you're looking for..  It doesn't blend well into the other paint on the model without lots, and lots of watering down.  There are now "layer" paints by GW, but they're still pretty thick.  By far, thicker than most other paints on the market.  

  Then there's the pots.  You can't pour from them, you can't mix the paints very well.  There are accomplished artists that get deeply offended when you count pots as a con since the paint should be the only thing that matters, but this is my article, not theirs.  And I don't like those artists anyways.

  The specialty paints... specifically the drybrush stuff, I hate.  Just use regular paint.  Their washes, however, are pretty legendary, and most painters still have a bottle of it somewhere and use it. I have mixed my own washes, but since I use washes for only very specific applications anymore, even that has gone down.  In fact, now that my LGS carries the Vallejo Game Ink (similar to a wash, but has it's roots in the panel liners from the WWII/Model Color series produced by Vallejo), I probably won't use washes but rarely.

  I quit using GW paints when I quit buying GW products, right at the beginning of  2013 when GW was really being a douche in the legal department.  That has since backed off, but I still won't use the paints because when I moved from GW, I went looking for Reaper.  Reaper doesn't actually exist in Omaha, so I moved into Vallejo.  Next on the list, though, is Army Painter.

  Army Painter

  Is also everywhere.  Follows Flames of War around like a little brother Mom won't let you leave behind at home.  They've got the spray cans too, which is a nice touch, however expensive.  I only recently bought Army Painter, and only because the new LGS that opened up, that's what they had.  So I tried it.  IMO, it's GW in a bottle.  So, now you can mix it easier, which is nice, but it's still thick stuff.  If I'm doing a basecoat by brush, I might use it, but when I run out, I won't buy anymore since my LGS got into Vallejo.  I've also found that it separates really bad over any period of time.  Worse than Vallejo or GW.  

  Vallejo

  Vallejo is 90% of my paint library.  I'm a dropper bottle fanatic, I love the assortment of colors, I like that they have thinners, glosses and all sorts of additive products designed specifically for their paints.  There's two (three, if you count the Airbrush line) lines of Vallejo, the Game Color and Model Color.  Game Color is your fantasy stuff.  Bright colors, more shades of it, wider selection of a larger spectrum.  Model Color is at Hobby Lobby more often than not these days, and focuses specifically on military and environment colors.  A billion shades of drab green, brown, grey, etc.  One or two of the other shades.  Might only be a dark purple and a light purple, etc.  Which is fine.  If you have Model Color in your area, you're fine.

  Vallejo has a good consistency out of the bottle that usually covers in one coat, but likes to have two depending on how you primed.  If you have a good solid primer that's in the vicinity of your shade, you're golden.  If you're trying to put yellow down on white and don't want a yellowish white, but actually a strong yellow, it's going to take a few coats.  I've also noticed that the paints are a little inconsistent in their thickness, and it's either travel/storage dependant, or shade dependant.  The white always gets a little chalky, while the dark greys always seem more watery.  It's weird.  It's all smoother than GW though so I'm fine.  And there's a thinner to fine tune it, or water works just fine too.  

  There is also the Airbrush line I mentioned earlier, but I'm going to cover that separately.

  P3 (Privateer Press's paints)

  This particular paint is pretty different from everything else.  It's got a different acrylic and is a completely different formulation of paint than most other brands.  When I was a PG, I finally broke down and started buying P3 because I felt like I should understand a paint that I was promoting.  I don't own very many of the colors, just a few of the primaries, and I actually use them quite a bit.  It's possible I'll replace them when I'm out of them even, but I'll still keep those colors in Vallejo as well.

  P3 is still in a pot, so no mixing without getting it everywhere.  Major downside at first, but we'll get there.  The acrylic, on the plus side, is non-toxic unlike most other acrylics like Vallejo, so that's a plus.  P3 is generally very thin, probably the thinnest I own.  Good luck getting the wrong bright color down on the wrong primer.  However, if your primer is right, it's a smooth paint, layers very well and blends extremely well.  The reds and blues below were painted and blended straight from the pot, and did really well.


The only complaint I have about P3, outside of the pots, is that you will struggle to drybrush with it because it is so watery.  If you are an avid drybrusher with a P3 arsenal, I would consider getting a second white, or whatever you're drybrushing, in a different brand.  Vallejo or GW white is fine, and if the white is specifically for Drybrushing, the GW is probably better just because it's thicker.  


Skill Progression

  I have one more paint to discuss, but I want to hit this real quick before we go there.  

  GW is an ok starter.  It covers thick, washes well.  It's forgiving, easy to work with and has a huge arsenal.  If you're just starting, you go with this and it's not too bad, you feel pretty good about your work until you realize that A) it's nearly impossible to layer or blend easily and B) you're literally feeding your brushes to the blood god and you can't keep brushes alive for longer than like, a month of painting.  So then you move into:

  Army Painter or Vallejo.  Army Painter if it's around, Vallejo if you have the choice.  Or Reaper.  Now you can mix paints.  Now you can thin your stuff out without using a wet palette.  You put drops in a tray, mix it together and get exactly the shade you want.  This is how I operated for a long time, and still do most times.  I'll start with straight, unmixed, undiluted dark color to basecoat, then add thinners, lighter paints, and use a couple of different spots in the tray as I work my way up the spectrum to my highlight.  I even have a retarder to keep the basecoat and following layers wet so I can go back to them if needed, to fix errors or 2 brush blend.  The lighter I get, and the closer to the highlight I get, the more I water it down to blend and layer.  I despised anything in pots because it's such a disaster in mixing. The only downside to this is the wasted paint you inevitably leave in the tray, but it's largely unnoticed.  I feel like I get my money's worth out of the bottle in most cases. 

  Then I got some P3.  Suddenly, even with less color selection, I can layer quite easily because of how watery the paint is.  I can dab my brush in the pot, once on the towel and go to the model where it stays wet enough to blend around and work into the layer below it.  Now, mixing is less important.  It's quite convenient.  If the direction I want to take a color is the same as one of my P3s, I'll probably use the P3 for some of it.  Reds and Blues especially, I've been using the P3s a lot, though I'll do my final highlights in Vallejo for specific control.  At this point, I'm able to actually work in layers, do 2 brush blending.  I can mix washes, but it's rare that I use them anymore.  The paint preference changes with the skill level and style.

  This brings me to my final paint, 

  Vallejo Air

  Vallejo Air is the exact same colors as Vallejo Game color, but pre-thinned for the airbrush.  I finally broke down recently and gave up trying to mix airbrush paints by hand, and just bought the stupid paints.  Then I started using them by brush.  It's straight up the best of both worlds.  It's watered down like P3, but has all the shades and mixing ease of normal Vallejo.  

  Lately, my workflow has been to start with a Vallejo color and use it for the basecoat, then mix in the Vallejo airs to simultaneously thin and change the color of the paint.  It's fantastic.  

  There's also the straight up cheating aspect of the Airbrush in the first place.  I shaded Ahriman in a few minutes.


  But now, back to Skill Progression.

  Look at the paints you're using now and consider if it's A) the paints you've always used, or B), you have tried the rest of the market and you definitely like these.  If it's B, that's great, even if it's GW! You're comfortable with your paints, you're churning out good quality, and that's awesome.  You've unlocked what works for you.

  For me, my style is still developing I feel.  I know the looks I like, but sometimes when I'm shooting for those (Jolly Roger Studios is a favorite of mine), I end up doing something slightly different, and actually like it maybe more.  I love the contrast of JRS work, but I'm finding some of my stuff turning out looking somewhat like I used a sketching technique like what Matt DiPetrio has been teaching for awhile.  Idk if it'll stick.

  Like I said, I haven't played more than two or three games in the last three months, but I've done so much hobby work that I've really gotten to enjoy learning my brush and pushing my envelope.  I still like my Vallejos.  Scale 75 is next on the list, but now that I've got Vallejo Air, the game is on.  It's amazing what all I can do now with a watered down paint in the hue of my choosing.  P3 only has so many colors, and you kind of get shoehorned into one specific shade track without lots of extra work like glazes and mixing out of pots, whereas Vallejo has it all.  

  So, look at your paints, and think about trying some other ones.  Secondly, look at your skills, and if you feel like you've hit a wall, and there hasn't been much improvement, try a new paint.  Thin a paint down and play with it.  See what you can do.  I'm having a blast.

  Incoming Projects

  For starters, I'm neck deep in Horus Heresy, for kicks and giggles.  So expect some of that.  I have some of the Prospero models coming in, some of the Calth models, whatever.  All in on Space Wolves since I wished I'd played them back in 40k.  Won't make that mistake again, so here I are.  I also have an assembled, magnetized Leman Russ primarch model on my WIP table.  Priorities atm are playable models, but I doubt I can hold off on painting Russ much longer.  He's playable currently, but I only have two or three praetors, a chaplain (or rune priest.  Nobody knows yet EDIT: Rune Priests/Priests of Fenris.  We know now.), a contemptor and one unit of marines actually assembled.  I have a ton more at home to be built or in the mail, including a Leviathan Dread and a Sicarius, but those are in due time.  The big 30k tournament in Omaha is in June I believe, so that's my deadline.

  With that mess, I also chose to develop some new skills, specifically, resin casting.  There were a couple of custom sculpts I did on shoulder pads and such for the terminator variants that instead of doing a set for every single termy, I just cast them in a silicone mold so I can reproduce them for all of my terminators, of which I intend there to be many of.  I love the looks of the Cataphractii, and the Tartaros is growing on me.

  The offshoot of the resin project is the basing project.  I didn't base my 40k marines at all hardly, but I will be this time.  Instead of individually basing every single one of them though like I have with all of my Warmachine stuff, I just sculpted bases out of FIMO and Sculpey, and cast them in Resin.  Expect that article here in the next few weeks because I'm really excited about it.


  So that's it for now.  Bunch of great stuff in the pipeline, including a detailed version of what you see above.  I'm still alive, just super busy with life.  Have an enjoyable Valentines day!

Monday, August 24, 2015

Basic necessities for Painting/Basing Part I

  This article is by request, mainly from players I PG for.  A lot of players view the hobby from the point of the Battlebox or the All-in-One, and it all looks so fine, so simple.  Wonderful paintjobs, great artwork, etc.  Then they open the box and flashing-intensive pieces spill out with no instructions and I get messaged on FB.

  I legitimately don't know where Grim2's keg is supposed to go.  Put it on his shoulder and call him Skaldi.  It's ok, I've seen worse.

  That being said, when all the grey pieces come out, you realize that you've bitten off a pretty serious hobby, and staring at the local paint rack doesn't help you.  So, where to start?  What do you need?  What's preference, what's mandatory?  What can wait, what I do I need for the journeyman?

  We'll break this into a few sections.

  A.  Assembly.  We have to build the thing first.
  B.  Painting.  What you actually were looking for.
  C.  Basing.  How not to use sand as a blanket solution

  Then we'll hit all three again.

  D.  Assembly.  We'll use the word "Pinning" this time since maybe you want to paint this model in steps.
  E.  Painting.  You know what drybrushing is.  What about wet blending or 2 brush?  What if you want to airbrush?
  F.  Basing.  I'll unleash everything from Hirst Arts to walking around town looking for rocks.

  So, Chapter A.  Assembly.

  Right off the bat, you've dumped out your battlebox and there's no instructions.  If you're a 40k player, you're both miffed that you're being forced into specific stances, but also pleasantly excited that every space marine arm won't be 4 joints to glue each.

  Every piece has a spot to go in and it's got a keyslot that only it's mating piece really fits.  Look at the picture, put the piece in, go from there.  The battlebox stuff is easy.  When you start assembling Nyss, you're welcome to cuss.

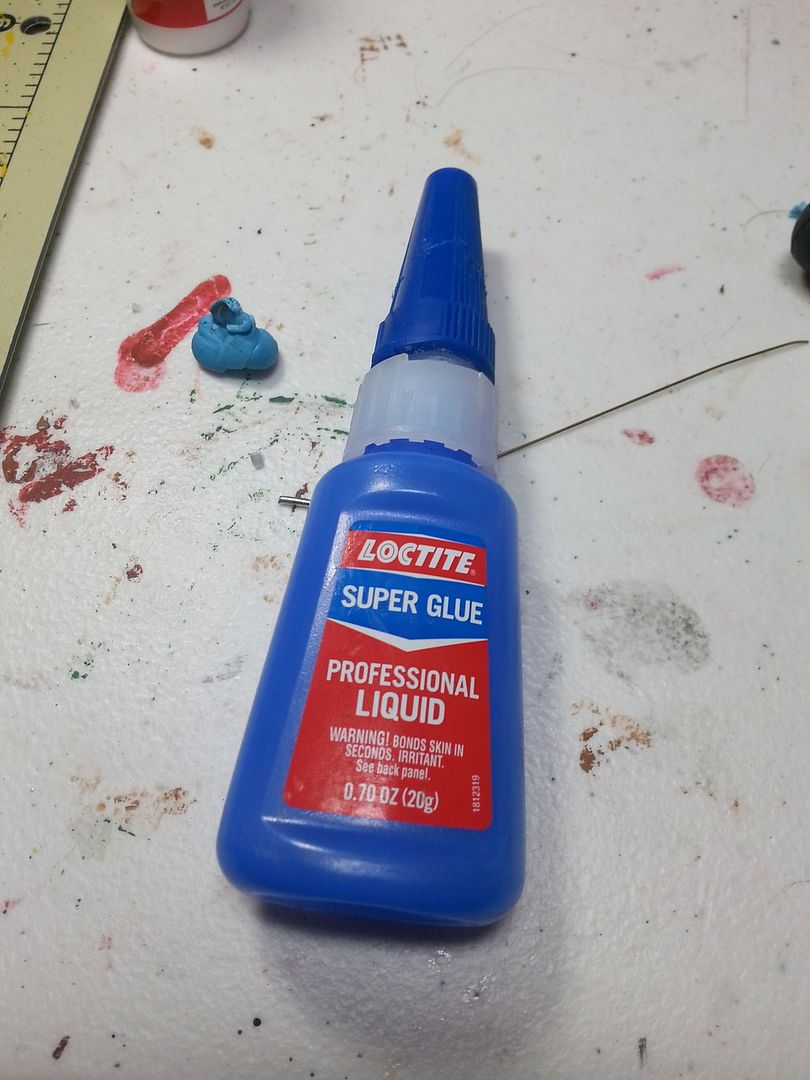
1.  Glue.  Lot of people have Zap a gap.  Some have the Army Painter brand.  Some actually pick up modeling glue from Hobbytown and some still have modeling cement from their 1942 British Spitfire model.  All of that probably works, but I consistently come back to liquid Loctite.  The stuff bonds plastic in less than ten seconds.  The gel stuff seems like you'd have more control, but you waste more glue, and it's actually more difficult to work with.


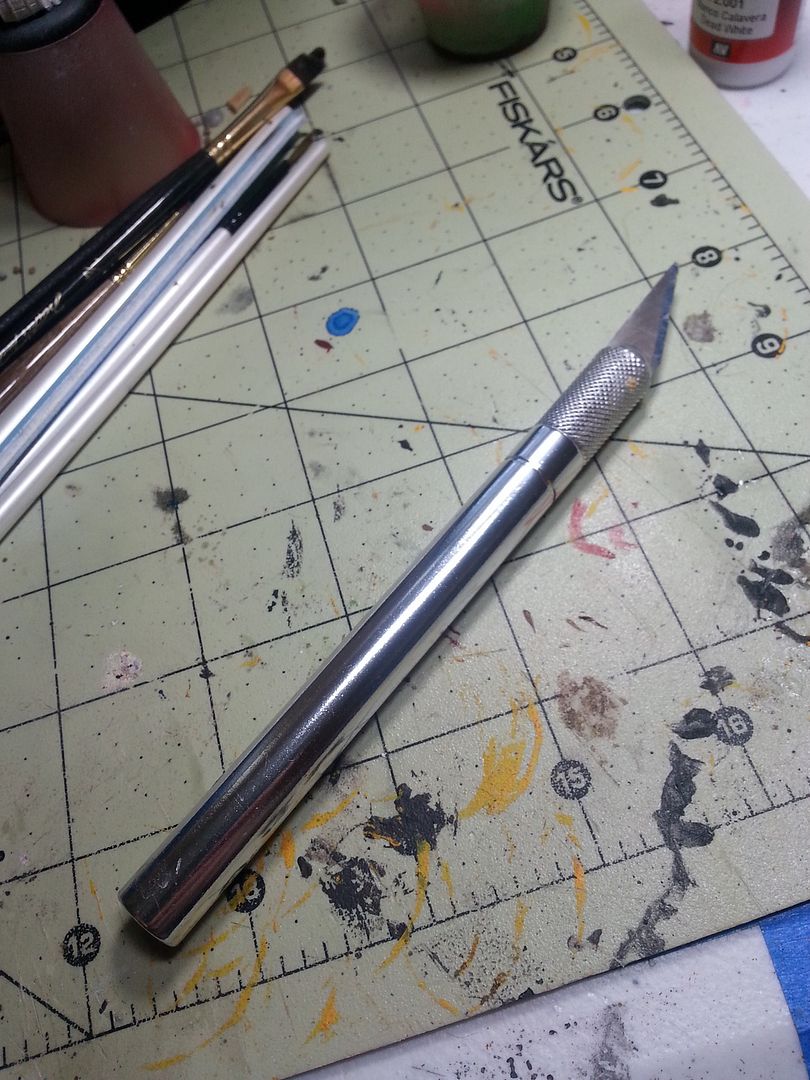
2.  An exacto knife.  There will be flashing to cut.  I'm not worried about mold seams at new player level unless they are, but I do like to have an exacto knife to cut large pieces of flashing and gating off.  Flashing, if you don't know, is weird thin/flat or pipe looking plastic that sticks from the middle point on a limb of your model.  Its where the seam of the mold was, or where the resin was poured in.  PP did the best they can during production, but the assembly really comes down to you.  Some models are worse than others, plastics usually being a bit more of a culprit than metal.  There are some cheap exacto knives out there, but I highly recommend spending more than 97 cents on one.  Get one with a good grip.  This is the tool I use the most for assembling, and for obvious reasons, it's the cause for most of my scars in this hobby.  So get one with a good grip.  Something you can hang onto and control.  This one has a thick handle, which is also smooth except for some knurling at the blade end.  I use this like a dough roller on my green stuff because of that smooth surface.


3.  Pliers.  On the metals specifically, some flashing will be difficult to cut off because of the size, so pliers to work it back and forth are good to have.  I have a pair of Leathermans on me at all times so it's not a big deal for me, but I use them all the time for modeling.

4.  Greystuff/Green stuff.  

  You know, the stuff that makes you feel like you're an IMF operative in Mission Impossible and you've got exploding bubblegum.  Get a small pack of the stuff, it's amazingly handy for sticking metal models together long enough to glue.  I usually dab glue on either side of the joint and stick a tiny ball of the stuff in the middle.


2.  Painting

  Where do I start with painting.  A lot of pictures of people's painting desk is a large surface with two cutting boards and four painting racks with entire lines from all the companies.  I'm here to tell you that 80% of those paints never get cracked open.

  When getting into your paints, determine your A) Primary color, B) Secondary color and C) Any accents.  My Trollbloods are Black with Blue tartans with red and white stripes.  So, I will need Dark, Rich, and Highlight versions of all of those, plus the basics.

1.  Primary (Lets say blue)
  A) Dark (Near black)
  B) Rich (Probably slightly darker than what you imagine your color to look like in the daylight)
  C) Highlight (Like  Light blue)
 2.  Secondary (Pretend green)
  A) Dark (Still near back.  Deep forest)
  B) Rich (Elm leaf green kinda thing.  What Robin Hood has got)
  C) Lime Green
 3.  Accents
  A) Accent 1 (Say red.  Just one shade of it.  Maybe this will be the pupil of our evil eyes)
  B) Accent 2 (Yellow, for the flame on the model or something.)

 Then the basics.  Stuff every painter, no matter the scheme, will need.

4.  Greyscale
  A) Black.
  B) Grey
  C) White
5.  Brown.  Everything has ropes and straps.
  A) Dark, near Black, Brown
  B) Rich, Milk chocolate brown.
  C) Tan
6.  Steel metals
  A) Dark
  B) Gunmetal
  C) Plata or Mithril, bright silver.
7.  Gold materials.
  A) Dark Bronze.
  B) Gold
  C) Bright Gold.

  This seems a bit daunting, especially for the guys with financial commitments already.  There's a few solutions.  If you're going to do the Privateer Press studio scheme, they have boxes to get you started.


  That runs about 15$ which is basically a buy 5, get 1 free deal.  Paint usually runs 3, 4$ a bottle.  Wayland games has them for 2.03 a bottle right now, Miniature Market is at 2.63.  When I first started, I got the greyscales, and basic colors and worked into the stuff that I wouldn't need right away. E.G., leather browns, and tartan colors.  The other option is companies sell bulk sets too, but you end up with a lot of colors you won't ever use.

  I personally prefer Vallejo.  They sell sets of 8 for 20$, which isn't much different.  There's two paint lines in Vallejo.  Game Color, and Model Color.  The former is brighter, richer colors and covers the whole spectrum with a lot more variety.  It's made for miniature games like WMH and 40k.  Model Color is specifically for the historical model-making industry.  WWII drab colors for tanks, planes and such.  So very diverse offerings in just olive green shades.  This line has the whole spectrum as well, but anything outside of classic tank and urban colors isn't expanded on very much.  As far as makeup/recipe, the paints are identical.  Hobby Lobby stocks Model Color quite a bit, game stores usually stock Game Color.  

  Vallejo also creates a lot of in-house modifiers like thinner, thickeners and such that are designed to work with their paints.  I overall like Vallejo quite a bit, but I came from GW which is thick, sludgy stuff.  The main thing I appreciated with Vallejo is the dropper bottles.  There's solutions to the P3 line, e.g., putting them all in dropper bottles.  I like Vallejo enough though that there's really very little reason for me to switch except to encourage new players and support the P3 line as a PG.  I'll probably never switch to it, but I've purchased some to paint with so I at least understand the mechanics well enough to teach it to players that want to go all out PP.

  Technical stuff now.

8.  Thinner.  Can be water if needed.
9.  Primer.  Cheap grey krylon (NOT MAXX COVERAGE) works great.
10.  Sealer.  Clear Matte Krylon works fantastic.
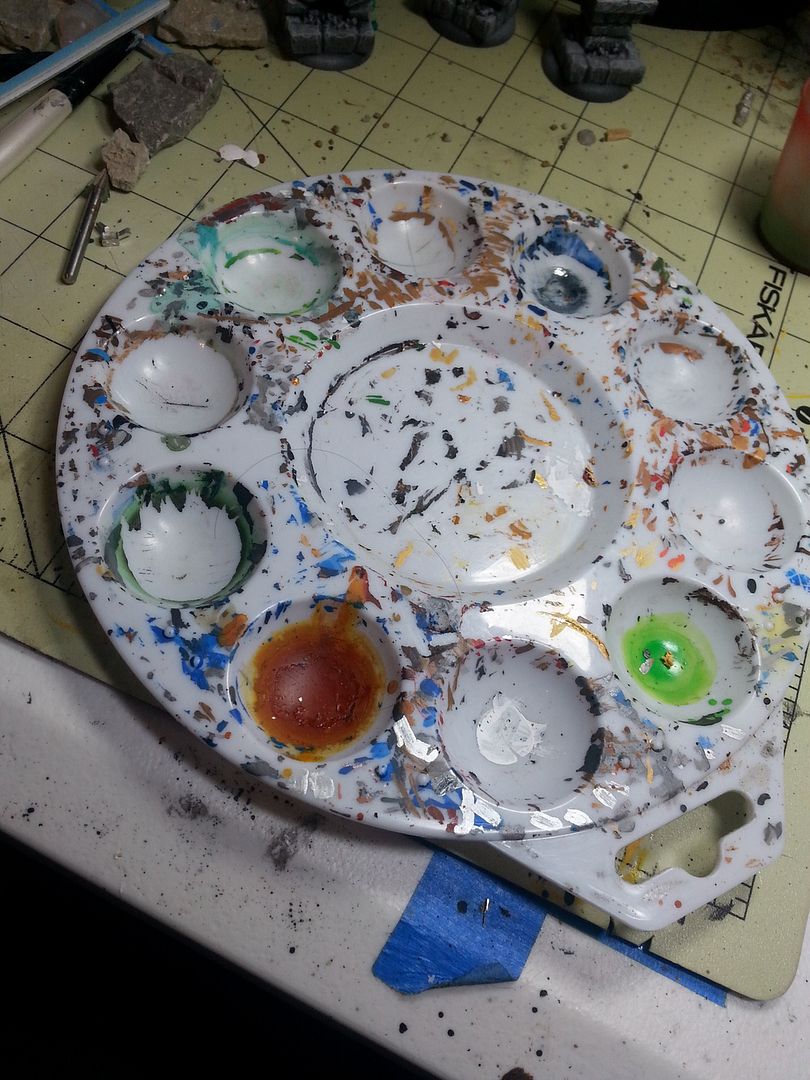
11.  Paint tray.  Basic stuff.  Dollar item usually.  But you need it.  I have 3 or 4.  One big one, two these size, and a 6 slot one for travel.  I usually use this one here, and my wife uses the other one.  Because the couple that paints together, stays together?


12. Brushes:


  There's a lot of debate on the best brushes to use.  The undeniable standard are Kolinsky Sable hairs from weasels in Siberia.  The hairs are more common than it sounds, but the brushes are expensive.  I will undoubtedly have some eventually.  They last longer, retain their point better, etc.  They're worth their money.  But instead of 4, 5$ a brush, it's closer to 25$.

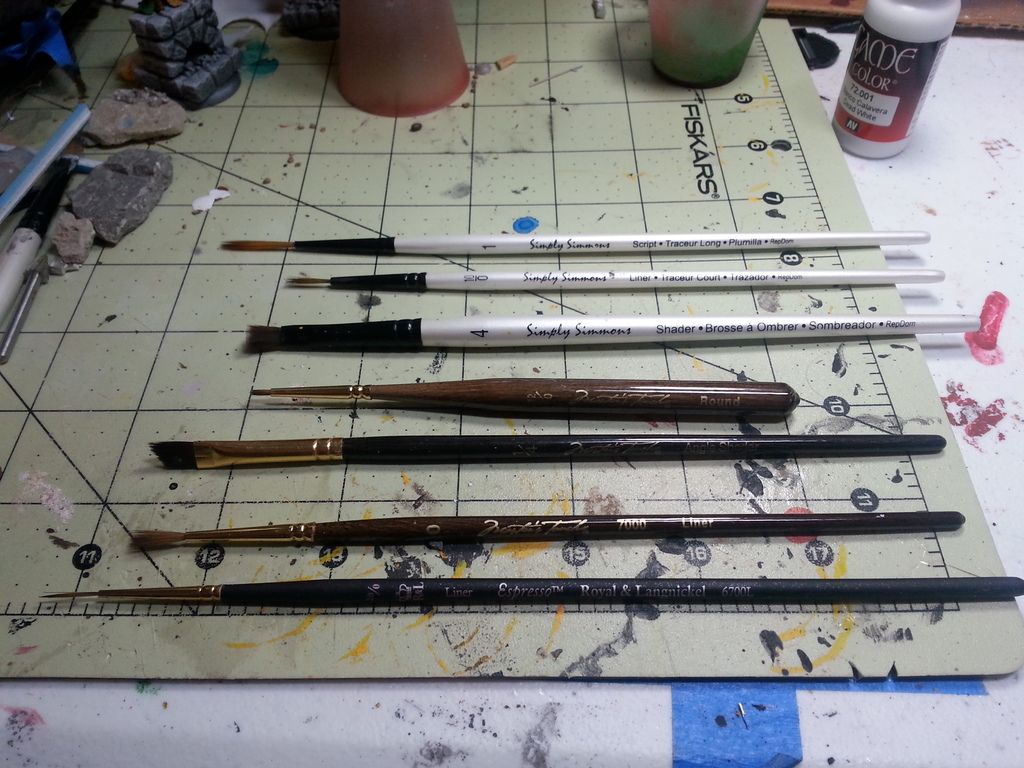
  Most of my brushes are from Hobby Lobby.  The generic brushes provided by both P3 and GW are synthetic brushes that are very shortlived.  Hobby Lobby and Michaels both have a couple of good brands, to get going on, and great sales.  There's 40% off sales at Hobby Lobby all the time, so I'm usually stocked up on brushes pretty well.  The 3 brands here are Master's Tough, Winsor & Newton, and Simply Simmons.  I use SS pretty rarely, the W&N one I'm using all the time, but most of my stock is Master's Touch.

  The ones listed here though are for pretty specific jobs.  We'll run through them.  Top to bottom we have:

1.  #1 Script.  In my "Twelve Things" article, I talked about how I'm liking longer brushes because of the amount of paint they can hold, giving me more working time for larger surfaces.  This is usually what I use for putting primary colors down.  If it's for a colossal or even a jack that I didn't airbrush, I'll probably go up a size.
2.  #10/0 Liner.  This one is for more detailed spots.  Not quite as fine of spots as the 20/0, but I have definitely used this as a water brush to support my 20/0.  The two of them usually work in conjunction to blend.
3.  #4 Shader.  Drybrush.  I go through these quick.  My Drybrushes are just big brushes.  Hobby Lobby does packs of brushes occasionally, and the four smallest are ones I can paint with, and largest three or four become drybrushes.
4.  #12/0 Round.  These used to be my painting brushes.  I liked their small tips, thicker handles.  However, they go bad very quickly because of how easy it is to get paint into the Ferrule (The metal neck holding the bristles), and once that dries, it wedges your bristles apart and makes it difficult to control the brush.  Secondly, the brush doesn't hold much paint, so it dries very quickly.  I use this as mostly a water brush to blend or erase.
5.  #1/4 Angle Shader.  Another drybrush, or in this case, a wash brush.  My wash brushes follow the same path as drybrushes. Left over big brushes I can't use elsewhere.  I like the angle shader because it can collect a lot of my wash or ink, distribute it quickly over the model, and then I'll wipe it off and come back to pull some wash off.
6.  #0 Liner.  Very similar to my #1 Script, but just a little smaller.  For putting primaries down on small to medium based models.  It also shades those as well.  I can do a bit of detail work with it as well, specifically edges of armor and such.  High points in cloth.  Some faces. This brush is probably my workhorse
7.  #20/0 Liner.  The down to earth eyeball painter.  My tartans, my gems, my eyes, faces, all that stuff.  This thing holds plenty of paint, works it out there, and gives me a lot of control because of how long the bristles are and how much I can manipulate it.  The actual parts of the bristles consist of the "toe", being the end of the brush and the "belly", being everything between the end of the bristles and the beginning of the ferrule.  With the Liner, I'll paint a lot of armor edges with the belly.  Instead of trying to drag the toe across a fine edge, and bristles touching either side and painting too much, you turn the brush and use the belly.  It's a lot more forgiving.

  Back to the regular stuff.  We're up to

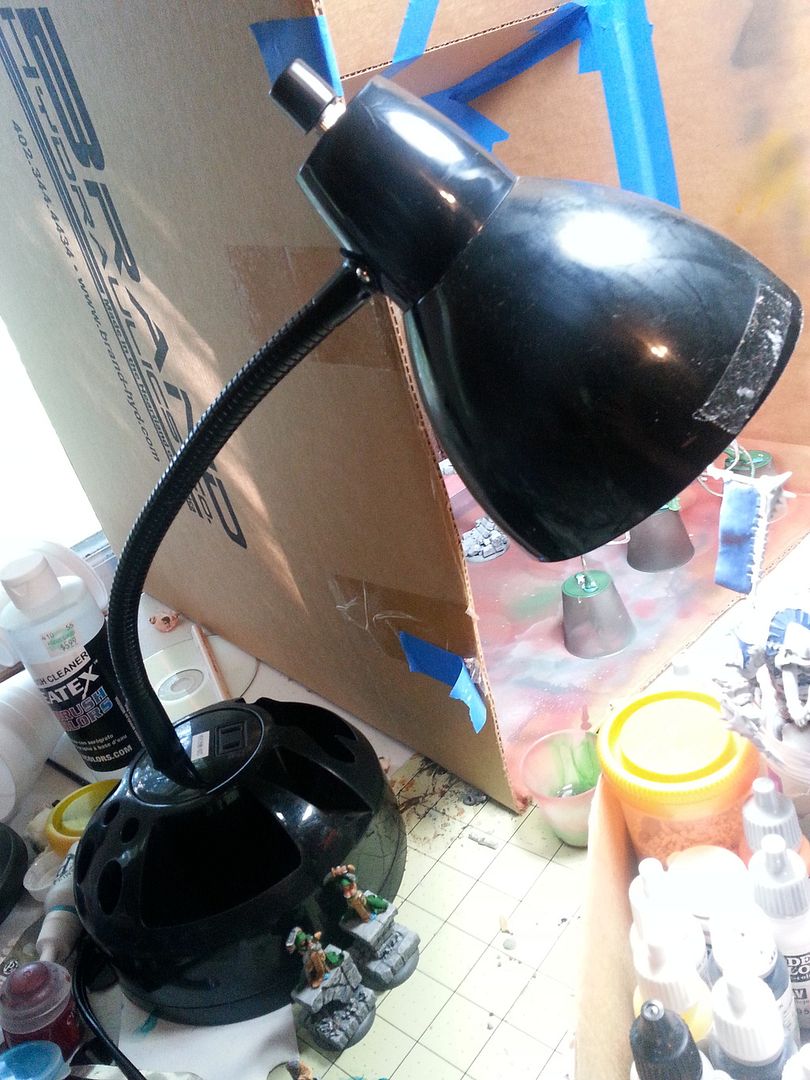
  13. Lamp.  My wife bought me an Ottlite, which is awesome.  I love that thing.  However, I also   have a cheap black lamp from walmart with a daylight bulb that was just as expensive as the lamp.  A solid, bright, daylight bulb is instrumental in getting good color on a model.


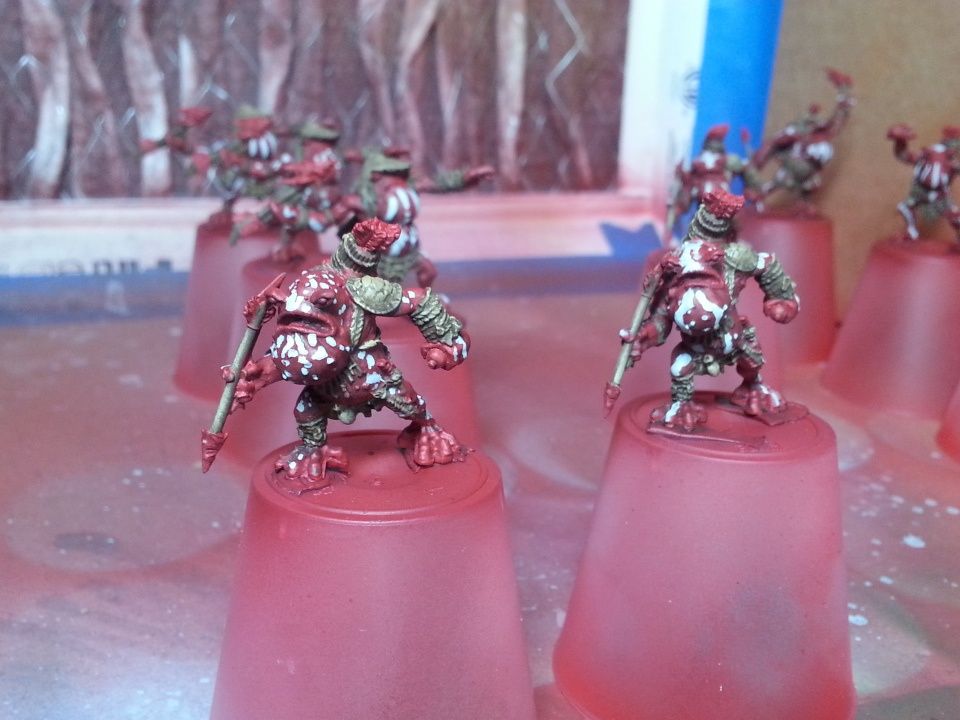
 14.  Model holder.  There's a lot of options to hold a model.  Some people have some plier looking things to hold the tab under a model, but I cut those off before I paint because cutting them after the paintjob is a good way to damage my paintjob.  So, whether or not they're attached to the base, I'll stickytack them to something to hang on to so I'm not touching the model.  There's enough oil on your fingers to create chipping issues later, so keeping hands free as much as you can is advisable.  Used to, I used 1x1 blocks of wood, but now I found 10 pack plastic shot glasses at Dollar General for a buck.  Those are awesome.  I also use them for blending my airbrush mixes, and as water cups when I'm on the road.


  15.  Paper Towels

Last but not least, cleaner uppers.  They're good to have around for offloading paint, cleaning brushes.  It's kind of a no-brainer, but in case you didn't think about it, you'll need 'em.


  C.  Basing.

  Only read this if straight black bases are not attractive to you.  If you want to do something different, great.  We already covered exacto knives and pliers.  You'll need that to break off the tabs meant to hold a model to the slot.  Watch your fingers with the knife.  You'll get that sudden slice and cut an inch deep through the tip of your pinky.  It's great.  Luckily, there's superglue nearby usually.

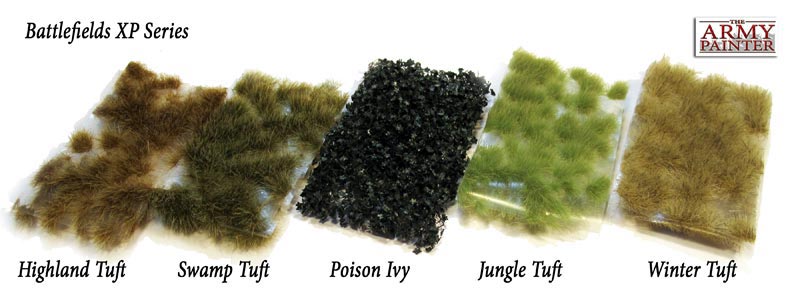
1.  Army Painter Grass tufts

  Grass tufts are like forgiveness.  They cover a multitude of sins.  I've legitimately painted bases brown, and then covered them in these tufts and gotten the greatest compliments on my basing skills.  Literally, dab of glue, tweezers, pliers, fingernails, whatever, pick the grass off the plastic and stick it to the base.  I liberally covered Denny3's base in the last article with these, but usually, I just hit points I don't like on my regular bases.  Some of the black plastic showing through or whatever, grass tuft.  I also like to have them under ledges, or just peeking out.  Add some life to the scenery.


2.  Rocks/Ballast

  I won't get super in depth here.  Rocks are simple.  You can go buy sand/gravel ballast at Hobby Lobby, or Hobbytown.  Or you can get rocks out of your driveway.  I look for small, flattish ones.  I usually need both.  The gravel fills in the spots, makes it look a bit natural, like pieces are falling off the cliff that your whole army is standing on.

3.  Tree Bark

  A great alternative to rocks, I usually just pick the most non-linear stuff out of the mulch.  As I've progressed though, I've gotten better at figuring out what's bark and what's rock so I usually just do rock.

4.  Etc.

  A lot can be used.  I'll go into my full palette in the next article, but I have Corkboard, foamboard, insulation foam, sticks, plasticard, cardboard, Hirst Arts, wood pegs/dowels/rods, so on, so forth.  

5.  White Elmers Glue

  Usually the most important thing.  I like superglue, but Elmer's Glue is nice for being cheaper, larger quantities, dries slower so you have longer to work with.  It's good to have.


In Conclusion

  That's really the gist of getting started.  My travel pack is all my neccessities:


  Whatever colors I'll be using, the brushes I listed, some shot cups, ballast rocks, rocks, retarder, thinner, exacto knife and the GW sculpting tool that's handy.  I usually fill a shot cup with water and get a paper towel from where I'm at.  And that's it.  My model is stickytacked to a cup and away I go.  I have brought my daylight bulb lamp with me before, so there is that, but usually this is all I need for projects on the go.  Stuff that's already based, or stuff I don't plan on basing fancy.  

   Hopefully, this answers a lot of questions for you, and if I left anything out, hop in and tell me how I'm living my life wrong.  The second iteration of this article will be a bit more in depth and get more into the basing and assembling side of things.  Airbrushes, pinning, Hirts Arts, etc.  Hope you enjoyed it, and cya around.