Sunday, December 17, 2017

Guildball Batrep #2 – Blacksmiths vs. Brewers


  We got next to no feedback on the previous Battle Report, so clearly we're meant to do more.  Or we enjoy it more than you do and your feedback is impervious to our pats on eachother's backs.  Either way, we're back.  Still Adam and still me, JD.


  Today's matchup is Adam playing his Butchers if he can assemble them in time, or another crack at the Blacksmiths.  I'm going to swing into the Brewers and try to bring something different today instead of my beloved Farmers or Union.  There's been no great changes to the Brewers, but occasionally I have to pull them out again to remember that they make me mad enough to put them back.  I don't feel like they're that far out of the game.  Certainly not enough to create a meme page on facebook with triple digit contributing members just to bemoan their hilarious inequality to the rest of the game.  We'll leave that kind of failure with other games.


Brewer rant, be forewarned

  The Brewers just don't seem to have it in this meta though.  It feels like a gameplan issue.  The players that are successful with Brewers have molded them into a playstyle identity they enjoy and have a consistent strategy with them.  Pat, with the great, highly recommended podcast "Strictly the Worst", is a prime example of this.  Most Guilds, you really already know what the strategy is.  The Brewers have lost that identity since S2, specifically during the "All score, all the time" period.  The Brewers are something of a bashy guild, but not as bashy as the Butchers and not as good at scoring as... even the Masons.  Morticians, Hunters and Butchers are really the only teams worse at scoring.


  Used to, the Brewers and Masons had this "Adaptability" identity.  They both could bash and they both could score.  The idea was to score better than bashers and bash better than scorers, with Brewers better at bashing, and the Masons better at scoring.  The game hit bashing really hard though in season 2 and it became very difficult to do well consistently with a fighting team.  It's only been very recently that fighting has kind of come back, and mostly due to the Shark/Siren/Midas/Vitriol nerf.  Those two teams could win 3-0 very quickly, and the only way to keep up was generally scoring.  Now that they've been set back a little bit by the errata, fighting has a shot. 


  The Brewers are still struggling though.  They've been outpaced it seems.  The recent two acquirements are PintPot and Lucky.  Both are very good, but it still seems to struggle with not having a Captain that can really lead a team in.  Tapper struggles to put a model down without his old heroic and Esters has an extremely poor INF > MOM conversion rate that really just leaves her as a support model while you hope Friday, Spigot1 and PintPot can carry the day.  This also leaves them with almost no 2'' melee, so you almost have to bring Tapper to deal with many problems.  Or Hooper, who is a set of his own problems.  So lets talk about lineups.  Enough ranting. 


JD's lineup.

  First and foremost, I'm a Tapper guy.  His non KS sculpt is the sculpt that got me into the game.  He will most certainly be my main Captain.  I will bring Esters because I think she does have game into a few lineups.  Specifically Fillet, Smoke, Burnish probably, and other condition heavy games.  But that's about it, and I don't like her.  Against Butchers, I'd probably go for a scoring game, at which Esters is possibly better than Tapper.  Against Blacksmiths though, I probably need to bash since I don't have any good ways to keep a ball against the likes of Cinder. 


  I'll also bring Scum.  I think Pat has ruined Quaff for most people even though I used to play him exclusively.  The cat missile has become a Brewer staple though, and is the best way to pick up momentum turn one.  If you're not aware of what it is, hopefully I can demonstrate but the gist of it is that Friday, at some point while she's forward, calls the cat to her.  The cat then hopefully makes use of "Sic' em" if you have it and charges some model within 11''.  At TAC7 on the charge, the cat has a chance of wrapping once, maybe twice, and if you put influence on the cat, you can get a few more attacks in for momentum.  It's not uncommon to see four momentum from Scum.  This is before any buffs like Commanding Aura, Tooled Up, crowdouts, any such nonsense.  If you're super lucky, the cat uses the momentous push on column 2 like four times to push a model within range of a basher and then the game is really on.


  Required models are pretty straightforward.  Spigot1 brings too much support to leave home without.  I don't often get Tooled Up on Tapper because Tapper is a perfect first activation, but Tooled up is great on other models like PintPot or Stoker.  Friday is my nearly only striker, and she is fantastic at it.  She also enables the previously mentioned cat.


  I think Hooper is required, unfortunately.  I dislike him, but he has 2'' melee which is necessary for certain matchups.  Unpredictable Movement, lots of 2'' melee (Fish, Farmers, etc) and he's ok into the condition game.  In every way but Melee range/threat though, he's outclassed by Stoker who has a far better toolbox and doesn't require a heroic to get a useful TAC.  The Brewer GIC helps with this but still.  So Hooper and Stoker are coming.


  PintPot is also coming.  Between PintPot and Stoker, Hooper really struggles to see the table in my games.  PintPot is also amazing for INF efficiency.  Easily one of the best rulesets in the Brewers.  In an Esters lineup, PintPot is doing the work. 


  Mash is coming.  He's really not a striker, but more 2'' melee, and against some teams an ok ball holder.  Against real scoring teams, they have the dodges to deal with him and he has no close control.  Close control and we'd be talking, but no.  He does bring 2 INF though.


  That's 9 models.  This leaves me with a fun model spot, which is Lucky, Spigot2 or Stave.  I haven't played Lucky yet, but I'm kind of itching to put Spigot2 on the table too.  However, I've played Spigot2 a bunch (believe it or not) and not my nearly painted Lucky yet, so Lucky it is.


  Tapper, Esters, Scum, Pintpot, Stoker, Hooper, Mash, Friday, Spigot1 and Lucky.


Adam's Lineup - So I've come to this conclusion that there is no way you wouldn't want Alloy and Hearth in a line up. No matter the guild I'm playing these two add so much to the blacksmiths kit. I can't wait until I have the second box so I'll actually be able to use the models. Going into the Brewers, and knowing they like to smack people, I have this plan in mind that I want to play ball. I haven't really decided how well the Blacksmiths can hang in a scrum with the Brewers at this point due to inexperience. I've said it in my last rep with these guys, and I'll say it again here, the pressure that Cinder, Hearth and Alloy put on a ball is insane. It's an incredible good set up to take the ball off someone on one success from 14" away. I'll always be taking Them with me, into every line up.

  This also adds Furnace into the mix, who I think is a solid master as well. The brewers aren't the fastest moving team, and the ability to remove armor, and limit more movement speed with burning is great. My next choices are Ferrite and Iron. They play ball together really well, and who doesn't like a momentous 7 damage? Ferrite also has one of the best legendaries to me of this squad, especially for scoring goals. She's also great at just debilitating players. Which comes into play later on as well. My Final 4 picks are Anvil and Sledge, since they do allow you to shift to a more fighting team if you wish, and the potential with Hearth, and Anvil, to allow Sledge 5 net hits on his way to a momentous 7. And Lastly I end up with Farris and Cast. Cast has this great ability called Shield throw that allows me to knock the ball off someone without having to tackle at all. Farris has a huge amount of movement and seemed like a nice addition to a ball heavy team. I need to spent more time with some of these other models to really know which ones should make it into a ten man team.


JD - Against Blacksmiths, I feel like I can't outball them with Brewers.  At all.  So Tapper, and Scum are my Captain/Mascot pick.  Adam picks Ferrite/Iron.


Adam - I don't really want to fight the Brewers, so I pick Ferrite and Iron as my captain and apprentice. The flexibility of a captain pick is really nice here, especially when that model gets to have an extra two influence it can be allocated. As well as her legendary changing giving everyone hobble on top of a move buff. Any time you damage someone when you have hobble this gives -2/-2 movement to them. This with the Burning can really hurt the Brewers in my opinion.

The Rolloff - I roll a 2 to Adam's 4 and he elects to receive.  I do swap board edges, as you'll notice in a few pics.  The side I chose was more open, and I generally need that for slow Brewers and their desire to scrum.


The Draft.

  Adam leads off with Hearth (Granite).  I take Friday, both of us leading the draft with obvious, non-telling decisions.  He picks Alloy (Mist), I go Spigot1, he picks Furnace, I pick PintPot, he takes Cinder and I take Hooper. 
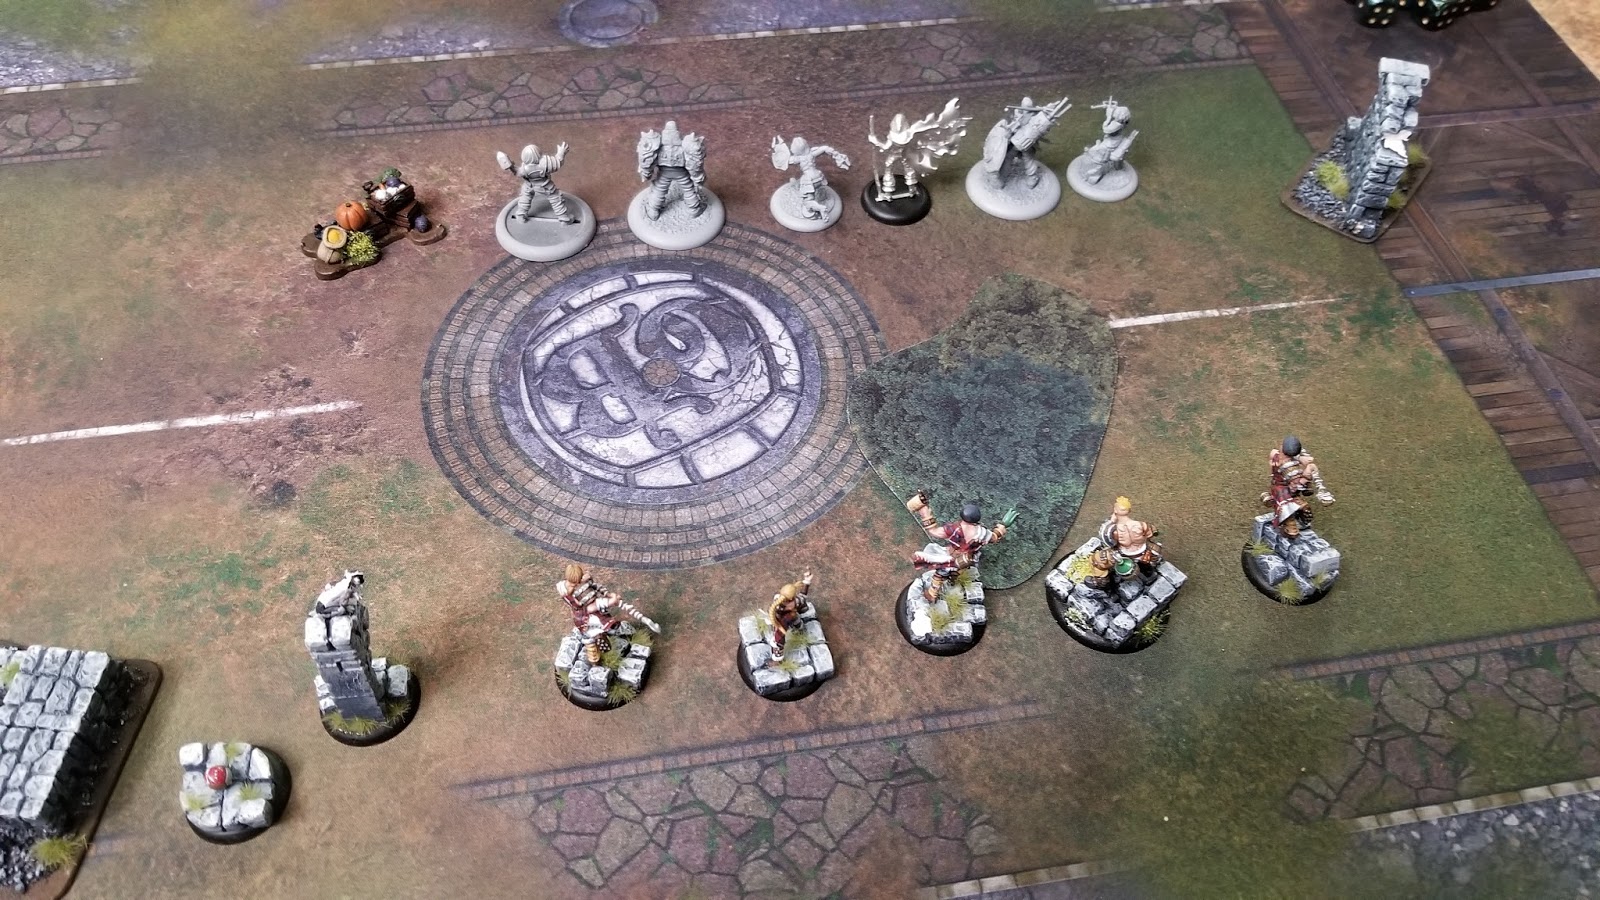


  JD - I hesitated a lot on Hooper, but I decided I needed his 2'' melee against Cinder's UM and the other three 2'' models in the list (Counting Alloy).  Otherwise, I like my lineup.  I debated hard between Hooper, Stoker or Lucky, and I think either one is better than Hooper except for the 2'' melee. Mash, even with his 2'' melee, was right out.  I normally like him against semi-bashy teams to hoard the ball with his 2'' Unpredictable Movement, but Cinder's ability to just ignore that whole thing with Hot Shot means Mash has no place in a fighting list. 


  As far as Plot Cards, I have Good Marker (Fairly important for Brewers I think), Heroic Landing (Also important), and Match Fixing (Less important, but I fully expected a goal kick from Cinder so I felt like it was a decent card to have).  There was no Knee Slider or Sic' Em in my hand, so I expect Adam got them but since he's playing Blacksmiths, Sic' Em goes to discard.  What a waste.  I expected Knee Slider though. 


  My GIC is Another Round, for the free heroic, the main thing I wanted to try in the Brewers this game.


Adam -  My Line up is fairly linear. Like I said earlier, Hearth and Alloy go great, especially with Furnace and Cinder. They all lead into each other in my opinion. Hearth is my big support key here being able to hand out 2" melee to people and giving plus two net hits on playbook results is a huge deal for me. I was satisfied with who I took overall. I put a lot of thought into if I would take Cinder or not, I debated between her and Cast. Especially since Cast gets extra damage from burning and could be tooled up, so she could hit pretty hard. However it really came down to this idea, that I wanted to play the ball here more than fight.

   My plot cards for this one were, Knee Slider, Wingback, and Brace for Impact! Knee slider being a really big deal to me here, because I don't know if you if you've seen Iron and his ridiculous movement capability, but a 10" slide back to safety is incredible. I had a feeling I was going to get the hurt laid on me at some point, and with the Apprentices being super squishy, Brace for impact seemed like a solid choice. Wingback seemed helpful in theory, but never really saw use.

JD - Holy cow, you had Wingback? Was neither Alloy nor Ferrite in range of Wingback all game? Or when you were considering a charge with Iron early on? I'm surprised I didn't see that one come through.

 Adam - Yeah, I thought about using it for awhile but no one really needed to charge.

  My GIC is Tough as Nails, which allows me 5 healing and +1 arm on a friendly guild model who is knocked down for the turn. Most of my models have 2 armor, or three if they are by a master, so immediately removing 3-4 dice from the equation was really nice

The Kick - Friday moves up, kicks.  She walks the full 6'' and tries to put it way over and does ok.  Enough to force Alloy to retrieve which is something. In the future, I may try to force Iron to receive to prevent him being the first turn goal scoring model, but either Iron does it, or Alloy does it.  Both are very capable.


  On that note, Iron gets 4, Ferrite 1, Furnace 1, Cinder 2, Hearth 1 and Alloy 3 I think.


  Pintpot gets 1, Scum gets 0, Friday 4, Tapper 4, Spigot 2, Hooper 2. 


   Alloy acrobats up, sprints to the ball, back and kicks to Cinder.


  Spigot uses the GIC for his heroic and gets Time's Called down, affecting Friday, Tapper and Scum.  He tools up scum, the cat with no Influence. 


  Cinder moves up, passes to Ferrite and shoots Friday for 1 damage and Searing strike.


 Hooper sprints up and into cover, trying not to block his charge lanes.  I wanted to get Tough Skin onto Friday, but it was more important to be farther forward for better charge lanes on round 2 than it was for Friday to be 5/2 near Spigot.


  Furnace tools up Iron, moves forward and drops his AOE on Cinder, very aware that Cinder is a prime target for Friday since Hot Shot is 6''.  Even on fire, Friday can walk there.


  PintPot sprints forward.


  Hearth moves up, uses Instruction on Cinder.  This was disappointing to me because it guaranteed Cinder a double dodge counterattack on Friday.  However, both of us had forgotten at this point that Cinder has Unpredictable Movement and Cinder was safe from Friday anyways.  Instruction on Cinder actually benefitted me since I changed gears and began looking at Hearth instead.


  On that note, I've decided it's Friday's turn due to some order of activation issues.  Iron is coming to town, and I kind of want Tapper to go into him after scoring. There's two problems with this.  A) Tapper needs to go before the cat so I can Ol' Jakes 2 INF onto him, and I have no momentum for that heroic, and Tapper can't produce any in his position.  B)  I'm pretty sure Adam has Knee Slider, so even if Tapper goes last, I'm quite likely to have wasted a perfectly good pat cat activation on a gamble that Tapper will be in range of Iron.  It's not worth the bet so I activate Friday.


  Friday shadow likes forward, calls Scum up and charges Hearth.  Adam camps the momentum, so no counter attack and Friday does a two non momentous damage and two momentous pushes over the course of the charge and two follow up attacks. 


  Ferrite moves forward, calls Iron up and successfully kicks to him. 


  The surprise in all of this is that Friday's two pushes are enough that Hearth is in range of Tapper, thanks to "Time's Called" on Spigot.  This is unexpectedly fantastic news.  Tapper heroics 2 INF onto Scum, and charges Hearth.  He declines the KD because of Sturdy, and ends up just doing 3 momentous damage twice and a push.  I pass on Commanding Aura since the only benefit would be on the cat and it's not really worth it.  3 momentous damage is as much or more than the cat would accomplish.  Right?


  Iron looks long and hard at trying to get a momentum off of PintPot or Spigot, but the counter attack potential is too great on both, so he wastes a few INF.  He just uses Impetus, sprints an kicks for a goal, making it handily. 


  The ball bounces out and lands right on Tapper who declines to snap it.  Iron uses Kneeslider and disappears off to my left.


  Scum shadow likes forward and walks into Hearth.  I'm a little worried about positioning and blocking up Tapper for what I have in mind, but I'm pretty sure Hearth will be out of the way quickly so I don't worry about it.  Scum hits Hearth twice, wrapping both times.  I opt for a Momentous 2 and non-momentous 1 both times, which with Tooled Up, takes it to a 2 and a 3 for a total of 10 damage.  This easily puts me ahead on momentum, no competition, and I will go first.  The score is 0-4 Blacksmiths.


  Tapper gets fully loaded, so does Spigot.  Hooper gets one, Friday two and Pintpot zero along with the cat.  Originally, I had planned on snapping the ball to Tapper, but it occurred to me that my first activation would be Tapper into Hearth, and even if she couldn't survive, it was worth her counter attacking for control of the ball or KD, so Tapper left it off of himself.  In four hits, Tapper kills Hearth and triggers Commanding Aura.  I want the next attack on Cinder, but I need to sprint to get into goal range so I use the last two INF for that instead, finally snapping the ball, and score for a 6pt activation.

  This is good news for me since I've now got Commanding Aura up on two apprentices and Instruction is off of the table.  Of all the Masters to bring down, Hearth with 2'' melee on a stick, free 2'' melee for Alloy and 1 INF cost "Instruction", she's the one to bring down.  Furnace is nice, Ferrite is great, but Hearth is really the Apprentice's Toolbox. 


  As expected though, the ball bounces out to Ferrite.  I use my Match Fixing plot card to reroll the perfect scatter and Adam gets another perfect scatter.  Both snap onto Ferrite.  She immediately sprints and scores, taking the score to 8-6 Blacksmiths.  She slides back to cover.


  The Goal scatter poses a problem.  I need to hide the ball here, but I can't go too far to the right and forward because Alloy can pretty easily move an score.  I have him blocked in with Friday and cover but he can still move around quite a bit.  Even worse is Cinder with a 14'' tackle against Brewer Defense.  I try to put the goal kick to my right corner.  Far enough forward it can't scatter behind my own line, and far enough to the right to put it out of reach for everyone.  It scatters six inches to the one, right into the cover near Hooper.  Right where either Cinder can pick it up.

  If I leave the ball, Cinder picks it up, kicks to Ferrite and scores.  I can't kill her because she's got Unpredictable Movement and Hooper only has 1 INF.  Hooper ends up walking around the cover to pick up the ball and using Tough Skin on himself.  I feel ok about this.  Cinder is engaged by Tapper, and Hooper is a 3/2 now, plus cover.  Cinder needs two successful hits for this to work.  It has to be Cinder because Alloy is locked up.


  Furnace moves up, puts 2 damage into Tapper, KDs him and puts the crowdout AOE on Cinder, but not himself since he wants to help Alloy kill Tapper.  With Tough hide, it's pretty sketchy but still in the realm of possibility since he's a 2/0 now against Alloy.  

  Friday calls Scum to her to block Alloy's path and dodges into Cinder to ignore Unpredictable Movement.  I need one more momentum to stand Tapper up, and Friday gets it with a nice push that tucks Cinder into the pocket with Tapper, Furnace and Friday. 


  Cinder counterattacks, dodges away.  Friday stands up Tapper, hits Furnace for another momentum and walks into range with Cinder, causing her to unpredictable movement away.  This is what I want though, so now Spigot or PintPot can kill her. 

  Cinder has other plans.  She moves within 6 of Hooper, bonus times the shot up to TAC6, back down to TAC5 because of cover.  She needs four out of five successes to tackle the ball and gets it.  She also gets a successful kick to Iron who dodges back out of 8'' of PintPot.

  Spigot activates.  I can't get PintPot to Iron to disrupt him from a top of 3 score, but I might could use Spigot's heroic to boost him.  However, I can't be within 4'' of Tapper for Commanding Aura on Cinder, and be with 4'' of PintPot for Time's Called.  I decide to try to kill Cinder because I don't think I can get it done without Commanding Aura.  So he moves into CA, kills Cinder in 3 hits (KD, wrap and wrap.) and wastes an INF.  Score is 8-8.

  Alloy moves through Scum's area, producing Unpredictable Movement there, hitting Friday for damage and Dirty Knives.  He almost ends his activation but remembers back to the Shadows at the last second and does it, putting him out of PintPot's range.  Which is good, because I think under CA, PintPot kills him. 

  Pintpot really needs to go into Iron though.  If I could get there I could KD him, and the ball scatter would either come back to PintPot or better yet, go off the edge of the board and I win, but I can't get to him.  So I go into Ferrite, KD her and do incidental damage because Adam remembers his GIC and gets a third ARM for the activation, taking her to a 2/3 against a TAC5 model. 


  Iron sprints into the corner, staging for Round 3 and my cat idles.


    I win the rolloff pretty easily, ahead by 3 momentum.  I decide to go second, forcing him to fight for momentum and give me a chance to damage a model or something.  He activates Ferrite, standing her up, hitting Pintpot with a momentous Disarm, who Counter attacks and gets a push, barely at TAC4 now.  Ferrite's stuck there, acrobats away but Adam clocks before he can call Iron up.

  This is game.  Tapper goes for the kill on Furnace, knocks him down but Adam does his GIC again and Tapper just can not get up his columns enough to get CA down until the fourth hit, at which point he hasn't done enough damage at all.  Iron scores, taking the game to a 9-12 Blacksmith win.


Thoughts on the Game

  JD - I actually enjoyed getting my Brewers out again.  These are some of my favorite models, I love their sculpts, I'm happy with how I painted them, and I enjoy the playstyle.  I really did enjoy this game.  I also have not changed my position on Brewers and the main reason they are out of the bag is for batrep variety, and so Adam can play Blacksmiths into a team that's not the Farmers, or the Union I've played religiously for a year.  Despite the meta swinging back from the straight up ball game, I still don't feel that Brewers can kill faster than the other team can score.  This is further excacerbated by the Blacksmiths where hiding the ball is almost impossible.  That said, I made some errors here that cost me the game, while at the same time, it's evident that Adam is learning his Blacksmiths quickly. 

  Pros are that I got an ok cat attack off, never went second, killed Hearth and really felt like I was keeping up until the goal kick scattered into Hooper's turf.  After that, there was very few ways to keep the ball away from Cinder and Alloy.  I think Hooper was the best decision, but it didn't feel like a great one.  I could have kicked it away with Hooper, but the odds of him failing the kick, and putting the ball closer to Alloy, or into the backfield were somewhat high and I couldn't risk it.  At 3/2 in cover, I felt pretty safe, and even Adam was pretty concerned about that roll he needed for the tackle.

  The Cons of my decisions come down to a couple.  Tapper probably should have kicked that ball off into the backline rather than scoring.  Let them spend a few activations trying to get it back into play, and waste Alloy's activation.  Maybe.  I don't feel like I played horribly there as I needed the Goal influence.

  I still dislike Hooper.  I didn't need the 2'' melee as much, or it wasn't relevant.  Lucky or Stoker would have been a far, far better option.

  The two big problems were the Spigot and PintPot activations.  I got greedy, and wanted to use Commanding Aura against Cinder for the kill.  That wasn't necessary, and in fact it was overkill.  I should have stayed closer to PintPot for the heroic and put PintPot into Iron.  That was the far better decision. 

  Secondly, I didn't realize PintPot actually has dodges.  He's only one of two Brewers to have dodges (Spigot2 is the other).  If I had known that, I would have charged Ferrite, dodged out and gone into Iron for the KD, or at least pushes.  At least be engaged with him, but with 3 attacks it should be ok to get the KD.  And with PintPot's heroic where he ignores the next attack, Iron can't do anything about it.

  Lastly, I should have gone first on the last turn.  I knew the game was over and was curious what Adam would do going first.  I don't think it would have changed anything, but I should have gone first. 

  Adam - Going into this game I didn't feel like I was going to just end up kicking and scoring repeatedly. My thought process in my line up was just to play solid ball and be able to get a couple kills in between. The allure of a momentous 7 damage and a non momentous 5, really make me feel like I'm gonna do some fighting here. However, more often than not, I found that challenging these guys is a bad idea, and I really needed knockdowns instead of damage to ensure I wasn't put in the dirt. I don't thing that they're bad at fighting, but, I definitely feel like they smash ball teams, with how weak they are in the fighting game a lot. I think they have a real leg up on teams that play the ball personally.   I have really enjoyed the Blacksmiths so far, and I've actually had a hard time with what models to bring, other than alloy and hearth anyways. I can't wait to paint up my my team, and get the next set of models so its completed. 

  Something I can't stress enough when playing this team, is deployment positioning. It's so important and something I talked about last rep Jd and I did. Changing the way I deployed, changed the whole game to me. Putting Alloy on the left wing, and Iron on the right wing, with Cinder in the middle, give me a ton of ball threat wherever this ball goes. Not to mention where the Masters deploy being equally important. Hearth being within 6" of alloy and cinder, allowed both of them to get the benefits I wanted. Furnace, still is able to be by Cinder, and Ferrite by Iron. Depending on your line up, dictates how you deploy and where these models go. Positioning is key with this guild, and I can't stress enough how important it is for the deployment of this team. They all feed off each other. I should have changed Iron and Ferrites placement. So I could have gotten two inch melee on Iron, and not wasted an influence

  I left Hearth alone when the attack came and I really shouldn't have done that. I didn't expect that cat to hit like a truck, and he just evaporated my health. I was really confident in her large health and armor. Which comes back to hurt me in the second turn, especially since it took away instruction, and all of Alloys extra abilities. I felt really good about the second turn goal however. It went about as smoothly as it could. Match Fixings was terrible here though. I couldn't have had a more perfect roll, and I had to do it again. I also didn't expect to get the tackle off on Hooper with Cinder and put myself in position to score The roll was dicey, but I felt like I had to take the chance or else Cinder was going to get obliterated before she could take the ball. Which she does right after she finishes her pass. I also should have taken the full dodge after the pass to iron, to get him way out of Pintpots range. If he would have had the speed buff I would have been in a really rough spot.

  By the time the third turn rolls around I just load up Ferrite and Iron and stop caring about anyone else, Ferrite gets easy momentum, but I miss the clock time and don't get far up enough to make sure I can get Try hard off, which would have given me a goal, on 2 or higher dice roll.

   One of the things I was happiest about during this match was remembering a lot of my abilities I forgot about last time. Back to the shadows saved Alloy's life, and My Gic made a lot of my characters tough to kill for sure .

   All in all I've come to really enjoy what I've played with the team so far, and I'm definitely enjoying them. Until I play Thresher again anyways, and he just turns me into his personal harvest. The Blacksmiths feel like Masons in a way, but they seem much more ball focused to me.


JD - Again, I really enjoyed this game.  For all the issues I have with Brewers, this game was pretty close and could have gone either way at a few points.  I do feel that as Adam gains experience at the Blacksmiths, I won't see opportunities to exploit his mistakes with them nearly as often.  Things like Alloy being strung up behind cover, or over extending Hearth and allowing me to get both Tapper and Scum into her.  Or leaving Iron within range of a buffed Pintpot and I just didn't take the opportunity.  I don't see many great ways to hide the ball in Brewers though maybe just tucking it onto Scum and sending the cat into the far corner is an option.  I don't know.  Again, I don't think the Brewers hide the ball and kill players faster than any scoring team can score.  This is still true against the Blacksmiths who possess the widest array of ball retrieving tech in the game.  The Apprentices go down easier, but fast enough to stop them from scoring? It's sketchy. 

  The next question is if it's a Blacksmith problem or a Brewer problem.  I don't know that it's a Blacksmith problem.  It's very good, but I need to see it against Union or Farmers some more before I have an opinion there.  Brewers have always struggled to control the ball, and when Shark was running the roost was the period I put Brewers away because they just couldn't stop the scoring.  So you have a very, very good team in the Blacksmiths going against a low tier team like the Brewers.  There's no room for error.

  Adam's Butchers are in, and nearly assembled so I'll be surprised if I don't see them across the table next Batrep.  I will likely hold off on my Union or Thresher Farmers for that game.  After reading some of Vincent's ramblings, I might try a Smoke team for kicks and giggles, even though I detest Smoke's gameplay.  With the recent OPD change, I'm going to play Grange more, and may be up for playing that into Butchers.  Is there any matchup into Butchers that would interest you guys? Or any matchups in the future you'd like to see? Possibly not even Captain specific, but a certain player combo you would like to see into a matchup.  Curious about a Hunter team into Blacksmiths? Obulus into Thresher? Throw your suggestions our way and if something piques our interest we may pick it up and give it a shot. 

  Thanks for reading, and enjoy your week!  Merry Christmas!


Wednesday, December 13, 2017

Guildball for the New Guys - Knowing enough about the other team to get through an activation


  There were a lot of rough moments for me in my early wargaming days, and still are some even now.  I had another round of them when I started playing Guildball.  It seemed like I had to take a "Gotcha" on the chin before I'd remember them.  Things like charging into Obulus with literally anything other than Mallet and remembering he has Unpredictable Movement, but only remembering it after he was safely away from my fully loaded Captain.

  I mentioned in a previous article (The Starting Lineup one, actually) that it's pretty useless to know your own models and what they're good at fighting when you don't know what they're fighting.  Decimate has Anatomical Precision, which ignores 1 ARM, but if you don't know that Farmers have very little ARM, then you won't know that you could probably bring Minx instead.  Or, in another example, Mash has Unpredictable Movement and 2'' melee.  These would theoretically make him a really, really good place to hide the ball against kicking teams except that the Fishermen have both 2'' melee almost everywhere, two to three different dodges that ignore UM, and Siren, who can just straight up force him to kick the ball.  I learned that one the hard way. 

  You have to know the other team before you start picking up the win ratio.  There's a few levels of this, and we won't tackle all of them today.  Based on my non-expert opinion, there's

 1. Knowing enough for This activation
 2. Knowing enough for the Next activation
 3. Knowing enough to understand the goal the other team has as they pick their players from the roster

 Guildball is very focused on individual activations.  This is a no-brainer with only 6 players on each team, but for many players, they're used to 6-10 different units of 3-10 models each.  When 10 models make attacks, you have a lot of chances to accomplish things, and the odds somewhat even out.  Rather than Honor missing that attack she had a 70% chance of hitting, it's more likely that 7 of your 10 models will do what you needed them to do.  Individual hits and misses are less critical in games based on units.  There's always some special individuals where it really counts but overall, it somewhat evens out, and you're able to focus fire and bring down the targets that really matter.

  In Guildball, a lot hinges on every activation, so it's in your best interest to ensure that you get the most out of them.  This is where point 1, Knowing enough for This activation, comes in.  Many new players fail to get through one key activation and it kills the entire round.  I watched in a tournament where a Butcher player sent their fully loaded Fillet into Shark.  She hit once, didn't KD him, and he counterattacked, resulting in a predictable doubledodge and he was gone while she sat on 3-4 INF.  That's a quarter of your team's total INF wasted. In this article, we're going to look at the basic things to assess when you activate a model, and specifically, attack.

  Secondly, we have Knowing enough for the Next activation.  If you've ever played Chess, they preach thinking ahead two or three or a dozen moves.  If you move X, what happens and how will you respond? Chess is far more linear than Guildball so the comparison begins to fall apart after that, but you definitely need to begin looking at the bigger picture. The ball game is a great example.  I will often let an enemy striker keep the ball when I'm up on points and I think that the opponent is going to try to score.  I will position a striker where they can receive, immediately counter score and close the game.  On the same token, I've been that other player where I'm behind on points, and that 4vp is really, really tempting but I know that as soon as I score, Flint will get the ball and counterscore. So rather than take the bait, I need to neutralize the striker before I do this thing.  Now we're thinking a few activations ahead of the game.

  Lastly, there's Knowing enough to understand the goal the other team has as they pick their players from the roster.  We talked a lot about this in the lineup article previous to this, and building a list in response to what they're playing.  I don't know that the topic really needs it's own article but maybe it does.  We'll see.  It really comes from experience and knowing their cards.  You can usually break each team down into categories and split them out from there.  Fishermen are a ball playing team. They have a lot of 2'' melee, dodges and ways to take the ball.  So you can expect not to be losing players to take outs and you need a way to hide the ball.  Etc.  After that, as you learn the other players you can understand more individual gameplans and how models contribute to the game, but if you master the first 2 topics here, the 3rd topic will be pretty much covered.  It's up to you to put it together.

  So, #1.  Knowing enough for This Activation

  By knowing enough, we're again referring to the enemy cards.  Let's talk about what ruins our day, shall we?  There's two categories; Passive  and Momentum Based defensive tech that you need to be concerned about.  What I want most from this article is for the reader to reduce the amount of times they leave a stack of INF on a model they moved into combat.  This is absolutely backbreaking and where not knowing your opponent's cards hurts the most.  Synergies between cards/players is one thing.  You may read the card a dozen times and not catch a synergy.  For example, you think your captain can survive Honor's activation, so you go ahead and load him up.  She activates, he makes it through, but then lo and behold, she chain activates into Harmony and you didn't know that was a thing.  And your Captain is now dead, him and his 6 INF.  Don't worry about those, take one on the chin.  You didn't know, and it sucks, and I've been there, and handled it both good and bad.  It's the wasted INF on a model just standing three sheets to the wind that really hurts though.  So let's look at this.

  Part I. Passive Defensive Tech doesn't require anything from the player.  They don't have to state anything ahead of time, use any character plays or make a choice.  It's on the back of the card and it just happens if they remember it.  The major ones are:

  Unpredictable Movement
  Gluttonous Mass
  Sturdy
  Close Control
  Countercharge

  The little ones are things like "Stoic" where they ignore the first push, "Tough Hide" where they take one less damage and such like that.  Those won't ruin your activations though. You may not kill that model completely but the dice could prevent that too.  Stoic rarely bothers me. If it does, it's usually when that model charges my model and I try to push them away that it actually catches me unawares.  Reanimate is frustrating, but it's the same thing mostly.  You'll still get the momentum and do damage.  You should be aware of it, but you're not going to be sitting there with a stack on INF you can't use.

  READ THE CARDS.  Even if you take notes, understand where these five specific traits are at.  Ask at the beginning of the game "Who has this crap?"  Note it down, remember.  Whatever you have to do.  Ask before you charge.  But better yet, read the cards because if you ask "Hey, does Velocity have Unpredictable Movement?", you've given your opponent more time to consider what is about to happen.

  A note towards Sportsmanship though.  Don't read the cards right there and take 15 minutes every turn.  If you're in the game, glance at their cards and ask more questions while you're playing.  One of Guildball's shining positives is that it's a 12 model game and theoretically shorter than most tabletop games but the amount of information to be found on the card makes new player games extremely long.  Even players that have played for awhile, but are facing a new player or faction can add a lot of time to the game.  Just ask.  "Defensive stats? Anything I should know about on the back?"  And go.  If nothing else, download their cards in Guildball Scrum and read them during their turn.  I highly encourage players to run through a different faction every week at some point.  Read the cards, make mental notes of the big 5 gotchas, get a feel for the stats. 

   Let's look at these five "Gotchas" closer though.

  Unpredictable Movement. 

  This one is a rough one at first for many players.  Models that have this make a 2'' dodge when you enter their melee range.  Most models that have this have 1'' melee, making 2'' melee basically cheating when you can stand outside of that zone and do what you want.  2'' melee ranges with Unpredictable Movement are a bit trickier.  You're going to trigger it no matter what (Thresher, Mallet, and during her legendary, Hearth, are the only exceptions).  This makes 2'' melee models pretty key with either version.  With 1'' and UM, you simply stay outside of it.  With 2'' and UM, you have to go base to base.  Base to base is going to be important in a lot of activations, so get used to it.  If they dodge out with Unpredictable Movement, they dodge 2'', which means they're still in your 2'' melee zone.  They can run, but they can't hide.  Mash from the Brewers, Greyscales from the Fishermen and Obulus from the Morticians are the two biggest offenders I can think of that have Unpredictable Movement and 2'' melee both.  Lots of models have it and 1'' melee, but 2'' melee models negate it.  So make a mental note of why 2'' melee models are important.  You always need a few to deal with this particular tech.  Also, be aware that this works while the model is KD.

  The other nifty trick is that dodging into the melee range doesn't trigger it.  So if you have a way to dodge into that zone, that's an option as well.  Maybe bounce off of another player, or just pay the INF for a dodge if it's an option, like on Mist with Acrobatics.

  The sad way to do it is to force him to use it earlier than your key activation.  If Stoker's going to for the kill, someone threatening enough to force the model to take the dodge needs to get in there.  Key thing to note is that unlike some of these other passive abilities, Unpredictable Movement is a choice.  So they may choose to weather one storm and wait for the hurricane.  You can use that to block escape routes but now we're trying to solve gunfights with knives.

  Sidenote.  A lot of Token sets, and specifically the Steamforged Season 3 sets have "Dodge Used" tokens to indicate a model has already used Unpredictable Movement.  There's nothing wrong with asking your opponent to mark it, or you marking it yourself with your own token.

  Another sidenote.  A good friend of mine played Brewers too and showed me a sweet trick with Friday.  He'd run Friday and 1INF, maaaaybe 2 into a model with UM and see if they went ahead and dodged. A lot of times, they wouldn't because what's a Friday with only a few INF and no buffs going to do?  So they'd hang out.  Then she'd call Scum over and Scum would dodge in and pin the model in.  Next activation, here comes whoever you want.  Stoker, Spigot, anyone because now the UM model is pinned in with Friday and Scum.  So, no UM and +2 TAC.  Obulus is gonna die.  "Get Over Here X" is on Friday/Scum, Ferrite/Iron, Jac/Salt... and I think that's it...  Just a neat trick.  It's a mean one too.  Lose/lose if it's set up correctly.

  Gluttonous Mass

 This was impressive when people first saw it.  Models ignore the first attack or character play.  The all encompassing absorption solution.  Charges, expensive character plays, all kinds of things.  Guaranteed Counter attack because nothing you did was going to affect them, even wraps.  There's just one problem.  Anything can trigger it and it's not a choice.  Throw 1 INF character plays at these models.  Specifically, it's Esters from the Brewers, Compound from Alchemists/Engineers and Fangtooth from the Union.  Esters and Fangtooth have 1'' melee, so just hitting them twice from 2'' is a decent option but it still doesn't feel good inside.  1 INF character plays are the way to do it.  If you have to do it in a prior activation, that's the best way, but even if you're playing someone like Tapper and you just throw a Marked Target at her for no effect, it's better than charging for 2 INF and 10 dice and whiffing it all because you forgot about Gluttonous Mass.  That's the worst case scenario.  And if you're in their melee like you would be with Compound, they counter attack and you can say goodbye to the 3-4 INF you have left.

  Sturdy

  Sturdy is better than Gluttonous Mass, IMO.  It can't be popped by cheap character plays or even other attacks.  You have to actually waste a KD hit to trigger it, which sucks.  It means that you're wasting an INF, and if you're in melee range, I definitely get a counter attack, and that's where things go south.  Several models have Sturdy, and a few models have the ability to hand it out.  Corsair from the Fishermen and Benediction from the Union can both hand it out, and Corsair starts with it.  Grange from the Farmers has it for a legendary and can also hand it out.  All three of those models have 2'' melee.  I think there's a few more out there, but it's those three that really hamper your day with it.  Watch when you go into them, and pay attention to who it's on.  Tokens are important here again.  There's a few ways to handle it.  Lower DEF models, you can get the wrap on them with a charge (Brewers excel here) and hit KD twice to get it.  Models from Season 2 onwards sometimes have playbook results with KD and damage, so you can get the momentum even though the KD was wasted.  The biggest thing to look at is what we'll focus on here in a minute, the Counter attack.  Sturdy means the Counter attack is coming.  Unless you can get there when they don't have momentum, or you're going to dodge/push away, you need to expect a counter attack and have a plan for it.

  The other option is to pop KD with another model.  There's only a few ranged KDs out there, so you'll probably have to do it in melee which means committing another model.  Again, we'll expound more in the next segment, Counterattacking, but in many cases, I'll counterattack on a model I plan to charge later and I'll pop that Sturdy then so it's ready when I actually need to bring him down. 

Close Control

  I think Close Control is also better than Gluttonous Mass.  See, GM is cute, but easily popped.  For models with specific goals in life and things they want to do, function specific passive tech like this is far more ideal. Sturdy lets fighters stay standing and push back, maybe escape the attack.  Close Control lets models meant to use the ball or hide it do either one.  Flint can come in for the attack, tackle the ball momentously on column 1 and then weather the counter attack where you take it back.  Even if you get the Tackle, he ignores it.  Then he can push dodge out and be on his merry way. 

  Close Control usually means you just need to hit them twice.  Most models with Close Control are 1'' melee, and are relying on higher DEF or dodges to get out of a scrape.  I think Corsair in the Fishermen is the only 2'' melee model with Close Control so I could be wrong.  2'' melee models are winners here in most cases.

  There is a character play running around a lot now called "Ball's Gone".  Spigot1 and 2 from the Farmers has it, and so does Brisket2 (Butchers), Bushel (Farmers), Greyscales (Fishermen) and maaaaybe one or two others.  The character play, if successful, allows you to take the ball and either keep it, or kick it immediately to another player (Not on goal).  This is not a Tackle, and therefore does not get stopped by Close Control.  It's for this reason I drop Bushel into any Masons team with Flint, and really any team with 1'' Strikers. In the case of Flint, she ignores the "Charmed (Male)" trait, and has Ball's Gone.  So she's hitting 3/1 at TAC4 (TAC8 on the charge, which is probably required) and kicking the ball out.  Even if Flint counterattacks, the ball is already out of there and there's nothing he can do to get it back.

  Whatever you do, if you need the ball and you forget it's a Close Control model you're going into, you're likely to allocate the wrong amount of Influence and be completely flustered when they ignore your first attack or force you to do a different option.  Be aware of it.

  Countercharge

  Where the other four options have been located on the target model, Countercharge sidelines you completely.  It's a very powerful ability that allows a model to charge an enemy model that has ended their advance within 6'', plus all normal qualifications of a charge (Line of site, not engaged, etc).  It sucks because you've gone through the check list, and we're sending Bushel into Flint and everything is going to work except we forgot about Brick who Countercharges into her and knocks her flying.  The other difference with countercharge is that because it's an activation, they'll get Momentum for the attack unlike a counterattack.  If you're trying to starve an opponent of Momentum, this is something to keep in mind. 

  There's five models with countercharge in the game, and four of them are conditional.  Brick, from the Masons, is the only dude to just have it, at all times.  Marbles, also from the Masons, recently attained it in the errata but only has it while within 4'' of Brick.  He's also the only model with Countercharge but not 2'' melee.  Tenderizer (Butchers) and Compound (Alchemist/Engineers) both have it but only while within 4'' of the goal.  Lastly, Tater (Farmers) has it, but only while within 6'' of a Harvest Marker. 

  The easiest way to handle Countercharge is to not go within 6''.  This is rarely an option though.  Because it only triggers on an advance (charges count), you can dodge into this aura safely.  If a model is Knocked down or Engaged (not Engaging.  Can still charge if engaging a model, but not if they themselves are engaged), they cannot charge.  However, every above model except Marbles has 2'' melee so if you engage them, you'll probably also be engaged by them and crowded out somewhat.  On a bad day, you'll want to charge a model, but Brick is around so you charge Brick instead and Marbles charges you, shoving you out of melee with Brick and now nothing you wanted to do can happen.  Hilariously enough, because Marbles has to be within 4'', I often charge in with a 2'' melee model and engage both of them to KD Brick.  And KDing Brick is usually pretty easy.  Whatever hits you need, you'll get them against a 2/2 model with the charge pretty generally.


  Tenderizer and Compound both lose it once they move up the board, so it's only on goal kicks you have to worry about them.  However, there's a lot of area they can't cover so it's often you can sneak in from one side or the other.  Striker Models with "Where'd they Go", so Flint (Masons), Ulfr (Hunters),  and Greyscales (Fishermen) can dodge in pretty easy and score, ignoring it.  Usually what happens though is that you just charge the goalkeeper himself, bounce out with your newfound momentum and score.  Compound also has Gluttonous Mass though too, so watch out for that double whammy as he's about the only legitimate goalie in the game.

  Tater's the difficult one since he's got ok DEF, and it's rare you can get rid of the Harvest Marker hid behind him.  His KD is really solid too, but if he wants to do damage, he can't do the KD.  Unless he wraps.  The other hilarious thing is that his KD isn't true KD, but an aura of his melee range.  If you force him to charge into a group of his own buddies he can't really take the KD option without bringing down his own players.  You're probably looking at a push or damage. 


  Your best bet is engaging him since knocking him down isn't really an option since the Farmers usually have Millhouse around him somewhere to take the KD instead of him. If you can hit him with a Goad or some sort of control character play, that helps a lot.

  The overall things that handle Countercharging is Knockdowns, engaging, and positioning.  Let's talk Positioning for a second.  Marbles really falls out here because he doesn't have 2'' melee.  This often means that he can't reach you if you think about positioning at all. 


  Sure, Tater would like to engage both Tower and Brick, and maybe if he'd had range, engage Marble too and get the Mow Down on all 3, but he doesn't have the range, and this position here leaves him wide open to a countercharge from Marbles who will deliver a momentous single push, at least.


  With this positioning, Tater doesn't get engagement on Tower, but he definitely gets to Brick and there's nothing Marbles can do about it.

  Players that play Countercharging models are posing a question to you.  Every turn, they're building a puzzle that their team requires to stay safe.  Farmers are the ultimate example of this.  Thresher is a very aggressive, fast, dangerous Captain that likes to stay up front.  He's got victim stats at 4/0 and a free counterattack but it's not very good.  Normally he'd go down every turn except Tater stands nearby ready to Countercharge.  You'd think you could knock either one down except Millhouse is 6'' away and she'll take the KD instead.  Every turn, this puzzle has to be solved and not only am I burning your clock while you figure this out (assuming you didn't fall for the trap), I'm getting more time to plan, and I'm frustrating you.  Brick and Marbles play something of the same game but not as well.


  Bear with me, there's a lot of things going on here, but this is typical Farmer formation right here.  Thresher is sitting pretty here, a little over two inches past the midline.  Should be easy prey for most teams but he's not.  We see that Millstone is within 6'' of both Tater and Thresher.  Tater's within 6'' of the Harvest Marker, and his 6'' countercharge aura is 2'' past Thresher.  You could KD Tater at range with something maybe, but no can do because Millstone is there.  In order to engage Thresher with any 2'' melee whatsoever, Tater can countercharge either direction with room for error and get there.  He's even capable of going further so as not to catch Thresher in his Mow Down aura.  He gets the KD, or a double push.  If he does a KD, your model stands up, hits Thresher and Thresher gets a free Counter Attack because he's within 4'' of the Harvest Marker, and your model is KD again. There's no coming back from that.  Then Thresher or Tater, or heck, even Millstone activates and murders your model with +2 TAC.  This is what makes Thresher good. 

  The weakpoint is positioning a model with countercharge in a way they can actually protect things and not be exploited.  It has to be very clean, open and well thought out.  Cover and other terrain that block Tater's charge lanes open up a hole in the wall here.  If I have models in the way, you can hide behind my own models when you attack and Tater can't get to you.  A player that plays or see countercharging models often should pick up a laser from Army Painter.  It drops a nice straight line on the table.  I often use this line to see what a charge lane looks like, and place a 2'' melee marker from it to where my charge would end to see if a countercharging model can get to me.

  How do you deal with this?  For starters, it's rarely as clean a setup as this.  Other models are in the game, going and moving.  I'm pretty sure I could engage both Tater and Thresher with a 2'' model.  If Tater and Thresher have both activated, you might get away with this.  A Goad is another option.  If Harry moves up to Goad Tater, he might get countercharged but now you've forced his hand.  Sure, he hits Harry really hard and now no Goad has happened, but that's the countercharge for the turn.  So he waits, he doesn't countercharge Harry.  Harry bonus times the goad and hits it and now Tater can't charge any direction but directly at Harry, and he wasted the opportunity to Countercharge too.  It's a lose-lose for the Farmer.  I might kill Harry later, maybe, but I can't save Thresher right now.

  The other option is to just straight up engage Tater with a sacrificial lamb.  Preferably one that has Loved Creature, Rising Anger or Reanimate.  Something meant to punish me for killing you.  Next activation I can clear Tater off, but now we're clogging the field and the charge lanes are much worse.  There's not many single activation solutions to this Farmer Defense triangle, but if you pay attention, there's opportunities later on for sure.  Forcing Tater to charge over his own Harvest Marker.  Attacking Thresher with a model that has Unpredictable Movement (Really only an Obulus thing there).  Clogging the field with other models.  Using the Countercharge to lure Tater out because he dies to a stiff breeze.  I think that's really the key.  Don't kill Thresher, kill Tater.  With Tater out of the picture, Thresher goes down much easier the next turn.

  Countercharge in general though, it's about positioning.  Use other models to block chargelanes, or engage the countercharge models themselves.  Also, surprise, you can DEF stance or Counterattack against countercharge. 
 
Part II.  Momenum Based Defensive Tech

  Momentum Based defensive tech is stuff that a player can choose to do in response to an attack and use Momentum to pay for it.  Specifically, we're talking about Counterattacks and Defensive Stance.

  Defensive Stance

  This is the easy one to talk about.  For one momentum you can up your DEF by one against a charge.  This applies to being knocked down as well.  If you're already at DEF 6, then it drops the opponent's dice pool by one.

  If the opponent has momentum, this is something to expect.  It's possible to do both Defensive Stance and a Counter Attack as well.  So if you're coming into my Mist model it is entirely possible that I will Defensive Stance, Counter Attack and Bonus Time the Counter Attack.  I'll hopefully survive the charge at DEF6 and reply with a TAC5 instead of TAC4 counter attack which may get a push dodge or double dodge that I need to get out of the situation.  When you're going into a critical attack (E.G., they have good counter attacks that let them get out of engagement, or you only have enough INF for so many attacks and you need to trigger a middle to high playbook result) you need to be aware that they will probably Defensive stance.  If my model is holding the ball, or can push/dodge you away easily, or I just want to reduce the number of hits you're going to get with the charge, I'll defensive stance.  If I don't have enough momentum to do both, you're forcing me to choose and I can't tell you which way I will go.  It depends on the location of the ball marker, my defensive stats and counter attack capabilities. 

  The workarounds are to either simply be prepared for it and take it into account when you're doing your dice math, or to walk into combat.  Some models can walk into combat and get the hit you need, like a KD on column 1 or 2, or maybe 3.  The reason to charge is if you're too far away and need the distance, or the playbook result you need is high enough that you can really only get it on the charge.  Ooor, you want the wrap.  Mist really likes to wrap.  He likes to get the Tackle on 1 and the Dodge or Push Dodge on 3 or 4, which needs 5 hits out of 8 on a charge.

  Counter Attacks

  This is the meat of defensive tech.  Almost all of the above is setup for a successful counter attack.  Sturdy, Gluttonous Mass, Close Control, Defensive Stance, everything gives you a better chance at actually getting a quality counter attack.  The easy solution to avoiding a Counter Attack is to KD the model you charge.  This is always preferable and it's what makes KD + Damage playbook results so nice since you get the best of both worlds by stopping a counterattack, and contributing to the death spiral.  However, we're going to continue this article like you probably can't get the KD, or you at least to have an idea of what to do if you don't get it.  Not everyone is the Brewers with 100% Momentous KDs on columns 1-3.  This is actually a problem for like, the Butchers.  Ox1 doesn't have a KD till column 4.  A good Defensive Stance and a Counter attack, or just bad dice and a counter attack and Ox just wasted 5 INF.

  After you have looked through the cards and read the backs of them, go through and look at the playbooks.  Look at them before you charge in or attack.  You're looking for double pushes, double dodges or KD on columns 1 and 2 in most cases, and up to column 3 and 4 when a model has TAC6 or higher.  Esters, for example, has Gluttonous Mass so she ignores the first attack, but if we look at her playbook:

  There's not actually much she can do at TAC5.  Her best hope is a KD on 3 but probably you're going to see a Push.  This is easily dealt with by any melee range by simply basing the model.  Against counter attacks, this is very key.  1'' Melee models should almost ALWAYS base a model during an attack so that they can't be pushed away far enough to disengage.  Esters will absorb the first attack and punch back but what's she really going to do? Nothing.  If you have 2'' melee, she can't even punch back.  Worst case scenario is 3 damage and a Double Push, against any ARM whatsoever, she needs all 5 dice to hit.

  Tapper on the other hand has

  There's a KD on 2 and a single Push on 3.  He's TAC 6 so the single push on 3 is more likely, but at TAC6 and Commanding Aura, he miiiggght could get the Double Push on a good day.  Probably not though.  More than likely, you're going to see a KD.  This, again, is easily avoidable if you A) Started the turn standing and B) Have a momentum to stand back up.  When charging in on 0 momentum, it's sometimes better to take a lesser result so that you can acquire the momentum needed to stand back up after a counter attack like this since Tapper is almost guaranteed that KD.  If you started the activation knocked down, you need to KD Tapper himself to prevent the counter attack.


 Then we have Stoker, who's got this amazing Counter Attack.  TAC5 needing the first result.

  He's DEF3, ARM2, and a Double Push on 1.  He's almost impervious to 1'' melee models.  Any cover, defensive stance, anything and he's pretty difficult to prevent getting his Counter Attack off against 1'' melee models that don't have decent access to KD.  Stoker is a beast unless you dedicate a 2'' melee model.  Then we have the master Counter Attack, Mash.


  Mash has sub par defensive stats on the front, but near Esters, he's ARM2.  None of that matters though because he has Unpredictable Movement and 2'' melee, plus the Double Push on column 2.  If he can stay standing, he's going to escape what ever you brought to bear since he'll UM to max melee, take the hit, hit back and push you out another 2''.  This is originally why I brought him against any kicking team whatsoever to hang onto the ball while I killed models.  The issue is that my opponent who was playing Fish always brought Greyscales who used Where'd the Go to retrieve the ball and not trigger Unpredictable Movement. 

  Let's look at some others.  Shark's a real beast because at DEF4 ARM1, he's going to Defensive Stance up to a 5/1 and Counter attack with a single dodge on 1 or more likely, the double dodge on 2 which at TAC6, he'll probably get.  If you're not a 2'' model, you can't catch him.  A 2'' model can try but if you don't Base to Base him, he'll still get away.


  Fish in general are tough to get the ball away from too because they almost always have low Tackle results so you usually have to hit them twice to actually retrieve the ball.  Be aware of this. 

  Honor is another good example.


  TAC6, double dodge on 2 if not the tackle on 1 or the push dodge on 3.  If you are 1'' melee model, good luck buttoning her down, and a 3/2 before defensive stance or legendary, she can be hard to get results against.  Plus, she has Poised so she gets a free counter attack.  Poised is one to watch out for in this regard if you've checked your opponent's Momentum and he's(or she's) dry, but Honor hits you anyways.  Honor, Thresher (Farmers and if 4'' from Harvest Marker), Sakana (Fishermen), Spigot2 (Brewers and within 8'' of the edge of the pitch) and a few other models all have Poised. 

  Just a few more.  Flint is another good one if you don't have 2'' melee.  He has Close Control and the Tackle on 1.  You can't KD him because you want the ball, but he doesn't declare a Counter Attack on the first attack.  So you hit him and trigger Close Control, declare another attack and then he counters.  So you tackle the ball, he tackles it back and now you have to hit this jerk a third time to get the ball.  This is assuming he doesn't just go for the push dodge on the first attack and run away, or hits the Guildball for "Where'd they Go" and is off and away 4''.


  Lastly, this one surprised me.  On the topic of triggering a Guildball on a counterattack (My favorite way to get Singled Out down, btw), Ferrite has a sneaky one.  


  So you get there, get the attack off, her KD is on column four but you're more worried about the doubledodge on two, so you've got her up against cover or another model so she can't dodge away far enough.  Except she doesn't, she hits the Guildball on one and Disarms you.


  And now your Captain with 4 INF on him is -2 TAC.  Congrats.  Hammer doesn't care, he can still do the work he needs to do on the low end of the playbook but the rest of us are a little frustrated, especially since she's ARM 2.  So, moving into the summary.

  The Counter Attack Summary.

  1.  LOOK.  Unless you know the Guild by heart, look at the card before you go if at all possible.  Look if they A) Have Momentum and can they DEF/Counterattack or both?, B) If I Have Momentum, C) What is my plan if they do Counterattack? Position, have momentum to stand up, or take the loss.  Don't get there and find out that Iron has a double Push on one, Close Control and you're attacking with Flint, so you get the tackle on the charge, but he has close control and keeps it, then double pushes you off and you're stuck.

  2.  The Momentum Gambit.  This used to be a major issue for first turn activations since only recently did teams that lost initiative get a Momentum for it.  It's still an issue for teams that lose first turn roll off and kick since they still don't get a momentum for it, and most teams struggle to build any on that first turn without the ball.  When you are Charging or Attacking another model, Check their momentum.  Are they going to Defensive Stance? Counter Attack?  Both?  If they have momentum for it, they probably will do one of them and you should guess at which.  Can this work in your favor? Sure.  If you both are relatively low on momentum towards the end of the turn, you can try to get them to spend some of it on important counters like trying to retain a ball, or keep a key player alive.  Look at their Momentum before you go because the best way to avoid a Counter Attack is to attack when they can't do one. 

 3.  Your momentum gambit.  If they do have Momentum, and you expect a counter attack, is it a KD that looks likely?  Then have momentum, and stand back up unless you've already done it this activation.  If you had to stand your model up to charge another model likely to KD you, then maybe you should use a different model.  If you don't have Momentum, and you attack, you will know by the time you finish rolling dice whether or not they're counter attacking.  If they take the counter attack, either KD them so you don't have to deal with it, or take an option with Momentum so you can stand back up.  You want momentum anyways, but Masons are a great example of wasting a charge for a lesser option.  Hammer might get enough for a five damage charge, but he needs to take a momentous option or a KD to avoid the counter attack knockdown, or to stand back up from it.

  4.  Spacing.  I've seen it a hundred times, and done it that many times myself.  A 1'' model charges in, gets counterattacked and gets pushed out 1''.  They had the range to get there all the way, but they just didn't think about it.  If you have 1'' melee and they have the ability to counter attack, go base to base if at all possible.  If you have 2'' melee and they only have 1'', pffft, stay outside of 1''.  Against melee ranges on models you expect counter attacks from, either get up close and personal, or stay out of the bubble entirely.  The in-between will get you hurt.


  But wait, there's more.


  There's a lot of things to do in an activation and you only have INF for so much.  We're not going to talk about the bajillion different options out there.  The focus of this article is a series of melee attacks because that's where things go wrong.  I do want to mention some things though, because while you're planning your activation, your opponent is planning on how to stop you.  I just want you to get through the next activation, but the overall game flow needs to earn it's place in the back of your head.  These are a few thoughts to tide you over to the next "For the New Guys" article.

  A.  Momentum Conversion

 Everyone's favorite resource.  The ideal scenario is where you generate 1 momentum per INF and then some.  This doesn't happen a lot and especially in teams that aren't the Brewers or Farmers who have playbooks shorter than their TAC.  However, you do need Momentum, and it should be a consideration every activation.  Yes, Stave's Lob Barrel is super awesome, but it nets you exactly 0 momentum for those two INF.  An expenditure of INF needs to be key to a strategy if it's not netting you straight Momentum.  Calculus, for example, can cast both "Noxious Blast" and "Blind".  Neither gains momentum in most scenarios.  However, Noxious Blast can set up conditions for VetKat or Smoke and result in a lot of damage, and Blind can prevent the opponent from netting that same needed Momentum.  Make sure your INF is contributing to the Momentum race, either for you or against them.  Honor's "Superior Strategy" is very strong, but after the first turn when the lines are engaged, it's hard to justify that 4 INF expenditure on a model when it may not result in the same or even close to the same amount of Momentum.  Letting your opponent go first every round because you're using cool character plays is a painful way to lose consistently.  Momentum isn't the name of the game, but it's a major factor.  Make sure your activations count towards it.

  One more note.  An early activation needs to gain Momentum for your defensive options like Counter Attacks and Defensive Stances, or even clearing conditions.  I try to avoid my first activation being something that won't create momentum. 

  B. Support roles
  Support roles are important, but they also telegraph.  Not much can stop you from tooling up a model, but your opponent now knows what model you're attacking with. A lot of times, they already know this, but it's something to keep in mind.  Other things you need to do with support roles are your passive support pieces.  Many models have auras that are very important.  Key activations involve simply moving them to where they need to be.  These are great activations to stall with while you're waiting for other pieces to get into place.  Millstone in Farmers is a really great example with her ability to take conditions.  I rarely give her INF.  She just walks to where she needs to be and hangs out.  This can do a lot to deter attacks on my stuff.  Sometimes it's just walking over to be near a weak model so that you crowd out whatever attacks.  Those are also quality activations. 

  C. Number of Activations
  You need to prevent back to back activations if at all possible.  In Seasons 1 and 2, Avarisse and Greede used to have individual activations and everyone took them because having 7 activations to your 6 meant they always went last even if they went first, giving them a better chance of having back to back activations.  If they lost initiative and went second, then they definitely had back to back activations.  The worst thing about most buffs in Guildball is that the enemy has a chance to respond to the move you just telegraphed.  If I'm giving a 2/2 MOV buff to my striker, I doubt you need 3 guesses to figure out what's next.  A back to back activation means there's nothing you can do to stop me.  Avarisse and Greede got nerfed for this.  It's one of the things that makes Honor so great with her "Superior Strategy" and it's also why it's so expensive.

  With that said, if you have a player that's facing a Take Out, you need to consider activating them, even if there is very little to do.  If activating them now so you get six activations this round will prevent them from getting a back to back activation where they put 6-8 pts together in the last two activations, you need to do it.  That's thinking a little farther ahead, but consider it for a moment at least.

The parting word.

  This has been something of a long article, but I hope it gives you a lot of food for thought.  I have been frustrated many times playing a game for reasons like I've listed above, and I know others have as well.  This is not to say that it isn't part of the game, it very, very much is.  Guildball has a give and go flow and you'll find that what we're talking about in this article isn't so much a negative play experience, but the fantastic depth of strategy available to a game with twelve models on the board.  You'll find that as much as it sucks to waste a model's stack of INF because you got counterattacked hard, it's very rewarding to be able to return the favor.  It's part of the give and take and gambling against the numbers that is Guildball. 

  The problem that exists is in that great depth of strategy, it's very difficult for a new player to grasp those intricacies early on and not just get stomped on every activation.  This is hard on a new player that's used to activating models and playing them until they're out of resources.  My goal here is to give you a window into what all is happening during that activation and the kind of things you should run through your head before you charge that model your opponent so oddly left out there all alone.

  Guildball, for all of it's flaws, is the best (imo) ruleset on the market today and I hope that newer players are able to see that early on, but it's a bit difficult when Brick just countercharged and ruined your day.  Hopefully this has helped steer you through that, and perhaps we'll see a few more of these New Guy articles.

  Thanks for reading, hope it helps!