Guildball terrain, when I have painting articles to finish, is probably multiple counts of treason. However, there's tournaments coming up for Guildball that I want to play in. The nice thing about guildball terrain is that you need a lot less than you need for Warmachine, and it's considerably smaller pieces.
And it's not stupid crap like acidic clouds or burning forests. I'm not even going to create terrain like that because it'll never make competitive play. It's going to occupy a special niche in the trashcan next to MK2 deep water.
Anyways. Guildball. My wife and I have been playing a lot of it. In my last picture, I had Mash, Stoker and Hemlock unpainted. That's since been rectified and their pictures will be at the end of this article. I've also added Gutter to my log.
My wife picked up Decimate, and subsequently we grabbed Blackheart too since it didn't make sense to grab Decimate and Gutter separately for 24$ when we could grab the 32$ starter box and get another ball and a Captain. So we're a Mascot and a player away from a 6 man union team now too. This game is growing on us pretty fast it seems.
The other thing I grabbed was a playmat, and then realized that the nice 2d terrain I have for Warmachine isn't really the right stuff for Guildball. A couple of the templates work. Forests, rough terrain and the walls are all functional, but Guildball has obstructions and such that can block los or be stood on. So I started building some in my copious amounts of spare time.
It's going to seem like cheating. There's a lot of ways to build terrain. What it boils down to is a backer to put it on, and the actual terrain.
The backer was actually the hard part to figure out. I originally thought that MDF would be fine, but it's really too thick and does not like to get wet. At all. So I was thinking hard about some different plastics but it dawned on me that I have all kinds of spare kydex scraps laying around as leftovers from other hobbies.
Kydex doesn't show up very often in the wargaming world. It's a PVC thermoplastic that's often heated up and formed over different things as a mold. It gets to cosplay a little bit because it's very easy to work with. Where you'll find it the most though, is holsters. I generally get mine for a couple of bucks per sq foot at Knifekits.com, but some local craft stores may carry it too. You can get it in varying thicknesses. Mine is all either .06" or .08" thick. It's cuttable, sandable, formable, you name it.
I simply cut mine with a bandsaw to some manageable sizes. My rough terrain patches are about 4'' long, 2.5 to 3'' wide. My obstructions are about 2.5 x 2.5", and my linear or, other obstructions, are 1.5 x 2.5'' or so. Very loose measurements, but just an idea. I then dremeled the edges to get a light bevel and take out any harsh edges.
Then I glued a plethora of Hirst Arts to the Kydex. Really simple. Drained most of the Hirst Arts blocks I had left. I need to order some more plaster. However, you can use regular rocks, or sticks, or tree bark or craft sticks, whatever, to form whatever your scenery is. The difference in Guildball is that if there's room to put a model on it, you can. If this is a goal of yours, then you should allow for a model to stand on it. If the guy is worried about his miniature falling off and chipping, he's not going to use the terrain correctly, or the terrain just won't ever make the table. So keep those things in mind. In my terrain, the pieces that you can stand on are obvious, while so are the others that you're not supposed to stand on. I just did 2x Rough terrain, 2x linear/LOS blocking obstruction and 2x regular obstruction. I'll probably keep my WMH forest templates, and I have some regular walls from WMH that are perfect, and also made of Hirst Arts. They'll slot right in.
I then spread out elmers glue and dipped them in various mixed ballast to get the rocks. Painted the base brown, washed it with a very dark brown, drybrushed a light brown on dirt, painted dark grey and drybrushed to white. Very simple. Add some grass tufts and we're talking.
Boom. Guildball terrain.
So that's that. Simple stuff. But I really like using the Kydex. That's probably going to stay.
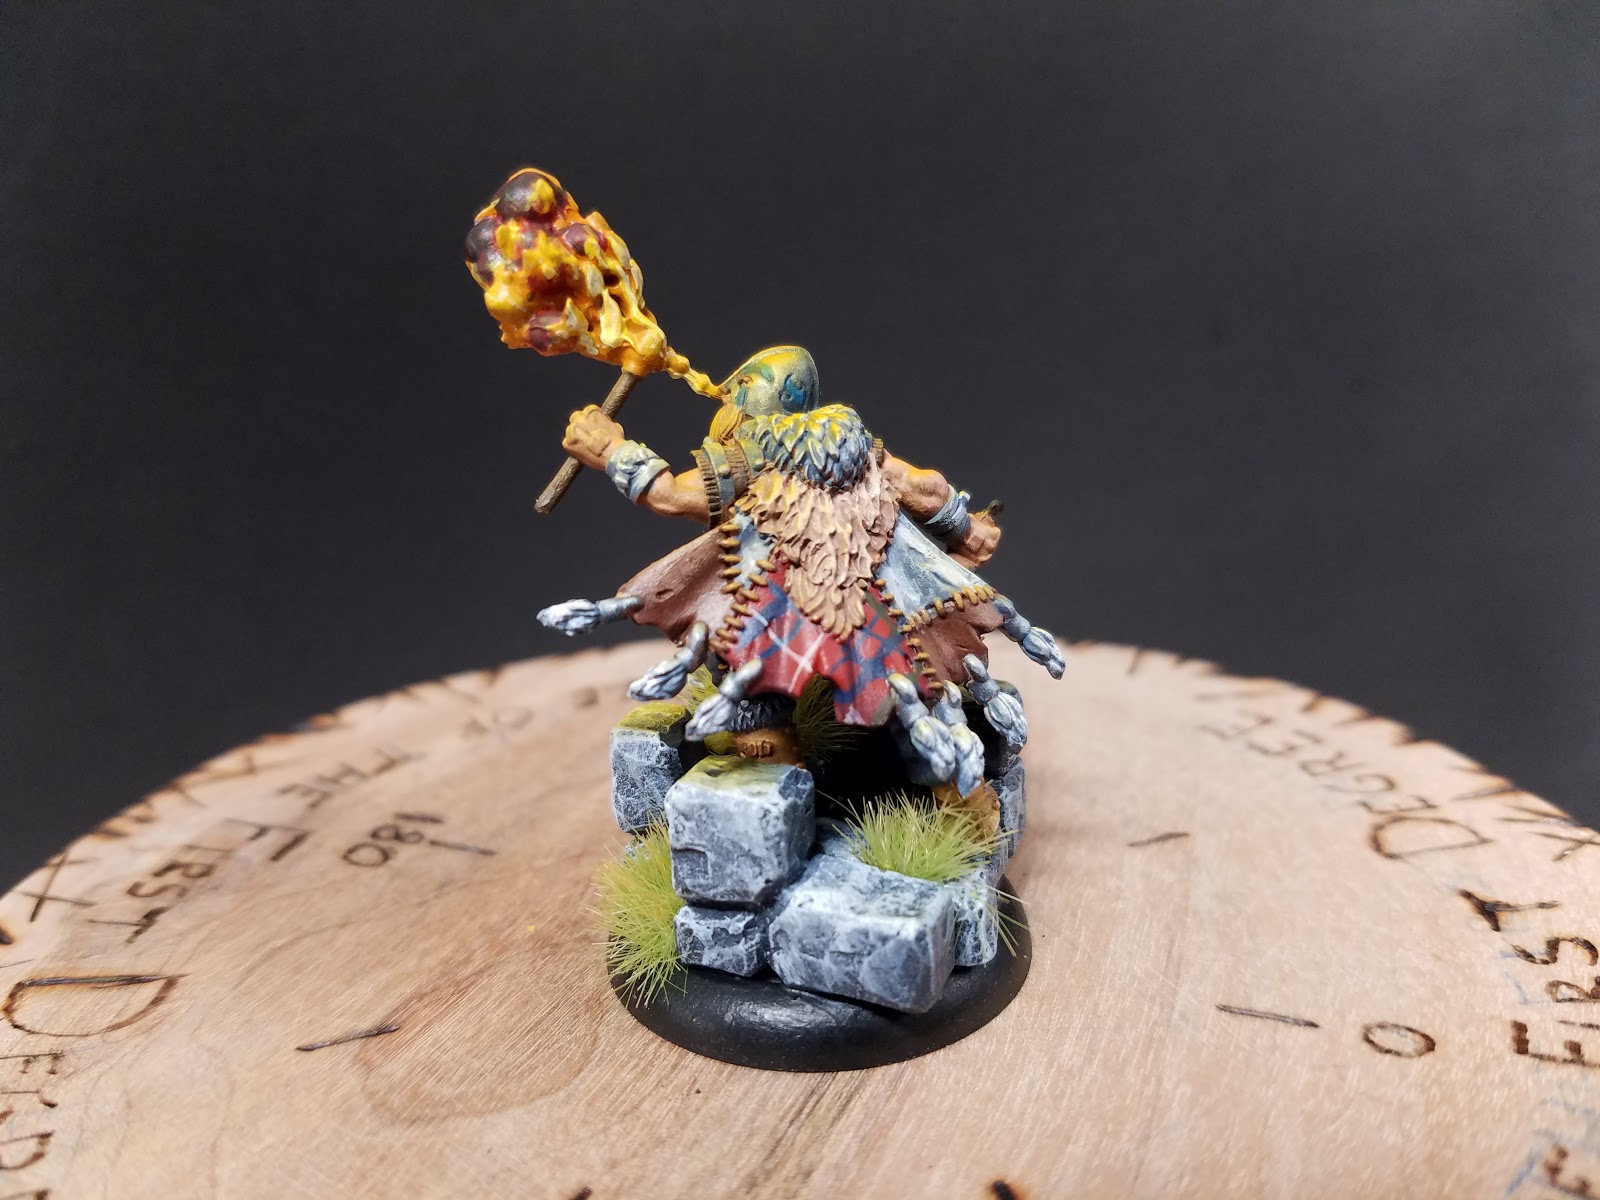
As far as my new Brewers, here's Mash, Stoker and Hemlock.
That's all I've got today. Probably won't see anything from me til after the 4th. Enjoy your holiday!
Thursday, June 30, 2016
Friday, June 24, 2016
Staying alive into MK3... and then Guildball
The leaked cards were right. Old news by now, but still.
I've played some, and built a ton of lists, and I think I'm done with Trolls for awhile. In fact, with the exception of some release events and things I'm already volunteered for, and happily, mind you, I'll probably be stepping back from Warmchine for a bit until the meta settles out. For a ruleset that desperately wanted to get rid of spams, that's all I've seen. PP has faith it will settle out, and when it does, I'll come back to Warmachine. Might be two weeks, might be eight. Might be early next year. I don't know.
The TL:DR version of where I think trolls are at right now can be summoned up in a few hotly debated bullet points that get thrown out if you step into the "Trolls can power through this" club comprised of the special snowflakes of the Facebook page. Madrak2 is literally carrying the faction right now.
1. We're an infantry faction that's being forced to take twice to three times as much battlegroup as normal. My Grim2 battlegroup stays almost the same size. However, casters like Madrak2 and the Grissels that want as much infantry and support as they can get are forced to take 30pts of beasts instead of maybe 10 to 14 (in MK2 pts). This hurts our ability to take Fell Callers, Stone Scribes, the KSB, the new Shaman, and our very improved Sorcerer. Madrak2 straight up just spams infantry and does the work himself. It's dumb.
2. We struggle to crank damage out on our infantry now with the Elemental buffs basically gone. Again, important on the infantry casters.
3. Our fury management has not scaled with our forced battlegroup size.
4. Our beasts do not trade with Warjacks very well. Rok can kill a Juggy, maaaybe hurt a second. One kills him, and there goes my premium heavy because my other one is just a sad reach troll now.
5. We can't take enough support for our infantry to trade up either.
6. Borka2 is still trash.
7. Doomshaper3 is essentially unplayable, and the Mountain King is equally concerned, when ranged Grevious Wounds got handed out like candy.
Every game I played was very frustrating, and by the end of a couple of weeks of playing things, I put them on the shelf and took a break til this settles out. If you're enjoying trolls, good on you.
My meta's had the Guildball epidemic for awhile though, and nearly half to two thirds of the players own at least one guild, if not four. I was enjoying MK2, but with MK3 kind of chasing the matador through the china shop, I finally gave in and demoed Guildball.
Right off the bat, the access to the game is pretty amazing. Everything you want is free online. Printable widgets, full ruleset, cards, even paper cutouts to try playing the game. So I printed them and my wife and I played a few games and we're pretty much hooked.
Transitioning from Trollbloods, I naturally went with the Brewers and they are some hella beautiful models. Steamforged is knocking them out of the park. My wife tried Fishermen, but didn't like the playstyle that much, and switched to the Masons. She's still playing paper cut outs but I expect her models soon. She's thoroughly enjoying the game, possibly more than I am, so I think Guildball is here to stay.
So, Guildball models. I love these sculpts for the most part. The Brewers have all been largely dynamic and exciting with the exception of the Cat and Friday. The rest of them are mid sprint or doing the action they're known for.
I personally started with the Brewer's Starter Kit, and really enjoyed the Tapper/Hooper combo, so I stuck with it. I filled it out to six with Scum, Stave, and Spigot and painted all seven of them.
Spigot's a fun model. I've looked at the Spigot2 rules quite a bit, and I keep coming back to him. Again, I'm 6 games in, so things will probably change, but Spigot1 does so much for the team around him that it's hard to pass it up. Even Scum passes a ball decently around him. So far, most of my goals have been with him, not Friday. I've played the two of them together in every list though, and Friday's very good paired with him, but if I had to drop a striker, it wouldn't be Spigot. I bought Hemlock the other day, and she'd probably trade in for Friday or Stave depending on the matchup, and Spigot makes even her a decent kicker.
The ball. Woo.
Friday's been nice. She's hard to hang onto with her immediate dodge, and she's an amazing striker. I usually try to push her towards the goal and snapshot her, but people generally focus on tieing her up or knocking her down and she ends up kicking the Spigot instead who snapshots. Which also works fine.
I've played some, and built a ton of lists, and I think I'm done with Trolls for awhile. In fact, with the exception of some release events and things I'm already volunteered for, and happily, mind you, I'll probably be stepping back from Warmchine for a bit until the meta settles out. For a ruleset that desperately wanted to get rid of spams, that's all I've seen. PP has faith it will settle out, and when it does, I'll come back to Warmachine. Might be two weeks, might be eight. Might be early next year. I don't know.
The TL:DR version of where I think trolls are at right now can be summoned up in a few hotly debated bullet points that get thrown out if you step into the "Trolls can power through this" club comprised of the special snowflakes of the Facebook page. Madrak2 is literally carrying the faction right now.
1. We're an infantry faction that's being forced to take twice to three times as much battlegroup as normal. My Grim2 battlegroup stays almost the same size. However, casters like Madrak2 and the Grissels that want as much infantry and support as they can get are forced to take 30pts of beasts instead of maybe 10 to 14 (in MK2 pts). This hurts our ability to take Fell Callers, Stone Scribes, the KSB, the new Shaman, and our very improved Sorcerer. Madrak2 straight up just spams infantry and does the work himself. It's dumb.
2. We struggle to crank damage out on our infantry now with the Elemental buffs basically gone. Again, important on the infantry casters.
3. Our fury management has not scaled with our forced battlegroup size.
4. Our beasts do not trade with Warjacks very well. Rok can kill a Juggy, maaaybe hurt a second. One kills him, and there goes my premium heavy because my other one is just a sad reach troll now.
5. We can't take enough support for our infantry to trade up either.
6. Borka2 is still trash.
7. Doomshaper3 is essentially unplayable, and the Mountain King is equally concerned, when ranged Grevious Wounds got handed out like candy.
Every game I played was very frustrating, and by the end of a couple of weeks of playing things, I put them on the shelf and took a break til this settles out. If you're enjoying trolls, good on you.
My meta's had the Guildball epidemic for awhile though, and nearly half to two thirds of the players own at least one guild, if not four. I was enjoying MK2, but with MK3 kind of chasing the matador through the china shop, I finally gave in and demoed Guildball.
Right off the bat, the access to the game is pretty amazing. Everything you want is free online. Printable widgets, full ruleset, cards, even paper cutouts to try playing the game. So I printed them and my wife and I played a few games and we're pretty much hooked.
Transitioning from Trollbloods, I naturally went with the Brewers and they are some hella beautiful models. Steamforged is knocking them out of the park. My wife tried Fishermen, but didn't like the playstyle that much, and switched to the Masons. She's still playing paper cut outs but I expect her models soon. She's thoroughly enjoying the game, possibly more than I am, so I think Guildball is here to stay.
So, Guildball models. I love these sculpts for the most part. The Brewers have all been largely dynamic and exciting with the exception of the Cat and Friday. The rest of them are mid sprint or doing the action they're known for.
I personally started with the Brewer's Starter Kit, and really enjoyed the Tapper/Hooper combo, so I stuck with it. I filled it out to six with Scum, Stave, and Spigot and painted all seven of them.
Red is new for me. I've done a lot of black, a lot of blue and a lot of tan, so I went red on this one as my primary color. The Tartan is actually my family's, it's the Rose clan's parade tartan so I was pretty excited to use it.
Tapper's my Captain right now. I literally have no idea about the game, so I couldn't tell you if I prefer him in a tournament to Ester or not. I love his sculpt though, and I've straight up one-rounded more than one player with him.
My biggest problem with Tapper is that he pretty much requires the cat. Scum is ok, but I'd love to have Second Wind from Quaff or that extra TAC on Hooper or Spigot. I can't pass up a free 1/1 INF though. It's pretty hard to pin this mascot down though. He's ok towards the end of a round for getting a free extra TAC by engaging another model, but Quaff still seems like a lot more utility. 1/1 INF is so nice though.
The ball. Woo.
Friday's been nice. She's hard to hang onto with her immediate dodge, and she's an amazing striker. I usually try to push her towards the goal and snapshot her, but people generally focus on tieing her up or knocking her down and she ends up kicking the Spigot instead who snapshots. Which also works fine.
Hooper. He either kills everything or I can't keep him alive because he gets tag teamed. I really enjoy just running him around with Tapper though and ganking things. If it gets really bad, Spigot usually sprints over to help after they've KDed the guy, and really polishes him off.
Stave, my personal favorite model in the collection. He gets a bit of a bad rep and Mash usually slides in to replace him but I've had decent beginner's luck with him for board control. He's really bad about feeding momentum to the other team, but he's amazing for really bringing in the model I want to kill. I've straight up blown the Hunter Captain and Shark into my lines where Tapper, followed by Hooper, followed by Spigot have round-one killed the guy. Heck, I even did it to another Stave in a mirror match.
So, I got into this game, and my first game was a proxy game with my wife who tried the Fishermen Guild. She got wiped off the board by Tapper/Hooper stabbing things repeatedly and Friday running circles around the muggings, scoring points. So she traded them out for Mason proxies and liked those much, much more. Hammer's a legit threat.
So, as of today, she has 7 Masons, the only released models she doesn't own is Hammer and Tower. She's not sure if she likes Brick, but she loves everyone else, and is looking at Union players now too. I went ahead and grabbed Mash because he's popular and I want to try him, and Stoker because he looks hella fun. I also grabbed Hemlock for that great smelling salts ability.
So yeah. I'm a Guildball player. A lot moreso than I'm a Warmachine player. Temporary change for now. We'll see where that goes from here. I'm thoroughly enjoying Guildball right now though, and my wife is too. Even if certain things are addressed in MK3, I think Guildball will be pretty big for us for awhile, and I currently doubt that Warmachine will be able to take that 1st place against for a bit.
Monday, April 25, 2016
Basic Necessities for Painting Part II: Advanced Assembly
By Advanced, I mean more than just pouring glue on stuff til the Nyss quit falling apart. We'll cover some more detailed expectations of the models you're dealing with and some further insight into assembling a clean model. For a final touch, and to keep Part III from being too unwieldy, we'll cover attaching the model to the base and the priming, and the pros/cons to priming before or after assembly/basing etc.
Let's rehash. I posted probably six articles in August, and have done nothing since. Things got busy, but it's time to push this particular series through. So, I listed the following:
1. Glue
2. Exacto Knife
3. Pliers
4. Greystuff
Pretty simple. That's more than enough to build a model and put it on the table. But lets go from fielding a model, to cleaning a model and having it completely prepared for a good paintjob. We can break this into further categories. Cleaning, Attaching/Pinning, Priming.
Further tools we'll need is a pinning drill, bits, and pins to go with it. GW and PP both manufacture a drill kit and PP's pins and bits are probably the best for the job without running around and getting them from multiple other locations. A vise can also be handy but I haven't used one yet.
Cleaning
One of the major downsides often brought up in PP's resin style of manufacturing models is the horrible mold lines left behind in models. Warders have been particularly denounced in this regard, mold lines in the middle of faces and etc. Recent molds have been vastly improved, but this does nothing for older sculpts. The exception to this has been Convergence. The Convergence sculpts have been pretty rough. So, we need to recognize these seams and deal with them.
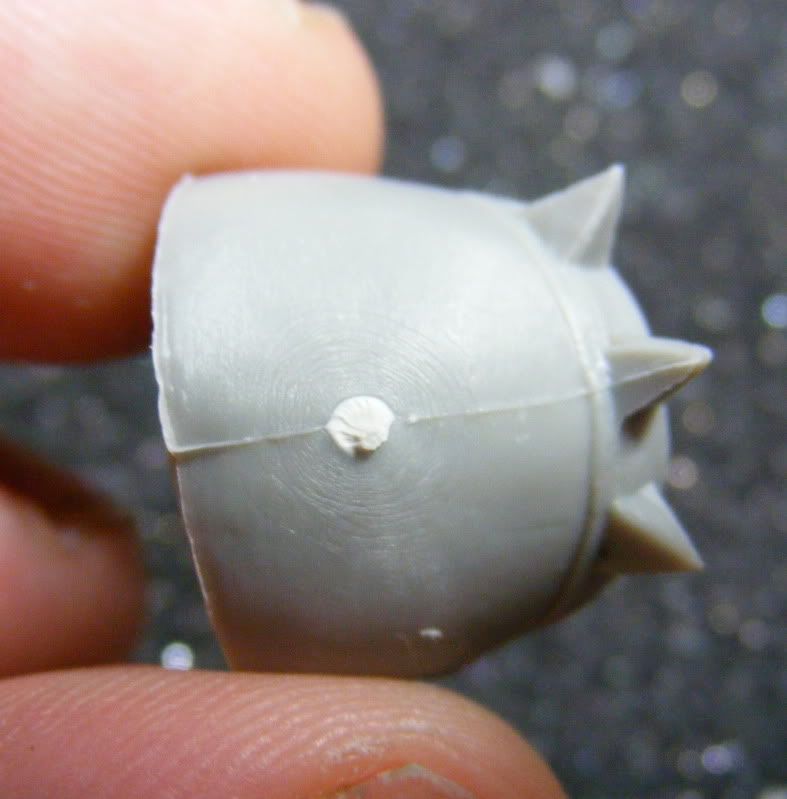
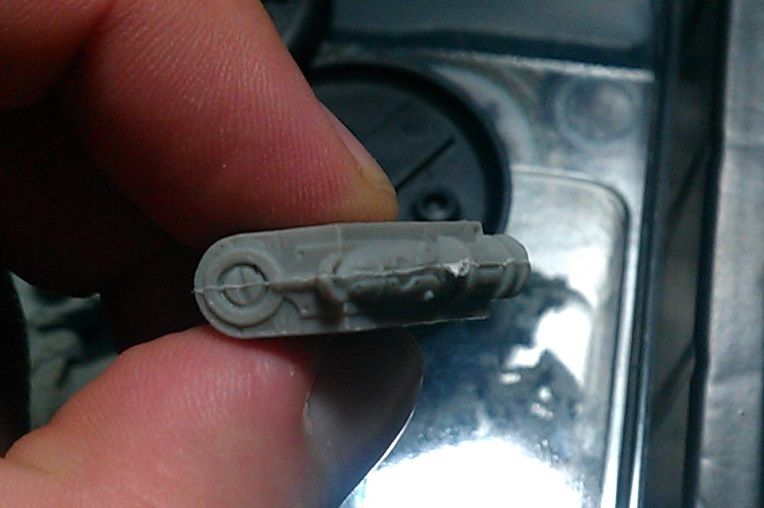
It's pretty easy to identify a mold line. It's usually a raised seam along a model.
Now, let's do the girl first because it's one joint. There's little to no weight going to be held at this joint, so we're not pinning it. On all metal models though, I usually greenstuff the joints. So, you'll need your favorite glue and your favorite sculpting material. In my case, it's the loctite professional liquid super glue in a long necked blue bottle.
Let's rehash. I posted probably six articles in August, and have done nothing since. Things got busy, but it's time to push this particular series through. So, I listed the following:
1. Glue
2. Exacto Knife
3. Pliers
4. Greystuff
Pretty simple. That's more than enough to build a model and put it on the table. But lets go from fielding a model, to cleaning a model and having it completely prepared for a good paintjob. We can break this into further categories. Cleaning, Attaching/Pinning, Priming.
Further tools we'll need is a pinning drill, bits, and pins to go with it. GW and PP both manufacture a drill kit and PP's pins and bits are probably the best for the job without running around and getting them from multiple other locations. A vise can also be handy but I haven't used one yet.
Cleaning
One of the major downsides often brought up in PP's resin style of manufacturing models is the horrible mold lines left behind in models. Warders have been particularly denounced in this regard, mold lines in the middle of faces and etc. Recent molds have been vastly improved, but this does nothing for older sculpts. The exception to this has been Convergence. The Convergence sculpts have been pretty rough. So, we need to recognize these seams and deal with them.
It's pretty easy to identify a mold line. It's usually a raised seam along a model.
In both cases it's pretty easy to recognize. Sometimes, the mold itself wasn't aligned perfectly, so one edge is offset from the other. Those are a bit harder to deal with but it can be done.
So, the Exacto knife is the first way to deal with this. Cut off the biggest pieces, in some cases a cylinder port where the resin was filled in. This is particularly bad on Colossals/Gargantuans. So, once we've cut this stuff, we can sand it. Instead of actually getting sandpaper, start with scraping your blade on your knife across. Sometimes this can scratch off a seam, and in particularly tight places with no lateral movement for a sanding motion, it's the best thing. If that doesn't work, Hobby Lobby and other such stores have sanding sticks.
Get some. They're sweet. Some different styles but the main thing about most of them is they have different grit on either side. They're pretty cheap and generally easy to find. If your local hobby store (Michaels, Hobby Lobby, Hobbytown, etc) support model kits at all, E.G., tanks, planes, cars, they'll have these sticks.
Pliers are also nice to have for the cleaning. I like to keep the tabs on the model until I'm ready to glue it to the base, However, at some point, I have to cut that tab off and that takes some significant force. If you have a lot of fragile bits on the base, then don't glue them on before you cut that tab off. However, if you cut it off early, you'll get a lot of fingerprint oil on the model that you should ideally clean off before painting the model. On the resin ones, that's not nearly as important. On the metal ones it becomes significantly more important.
For actual washing, soapy water and a blowdryer is pretty standard. Scrub as much as you can carefully but attempt not to lose parts down the drain because that makes this process significantly more difficult.
Actual Cleaning/Assembly
Someone gifted me a Goreshade1 resculpt model at a convention recently, and I'm not a Cryx player, but it's a really pretty model, and a small diorama throughout this series would help to serve a lot of points. So we're going to cover tools as we just did, and then move into the process where I can show what we're doing and worrying about.
So, here's the model we got.
My final vision for this model is to utilize the strolling stance he has, and have him and the deathwalker casually walking down from the rocky bluff, with three or four bodies laying about. Some Alexia blisters or something. Have the deathwalker strolling from one of the bodies specifically.
The terrain will be pretty varied. I'd like to get rocks, insulation foam, tree bark, ballast and all kinds of stuff involved so I can cover a lot of different techniques. It'll be probably desert based but I may change my mind. Haven't decided for sure yet. That's the next article, and it's taken probably six months for this one.
So, let's build this guy. We're going to stay pretty stock, no modding. Just clean edges.
Right off the bat, theres some extra flashing on the pointy things. I'm going to break off the flashing and sand those points a bit. The bottom of the cloak has similar issues but the sanding stick fits in there just fine. The main thing is cut the big chunks of flashing. Clean it with the sanding stick.
Here's a particularly large piece of flashing on the hilt. There's a little more on the back edge of the blade tip, and then there's a fine line down the front of the handle too. So I'll hit that largest offender with a knife.
That'll leave a small edge, so I'll hit it with the rough grit on the stick, and then the softer grit.
I also took the knife to that flashing at the blade tip and scraped it off. I sanded it with the light grit to finish it off.
Now you see the edge running down the handle. Just a thin line but it's frustrating because of the amount of detail.
I scraped very selectively with the knife and then sanded lightly.
That piece is done. I'll touch up the bottom of the cloak the same way.
I'm planning on washing the whole model anyways, so I'm going to cut off the feet tabs now. Get it set against your cutting bad and rock the model back and forth carefully to work your blade through the metal and then sand the rest.
Finally, there's a thin line on top of the shoulders of the torso. I'll sand them lightly. The spikes on the backpiece were the same way. Only one was noticeably bad flashing.
Assembly
Alright, so now we're into the assembly side of things. If you're going to clean them, soak them in soapy water, brush them with a toothbrush, blow dry them or let them sit on a paper towel. Pick it up tomorrow after they're dry.
Now, let's do the girl first because it's one joint. There's little to no weight going to be held at this joint, so we're not pinning it. On all metal models though, I usually greenstuff the joints. So, you'll need your favorite glue and your favorite sculpting material. In my case, it's the loctite professional liquid super glue in a long necked blue bottle.
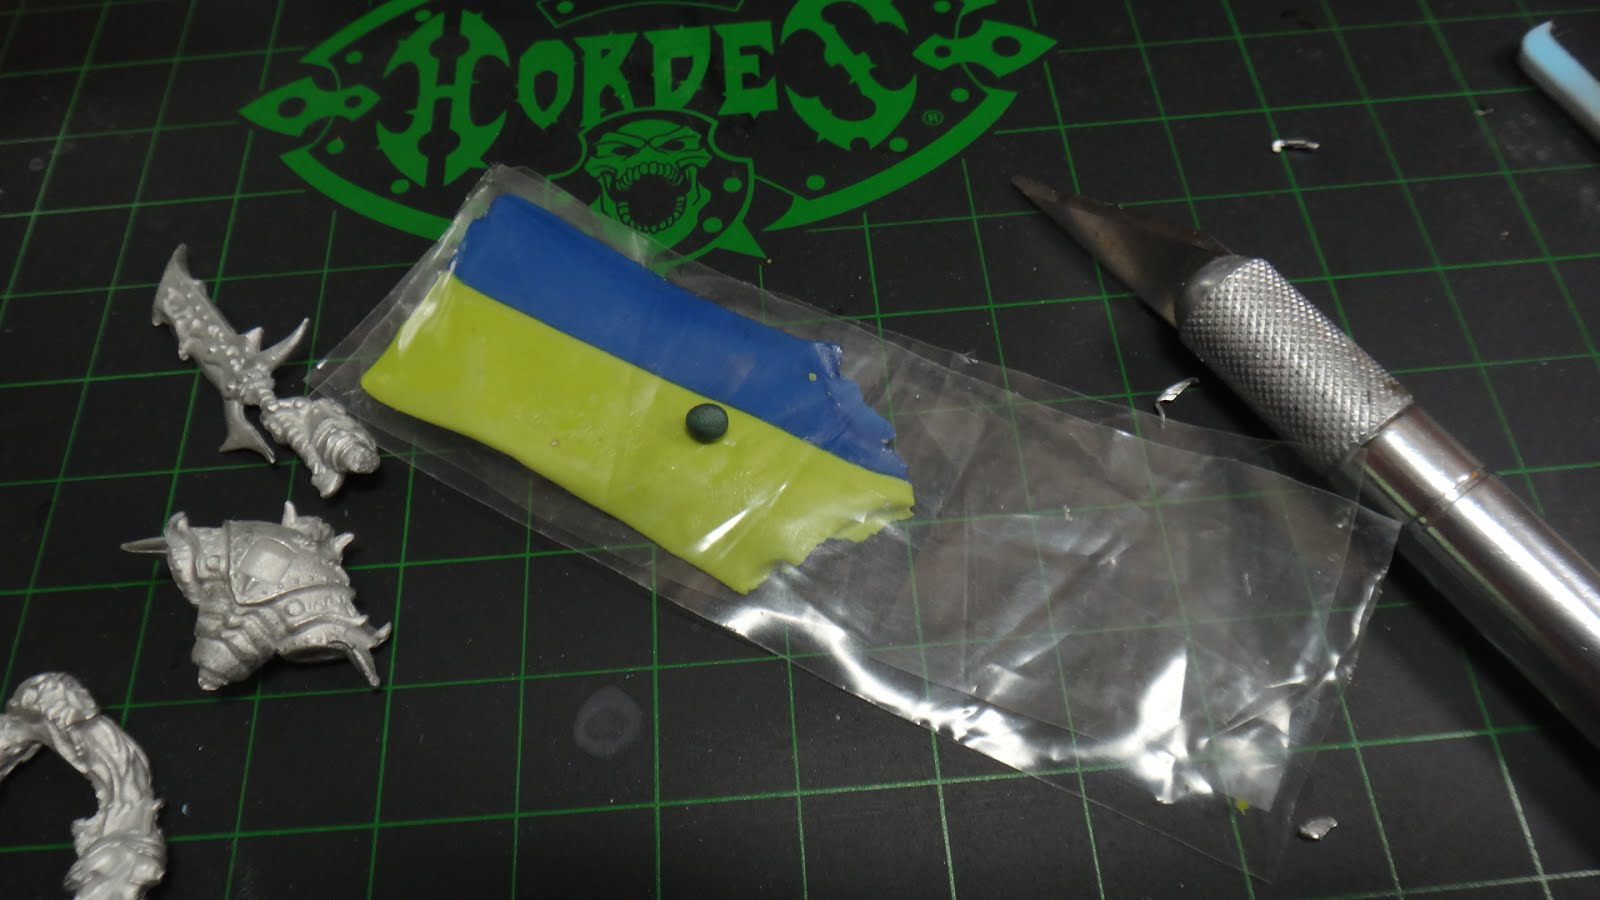
And greenstuff, just your typical GW or Galeforce 9 tubes of blue/green material. The PP grey/brown stuff is also extremely good, but it doesn't come in the large tube quantities like the green/blue stuff does. So, roll a little ball of the grey green stuff, and have your favorite sculpting tool nearby to use it to set it in there and let's get this started.
Here's the joint. Most of PP's miniatures have that nice little square knob to line things up the way they envisioned. I've definitely cut them off before so I could do what I want, but this time we'll stick with what they want.
Here, I cut just a tiny bit of green stuff off and I'm going to put it in that slot.
Put a very fine drop of glue in there and set the arm. Resin models set extremely quickly. Couple of seconds. Metal models do not. I've held metal to metal for over a minute before. Abby2 will have you looking at quitting the hobby entirely. The greenstuff helps a lot to hold the part together and give it a lot more stick while it sets. Scoring the joints with the knife helps too but most of the time this is unnecessary.
And there she is. I'll set her aside and move onto the main show. Goreshade himself. His arms specifically are much more weight at a small connection point, unlike the girl's arm. These, I will pin. Especially the arm that has the skull with the giant trail behind it.
So for this, I have the GW drilling kit with the PP pinning kit. A dremel is nice for bigger pinning jobs, but at this diameter, it's too much. I'm going to drill dead center in the joint squares. Put the knob against your palm and twist the drill. This particular model likes to unscrew the drill from the palm setter, instead of spinning like it's supposed to, so pay attention to that. Don't give yourself too much bit out of the tip because you'll break it pretty quickly with the amount of pressure you have to apply as you drill.
I drilled about an 1/16'' to 1/8'' inch into both joints, and then cut a probably 3/16'' bar and made a small ball of green stuff. I'll stick the pin into the socket with the green stuff, add some glue and stick the other end in.
For the leg/torso connection, I'm just going to greenstuff. It's not holding weight at a bad angle or anything. Same with the backpack and the second half of the trail coming off of the skull.
The cloak, I thought, stuck up under the backpack and would have lots of surface area to glue to. I was wrong. It actually comes off the lower edge of the backpack and doesn't touch the torso at all. So I did a noodle of greenstuff along the top of the cape and glued it in. I had to hold it for awhile, but it wasn't bad.
Then I had to go back in and cut the excess greenstuff out. It's easier to do while it's still pliable, but you also don't want to break the cape loose. So do the large chunks while pliable, and fine tuning after it's dried and solidified.
Then I did some final greenstuff on the trail joint since the joint didn't flow well at all and left a visible seam.
And here they're assembled.
One day, when MKIV comes out, I'll do the second part of this series, which will be basing. We're not basing these guys to their plastic bases because I want to do a far more comprehensive basing tutorial than what two bases would provide. As I said before, we'll have a chance to look at lots of different basing material, techniques and we'll probably do a little bit of painting on just the terrain too so it's ready to go before we attach the painted miniatures in the third article.
That's it for now, hopefully this has given you some insight on the finer details of assembly for the hobby. Any comments or questions can be sent to me here, or on my twitter feed. Thanks for reading!
Subscribe to:
Posts (Atom)