So messy, yes... I know... I'm cutting the edge boards at this point. I glued the fleece on the day before, and that's the tan stuff you see sticking out in the first picture, and all over the back on the second. The other option was felt, but I liked the fleece better.


I'm pretty happy with it, and as can see, it supports some weight too without just flipping up all over the place. So now, I've got a full scale Warmachine table at home and I love that. Over the next few weeks, I'll be putting my accumulated terrain work into play on a large scale and fill in a desert/entrenched warzone into the table. I've got water effects, coffee grounds, tea grounds, insulation foam, trees, all sorts of stuff. I'm excited. The other thing I've got to do is stain the outside of the table, install some straps to carry it and some locks to keep it closed and it's good to go.
You can see the basic terrain I have now. This was stuff for A) Kicks and giggles, though I used it later at the Convergence of Cyriss event and it won me the medallion thing, woohoo. B) To figure out if I'm capable of this or not. I think I am. The foam is 2'' thick high density insulation foam that I cut to basic shape with a hacksaw blade, then ran a craft knife down the edges of it multiple times. Stab it with a screwdriver, pick out random bits and it creates the edges you see in the pictures above and below.


Then they got basecoated in cheap yellow acrylic from Walmart. That's how they sat for a long, long time, and then with the table suddenly getting built, I needed to finish them. The trenches were a pain to cut out, but a utility knife does decent, then I painted a dark walmart acrylic in there for a mud basecoat. The trench walls are popsicle sticks glued together. Then I coated everything in watered down glue to give it kind of a shell. After that, they got sprayed in 3M Adhesive (the shell keeping the foam from getting ate up by the aerosol). The rocks are a mix I've been accumulating from hobby lobby's fine collection of ballast. I think there's three sizes in there, from the fine sand ballast, to the small rocks. It gives it a pretty varied look. At this point, I wash the trench walls with my regular model wash, and carefully spray a Krylon british tan over the rocks. Mix up some more cheap acrylic for a light light yellow, and drybrush the whole thing, and I'm pretty happy with them.
I figure I'm the only guy with legitimate trenches too. They're wide enough for small based models, and one trench is big enough for medium based, but anything else can't quite get in there.


Pretty slick, huh? To top this all off, I finished my Lances.

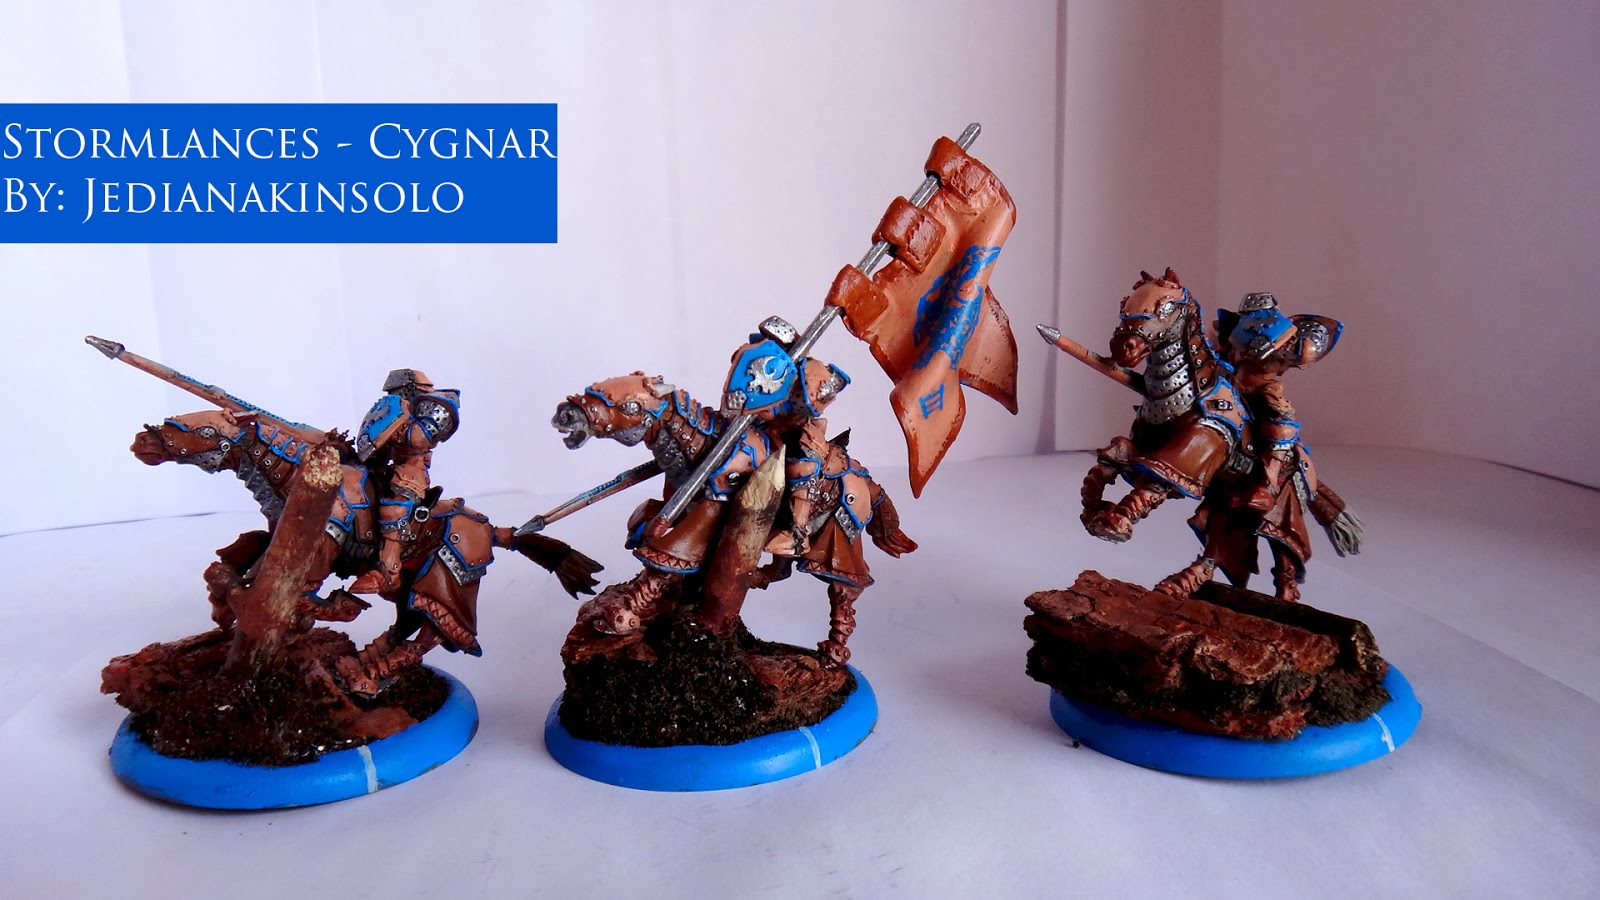
These took some time. The bases are greenstuff/bark with sticks from the back yard, coffee grounds and tea grounds. Used, mind you. Coffee is valuable stuff. The flag is greenstuff I modeled. I tried to do this awhile back for a different unit, and for the life of me, couldn't build a flag. It helps if you spray a flat plastic surface in a non-stick cooking spray. Makes it hecka easier to greenstuff anything, really. Rolled it out flat, cut the shapes and then wrapped pieces around an alan wrench to hold the flag in place. The stitch marks were poked in with a hobby knife. I'm pretty happy with how these guys turned out.
While I was working on these guys, my wife decided to tackle the Journeyman. We posted pictures of that the other day, but here's the completed one.

I haven't thought of a better name for her than JediAnakinSolo's wife. I'm just going to start calling her JediTahiriVeila. See if anyone gets it. If you haven't noticed, it matches my blue Cygnar not at all. In fact, it's pretty nearly exactly what I painted my Khador. I don't care. I really like it and don't mind it standing out at all. Gives it some flavor.
To top it all off, she ended up wanting to do something crafty or artsy last night, but couldn't decide on anything for a bit, until she sat down and saw the unassembled Nyss in front of her. I have six already basecoated (in horrible colors, according to her), but had just got the units to flesh it out to a full Nyss unit. She decided to tackle those. Four assembled Nyss and a wife with hands glued together amidst green stuff, and we went ahead and started painting them. She picked all the colors, pretty much ran the show until we got to the base. The orange, white, light blue, all of it. I think the native american skin tone attempt was more my idea because neither of us like the fluff Nyss shades. Cylena, we wanted to be different, so she's african, and we think it turned out pretty well.


The original plan for the fall leaves was to be crushed eggshells, an idea I saw on... rayofpaint's blog, I think? So she'd been saving up eggshells for me for month now, and I crushed them all up, and we ran to walmart for more acrylic for terrain and food coloring to dye the eggshells. On the way in, I had the idea to stop by the spice rack. Pffft. Throw your eggshells away. We bought crushed red pepper flakes from the Great Value brand and mixed it into some our ballast mix at a 3:1 ratio. I really like how they turned out. A couple of these guys (3 to be exact) have a little tree with them. The trees were from a package of them at hobby lobby that I found on sale. I green stuffed it in, and scattered the CRPF over the top. Kind of my beta for forest terrain on the table. I like how it turned out, and I think we'll see more of that in the future. Overall, I really liked my wife's choices of colors and intuition on these guys, and a 10 man unit gets painted waaaaaay faster when you have two people doing it.
That's all I've got today folks. See you around later this week and hopefully we'll have some table progress.
Nice painting, I especially like Cylena. Could you post closer pictures of the Storm Lances as these ones don't really allow the viewer to see the detail. The warpaint on the Nyss really makes them look very different from usual, and I might consider it for my own Nyss if I ever actually get any.
ReplyDeleteThanks. My wife really pioneered the Nyss, and I can't take credit for a whole lot of that. The orange and blue and skin tones were all her. The Warpaint kinda spawned off of her idea to take them in a native american direction, and I really think it was a classy, unifying idea. I'll get some pics of the lances here shortly.
DeleteHere you go:
Deletehttp://privateerpressforums.com/showthread.php?180415-Stormlances-Nyss-and-Journeyman